Are the objects in your drawings the correct size and shape in relation to each other?
In most of the drawings in these three exercises, especially Boxes and Books, the objects were the correct size and shape in relation to each other apart from when I started to use pen for the Jugs and Jars, but with a bit of practise I managed to get them in proportion, a better quality pen helped.
Do the shapes between the objects look correct?
Yes, one thing I don’t seem to have a problem with at this stage is the space between the objects, it helps to get them right the first time and then make sure you are looking from the same angle as you continue to draw.
Do the objects in your drawing look solid?
Yes the drawings in the Supermarket shop exercise all look solid, however the objects in the watercolour pencil drawings do not look as sturdy as the others, but with more practise I will get better at drawing with these.
Have you managed to create the feeling of depth?
I would say that in all three exercises I managed to create a good feeling of depth but more so in the charcoal sketch and the colour pencil drawing of the Supermarket Shop exercise
I originally wanted to do this exercise as quickly and as simply as possible, but then turned into something that I needed, a practise for using different medium.
I did a practise drawing in charcoal pencil rather than graphite, I probably should have sketched it out in pencil first to see if it fit on the paper as I lost the top of the box of baby food but it felt good to do something completely in charcoal.
1st rawing with charcoal and Pencil
I wanted to produce the finish drawing in watercolour pencil, but I needed to get work up some confidence as I had never used watercolour pencils before so did an initial drawing in ordinary colour pencils, and I’m glad I did as it taught me a few crucial lessons.
1. I would never buy any drawing tools made in Thailand again, the leads kept breaking.
2. Next time I produce a colour pencil drawing to use paper with less tooth, rough paper is hard for blending.
3. Place objects at the best angles so I don’t have to spend hours producing every bit of detail.
4. Read the exercises in the course materials properly. Most of these objects were cylinders with only 1 box and no packets.
2nd Drawing Colour Pencil
After completing the colour pencil drawing which wasn’t great as I left a lot of text out off the objects plus the tin in the the middle was too light (the rough paper making it hard to blend) I went to do a bit of shopping. This time I purchased Faber Castell watercolour pencils not trusting the Masterart ones I had in the drawer and some A3 watercolour paper.
I changed a few objects, I had to use the gravy for Sunday dinner so swapped that for parsley sauce, swapped the tin for a big bag of Nesvita cereal drinks, took the plastic lid off the Rosa tin and swapped the baked beans for a bag of Tipco something or other that the school director gave me for Christmas.
3rd drawing watercolour pencil on watercolour paper
I’ve never used watercolour pencils or watercolour paper before so instead of spending hours trying to learn how to use them through trial and error I jumped onto YouTube to have a look at a couple of videos.
However once I started the exercise I learnt some more valuable lessons:
1. This probably want the best medium for this exercise with all the writing on the boxes.
2. I probably should have used a heavier paper, the 190 I was using begun to warp like mad.
3. The video was not enough I should have practised before doing this exercise.
Even though I did not rush through this exercise (it took a good few hours split up over a couple of days) the final drawing in my eyes looks a complete mess due to the very reflective purple box in the middle that made me lose my rag. However I am happy that I allowed myself the chance to start using watercolour pencils and to be honest for the first drawing ever with this medium, I don’t think I did too bad even though it does looks better without my glasses and my eyes squinted.
Overall the shapes were fine, the shapes between the objects were pretty much perfect and there is depth there so in that respect I was successful.
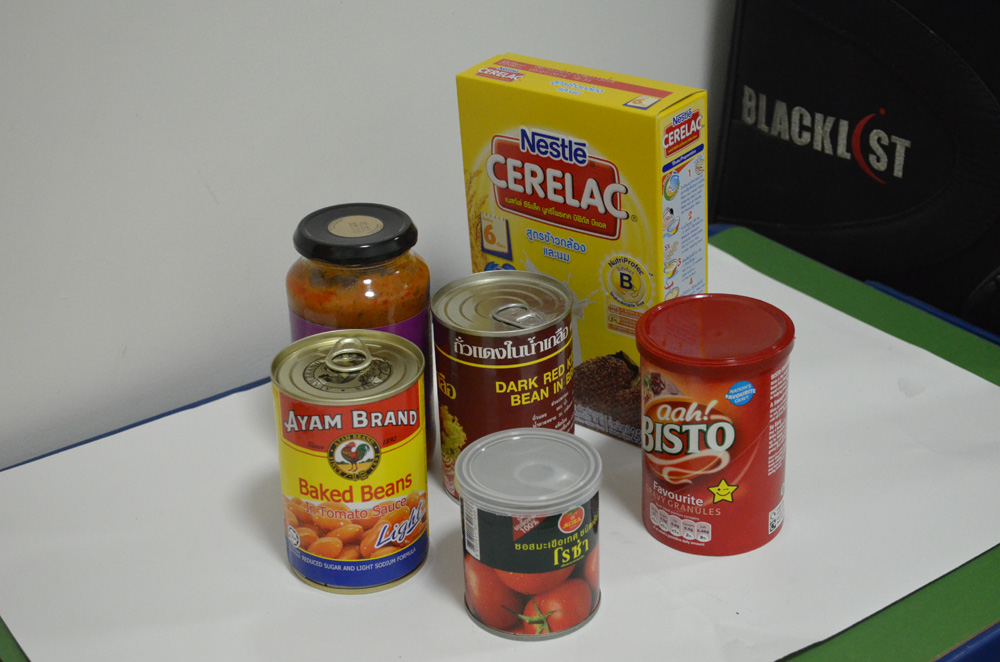
For this Jugs and Jars exercise I collected together 6 cylindrical objects including jars, vases, bottles and jugs as well as a glass and arranged them so I was looking slightly down at them. Then with a softish pencil I drew what I could see, then rearranged and drew them at a slightly different angle.
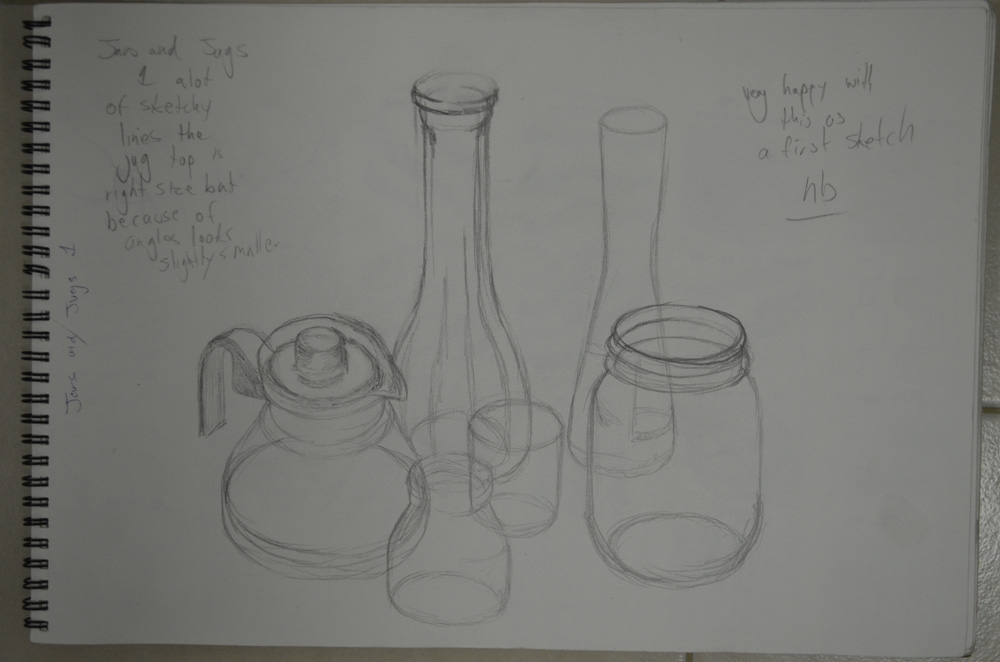
I flew through the pencil sketches in a matter of minutes as I had no fears of getting it wrong, knowing that I could always work the objects into shape with a few extra strokes.
1st Sketch HB
I then moved the objects around and drew them from different angles and again, I breezed through this part of the exercise and the only time I used an eraser was to restart drawing the first object as I worked from left to right and I started drawing the glass teapot a little too low that the small jug at the front would have been off the page.
2nd sketch HB change of angle
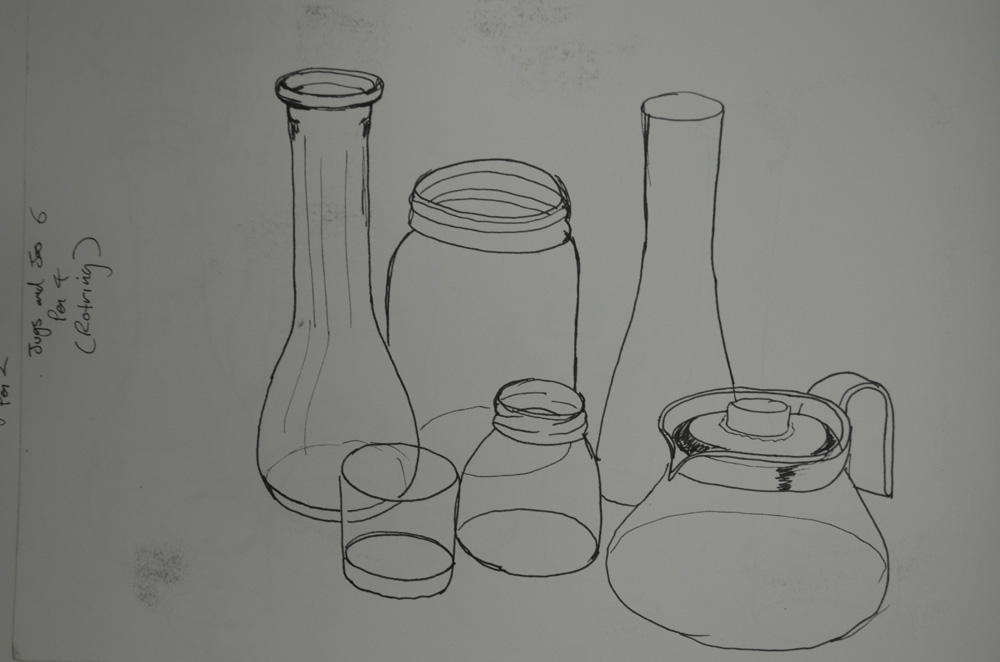
When it came down to drawing with pen I got nervous, knowing that I couldn’t erase anything, even though I hadn’t need to make real corrections while using the pencil and with this in my head I began to mess up and make some real mistakes. I drew the first couple of pen drawings with an Artline 0.3 Drawing pen and it was pretty crappy and scratchy, so I was forced to purchase a couple of Rotring Drawing pens.
1st Sketch with Artline Drawing Pen
I found it a lot easier and smoother to draw with the Rotring so it gave me some confidence back but it would still take a lot of practise to get it right first time with a pen without using any kind of scaling system or going through it in pencil first.
For this exercise of drawing a pile of six mixed boxes and books I decided that I would approach it from two different angles, with the easel and without, both with an hb pencil. Knowing that I would be rocking back and forth from the easel hence changing perspective I was intrigued to see how the drawing would turn out, plus I hadn’t had the easel out for a while.
my workspace for this exercise
After a play around with the books I optedto attempt drawing the books at probably one of the worst angles I could put them in with the back corners of all, almost in-line.
tower of boxes and books
I was right about using the easel, even though the stack of books and boxes were in perspective the finished sketch did not look like I had drawn it from the angle I had aimed for. I also drew from the bottom book up which I found was more difficult as it is easier to draw down.
drawing with easel from bottom book up
For my second go I packed up the easel and settled for the sketchbook on my knee approach, and drawing with my head back in the chair I managed to get the books in almost the right position every time. This time I drew from the top box down to the bottom book and turning my sketchpad around as I pulled the pencil towards me to get better lines and angles I sailed through it in about 25 minutes.
first drawing without easel top box down
This time I wanted to have another go without drawing the lines through, I could have just erased all the lines on the second drawing but i decided I needed the practise so started a fresh. I drew the top box a bit bigger than it should have been and so the angles were slightly out and I almost lost the bottom of the book, but I was still happy with the finished result and so I added to the drawing with a little bit of detail.
drawing without lines through, no easel, top down
Taking design and communication all those years ago at school paid off on this exercise but the true trick was to place a dot where the corners should be and then draw towards them, that way there is less line correction needed.