Project The Moving Figure – Exercise : Fleeting Moments

7 - Follow up Drawing of Man and a Woman Pushing Stall

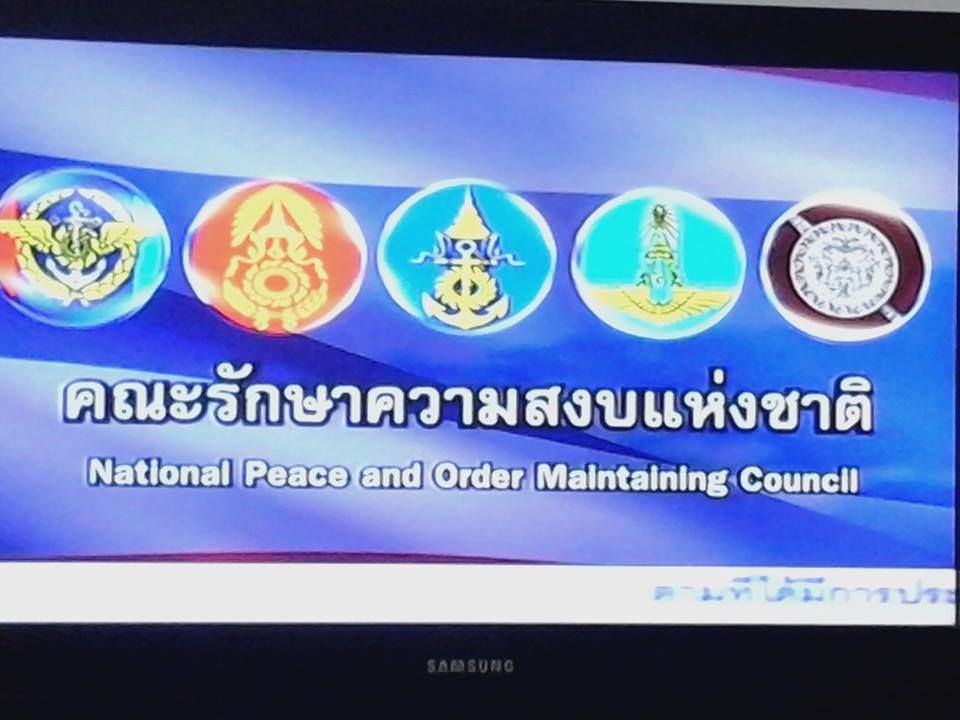
On the day I started this exercise I woke up to the first day of my second coupe d’etat while I’ve been in Thailand. Not bad going. The TV wasn’t exactly blank, there were 5 military logos on there with some old be proud of Thailand, very fascist sounding music on from a bygone era. The whole country was on curfew and I was wondering if it was safe to go out. If you ever want to know what it feels like to be on curfew at the start of a coupe d’etat, watch iRobot, because the ‘stay in your homes’ scene is quite close.

1st day of Tha Coupe d'etat
1st day of Tha Coupe d’etat

So anyway, while I was on lockdown, that first morning a memory came into my head that I thought I would try and get down on paper, It was the first day I met my girlfriend, September last yea, to be exact. I remember what we were both wearing, where we were and if she was the first up the escalators from the underground train or not. I just couldn’t quite pull it off in an abbreviated drawing, But it was worth a try.

1 - Drawing a Memory from Last Year
1 – Drawing a Memory from Last Year

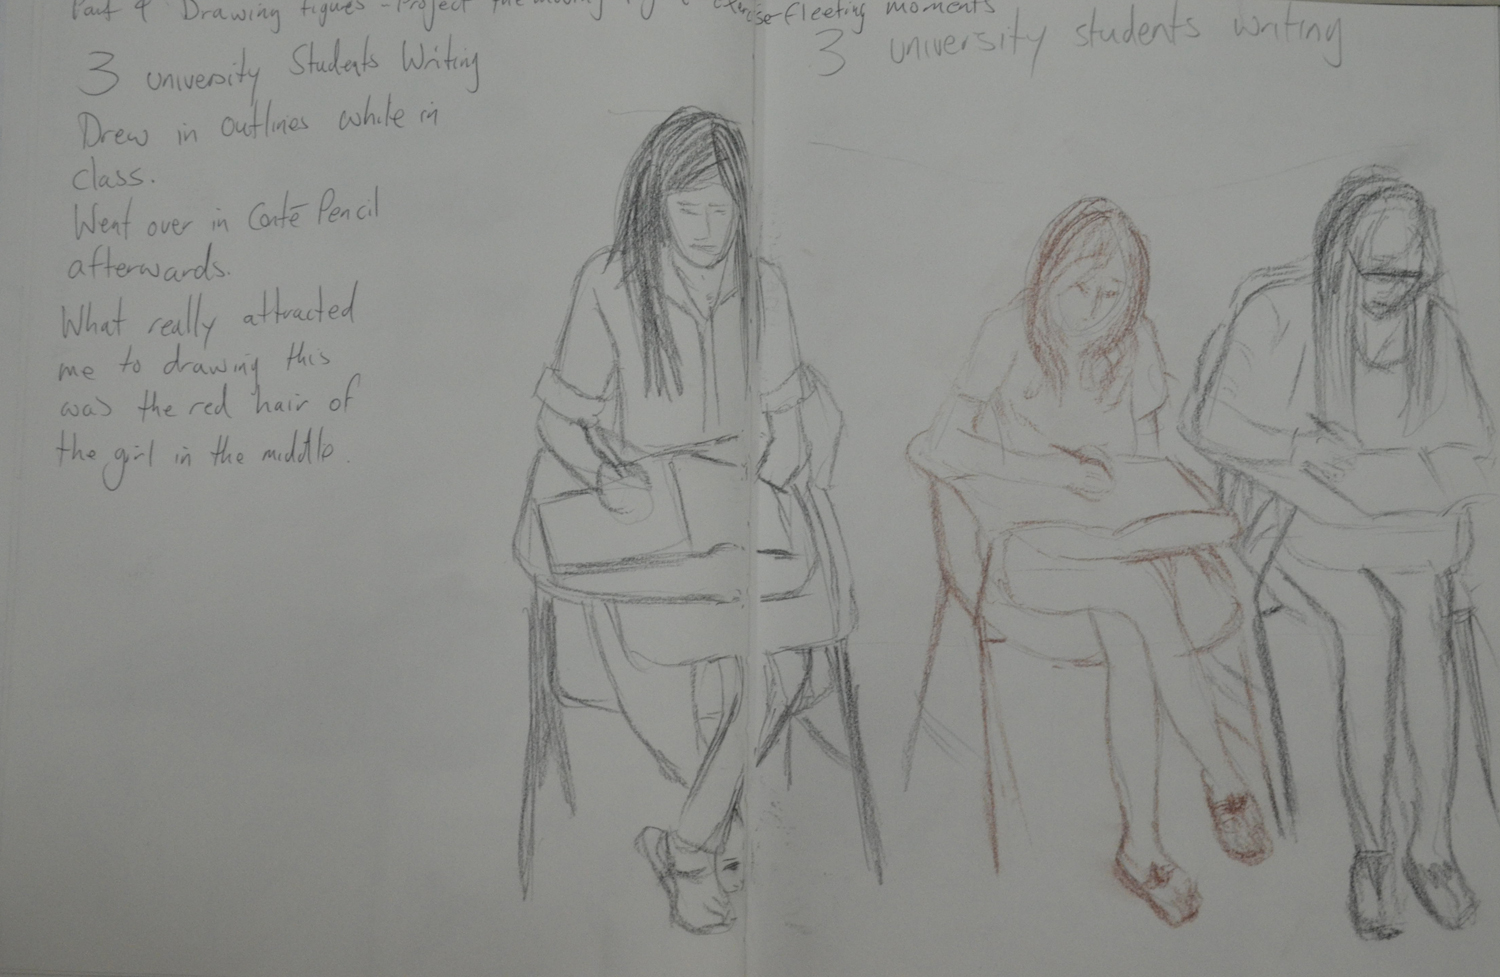
That morning I was supposed to be teaching 3 students in a private class but everyone had cancelled, luckily for me I had made some very quick pencil sketches of the three students the day before noting their height and frame and how they were sitting and decided to go over them with a more detailed sketch from what I could remember, clothes, hairstyle etc. I haven’t taught them since so I haven’t been able to check if there was any likeness there.

2 - Sketch of 3 Students over outline
2 – Sketch of 3 Students over outline

All but one class had cancelled, which was my 4-6 pm, so I decided to take my spare computer down for repair in the early afternoon and just as I was having some breakfast preparing to get ready the army allowed the first TV broadcast of the day.

The scene on the TV was the yellow shirts who had been occupying the area near my school for the last 7 months, being cleared off by the army and their was a small, chubby, Chinese/Thai guy doing the reporting. The thing that made me want to draw him was that everything about him was that even though he was fat, which you would associate with being round, everything about him seemed to be square from his head to his microphone. After making a quick square sketch of him, I tried to draw him exactly how I remembered him but changed him a few times as his head wasn’t in proportion and I wasn’t sure if he was holding the mic with two hands or not.

3 - News Reporter 1st Day Thai Coupe
3 – News Reporter 1st Day Thai Coupe

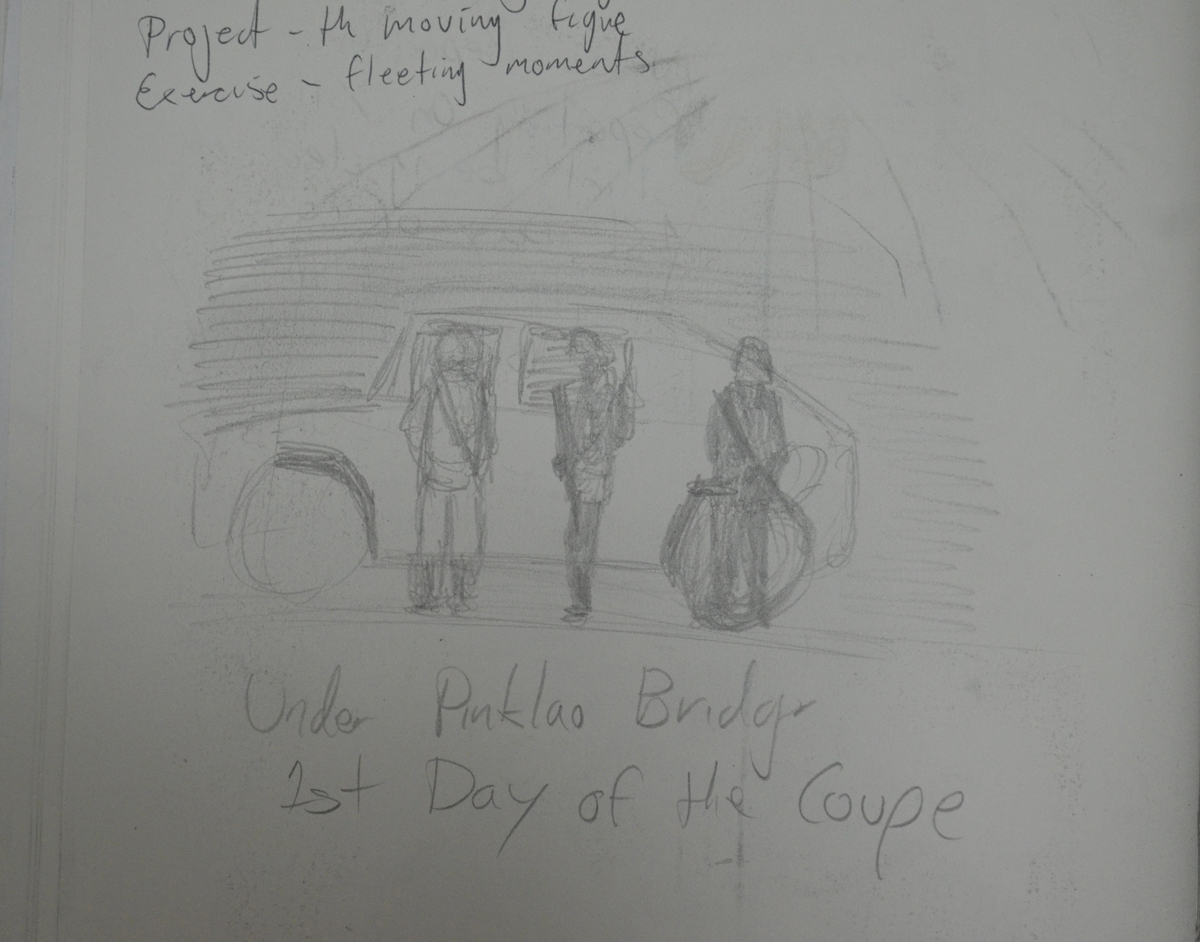
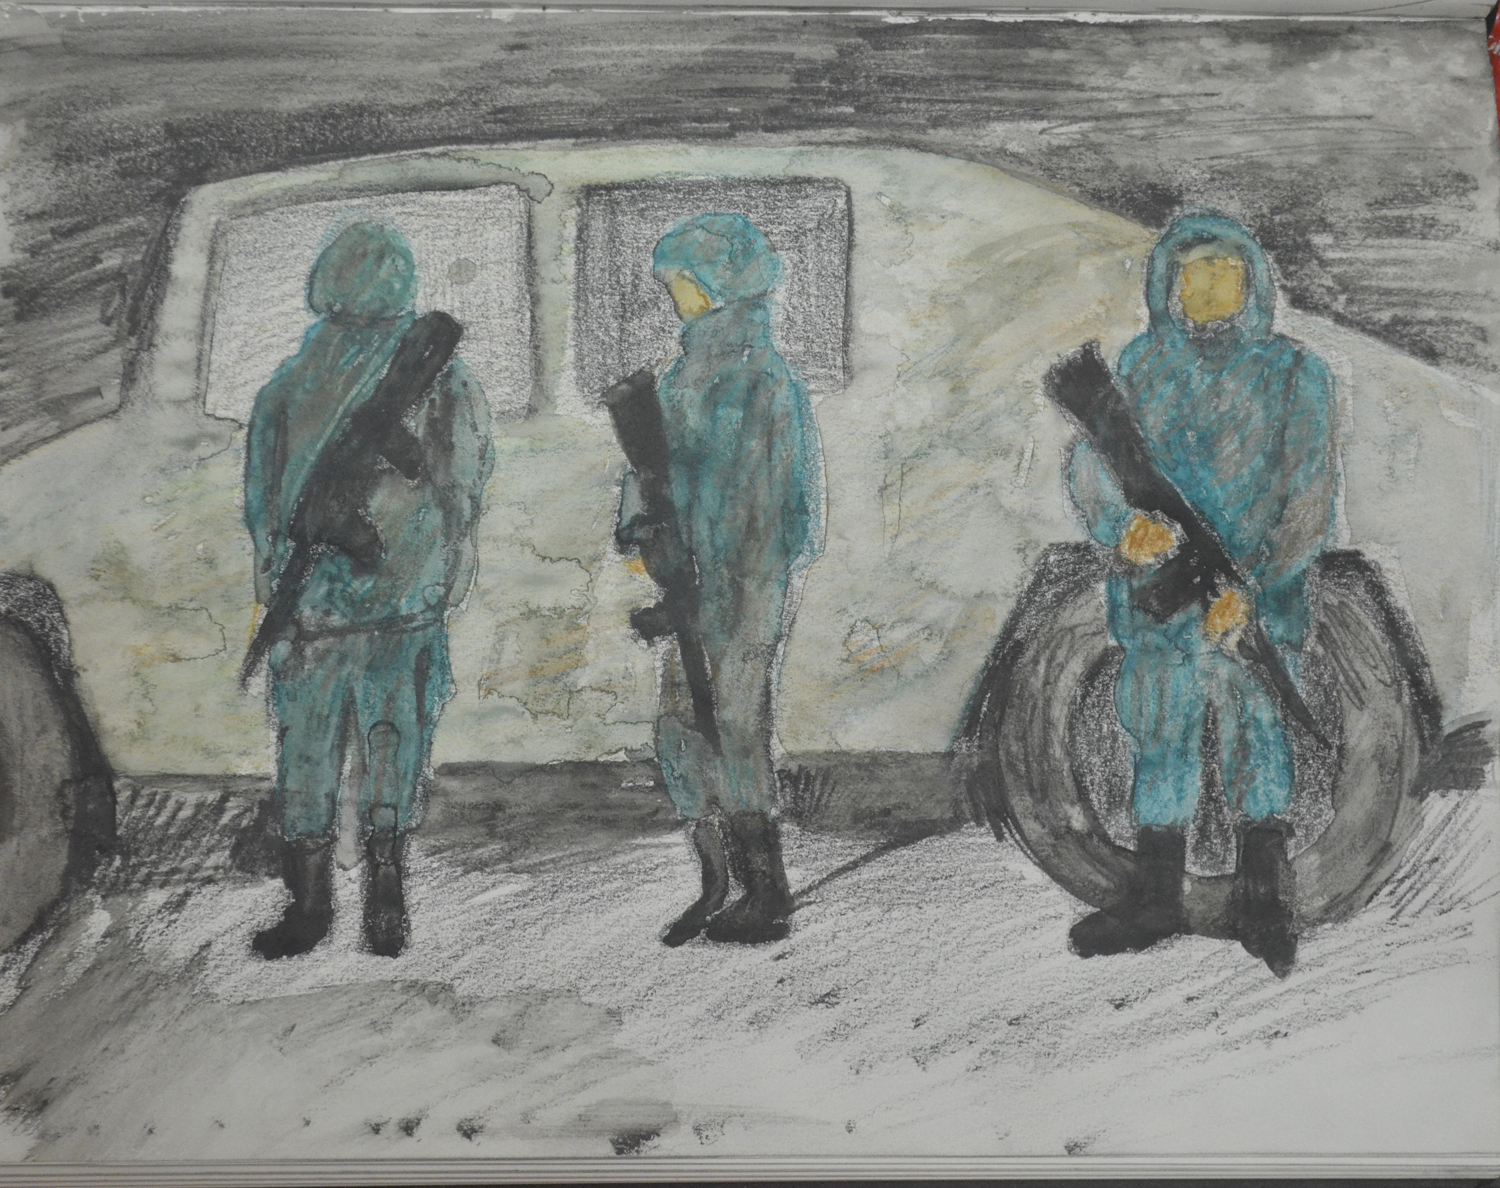
That afternoon on my way to taking my computer to repaired I got my first glimpse of the army, stationed (or hiding from the sun) under the flyover at Pinklao intersection, two of them stood on top of the bridge with their backs to me and three of them stood by a Chinese knock off of a hummer. I made a quick drawing of what I remembered about the three stood by the hummer while the guy checked to see if my computer was worth repairing.

4 - Sketch of Soldiers under Pinklao Bridge
4 – Sketch of Soldiers under Pinklao Bridge

The sketch wasn’t up to much so I made a larger drawing with watercolour pencil in my sketch book the next evening. It was really messy, but by then so was my memory of the whole scene.

5 - Quick Watercolour Pencil Drawing from Sketch
5 – Quick Watercolour Pencil Drawing from Sketch

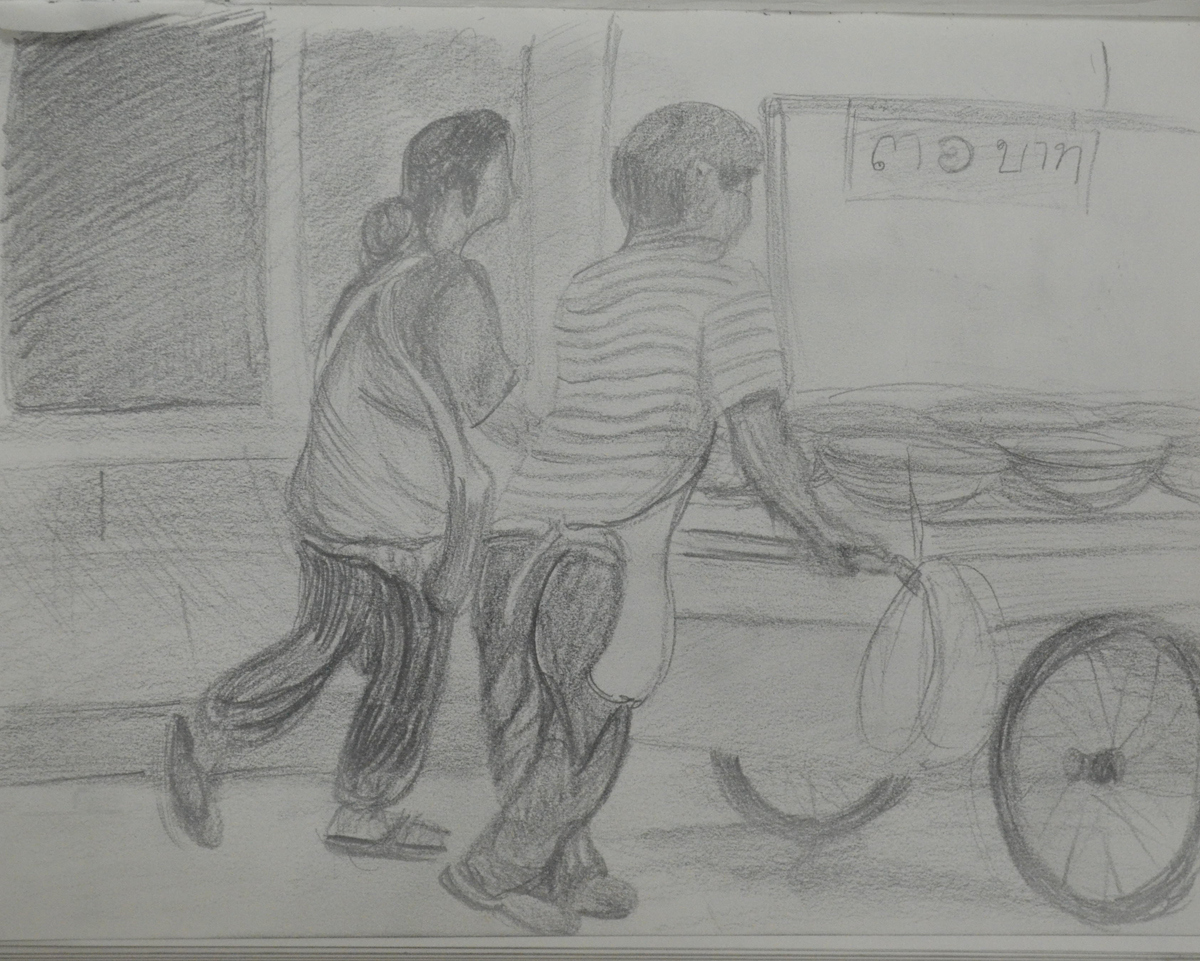
On my way back from my 4-6 pm private I decided to take a taxi, only to find that their was a traffic jam, after 20 minutes of sat in very slow traffic I got to find out what the hold up was, a man and a woman taking their market/food stall out for a jog.

6 - Quick Sketch - Man and a Woman Pushing Stall
6 – Quick Sketch – Man and a Woman Pushing Stall

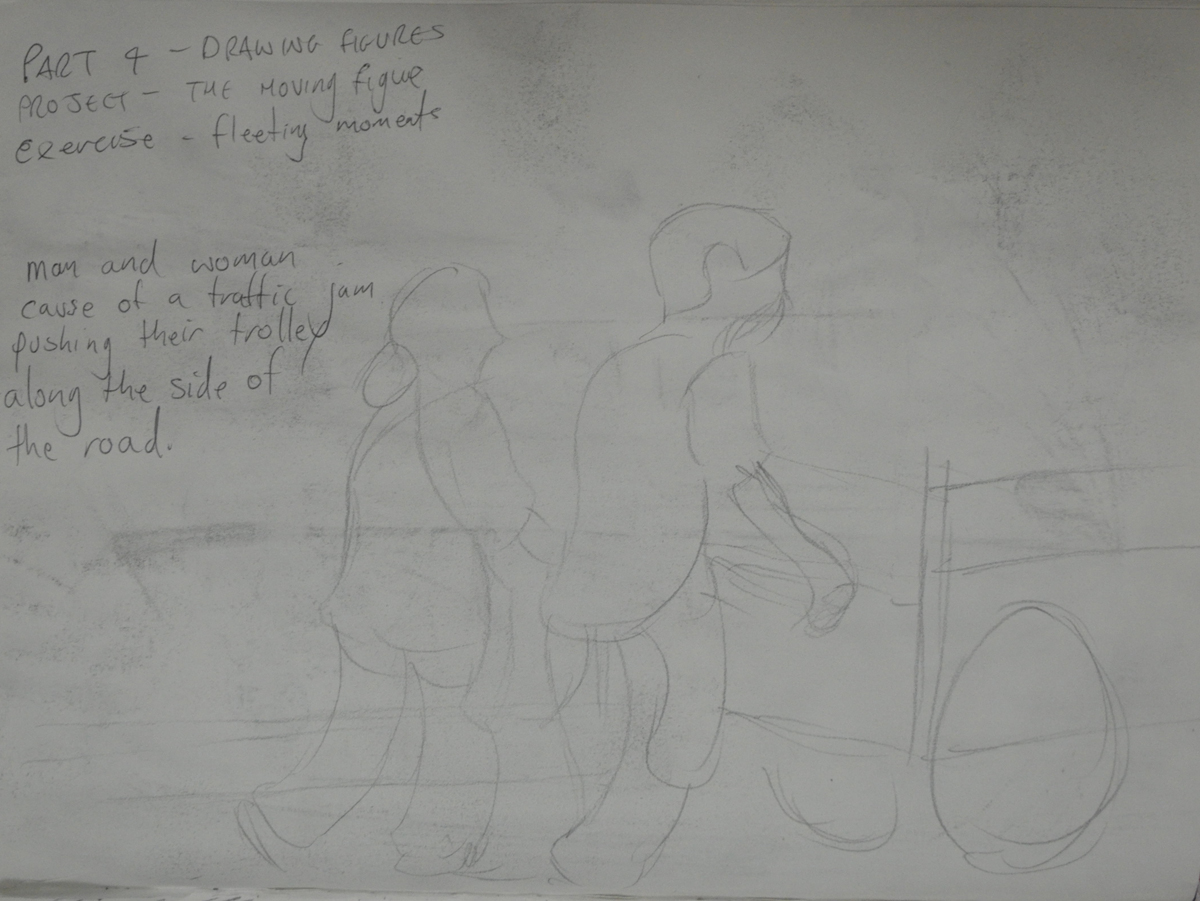
I made a really quick sketch of them while I was still in the taxi and the following night I tried to replicate the scene with a better drawing.

7 - Follow up Drawing of Man and a Woman Pushing Stall
7 – Follow up Drawing of Man and a Woman Pushing Stall

Finally the last drawing was of two of two motorbike Taxi riders who I have known for the best part of 12 years, I made a very quick sketch of them while I was at the motorbike taxi rank and improved on it when I got home. Unlike the others I went over the top of the initial sketch so you can still see the rough sketch underneath.

8 - Motorbike Taxi Riders Waiting
8 – Motorbike Taxi Riders Waiting

Proportions – Quick Poses

Felt Tip Pen continuous Drawing

It was a nice refreshing change after the last assignment to do some quick drawings so I went into this exercise feeling quite optimistic. I had already done some quick 2 minute and a 10 minute sketch at school in my last sketch book from a life drawing site, so I was eager to get on with it. I was lucky to have my girlfriend come to visit me as she is a yoga teacher and a very willing model.

1st 2 minute drawing graphite pencil

We left the yoga poses alone for now and just started with some simple poses, that turned out to be not so easy. Like I said earlier I did some quick sketches at school from a life drawing site and they really were quite easy. It was very different with a model stood in front of me swaying about.

2nd 2 Minute Drawing Black Conte Pencil

I did as the brief said and started out drawing from the middle of the body then out to the head and feet and used the black end of my Mars Lumograph pencil for measurement.

3rd 2 Minute Drawing Sanguine Conte

The most challenging thing for me here was finding a pose that I could actually I draw and trying different mediums made me realize just how rubbish I actually was at figure drawing. I had always worked from memory or photographs when drawing the human body.

4th 2 minute drawing Sanuine Cinte

An other big problem I had at this stage was drawing my girlfriends profile and any of her facial features. So at this stage I scrapped even trying to draw facial features and went for drawing the outline of the face.

5th 2 Minute Sketch 3B Pencil

After experimenting with different mediums (graphite pencil, black Conte and Sanguine Conte ) I went back to drawing with a 3B pencil until I got my confidence up.

6th 2 Minute Drawing 3 B Pencil

After 6 x 2 minute drawings I settled for a seated pose for the girlfriend for two reasons, 1 because she was doing a fair bit of wriggling and 2 because I didn’t want to put her off posing for me in future exercises.

7th Sketch10 Minutes Graphite Pencil
8th Sketch 10 Minutes Compressed Charcoal

I completed 2 x 10 minute drawings in graphite pencil and compressed charcoal, which I was quite pleased with as they did actually look like my girlfriend in shape and height.

Felt Tip Pen continuous Drawing

From there I started to do a bit of experimenting trying 1 continuous drawing in felt tip pen which the girlfriend was quite pleased with as it made her look slim.

My Findings

From measuring while drawing and also measuring after drawing with lines on the sketches I found that the girlfriend’s head fit into her body four times to the bottom of the backside in a seated position if the girlfriend is willing to help me on future exercises then this knowledge will come in quite handy.

Earlier Drawings

The following drawings were drawn using a life drawing site while I was at school just before the summer holidays.

1st Drawing at School 2 Minutes
2nd Drawing at School 2 minutes
3rd Drawing at School 2 minutes
4th Drawing at School 10 minutes

Study of a Townscape Using Line

2 Study of Landscape Using Line 2nd Attempt

When I first started this course I went upstairs to the third floor of my school for a bit of sketching practise and did a couple of drawings of the outside of the school building from the balcony. When this exercise came up it was a good excuse to get back up there as the school has a great view of the temple next door.

I actually completed this exercise well over a month ago but for the last couple of months I have been concentrating on drawing rather than my online log as Townscapes as been quite a long project for me with the irregular shapes of Thai architecture making this part of the course quite difficult but also very interesting.

So anyway it was the start of the cool season and clouds were getting less and less in the sky and the only chance I got to go out on the balcony was 1:30 pm and the sun was beating almost straight down.

Study of Townscape Using Line first Drawing

The first preliminary drawing took me a little over 25 minutes with a Rotring Tikky Graphic 0.3 and even though it was quite messy I felt that that could have been the final drawing for this study. And reminded me of a couple of the pen drawings in the Urban Sketching Handbook, particularly Singapore by Kampong Glam by Paul Heaston and Nanjing Fuzimiao by Frank Ching, the latter drawn in 30 minutes roughly about the same time as my drawing.

2 Study of Landscape Using Line 2nd Attempt

The second drawing took me from a flowing line drawing to something a bit more technical, with the first drawing everything flowed, I didn’t worry about the marks I was making and I wasn’t trying at all, with the second drawing I started to think about perspective the marks I was making the shapes I was drawing, negative space and everything went wrong. Instead of drawing objects I was familiar with I started to draw them like I was seeing them for the first time and everything went wrong. One of the biggest notable errors is the spire of the temple in the second drawing making it look like a Tibetan temple rather than a Thai temple.

Study of Landscape Using Line - Final Study
Study of Landscape Using Line – Final Study

The final study was drawn from both of the preliminary drawings, using the temple from the first drawing and the school building from the second drawing every thing else was a mixture of both.

I never had any doubts about what I would use for the  fore, middle and background but what lines and marks to use was always going to stress me out. This is the second time I have had to do line drawings in an exercise and the second time I have found it hard not to hatch and even though I know a degree of hatching was needed I know I went over the top with it.

Plants and Flowers in Coloured Pencils

Plants and Flowers in Coloured Pencil

For this exercise I bought an assortment of flowers from the Tops supermarket while I was visiting my kids for a meal for my oldest daughters Birthday. The flowers I chose were orchids and some red and pink roses, I really was not thinking about shapes or colour when I purchased them but I am glad I made the choices that I did. On an A2 sheet of white paper I began to draw.

Roses and Orchids
Roses and Orchids

Now the brief said to experiment with different methods of blending in my sketchbook first, however I thought I had had enough practise blending colour with colour pencils so far in this course so I put pencil straight to paper, for the flowers this was no problem but for the leaves I wish I had done as the brief said and practised a little more.

Drawing the Orchid
Drawing the Orchid

I began with a neutral colour for each subject starting with the orchid and working my way around the composition working on the most prominent flowers and leaves first keeping a careful eye on negative space.

Part way through the drawing I read the brief again to find out I had skipped over some valuable instructions:

  • Make the plant the focal point of your drawing but draw the background
  • Do not draw the plant in isolation
  • Draw in the context to give depth and substance to the drawing

The background I had chosen was a plane white wall with brown skirting boards and very pale floor tiles but I decided to carry on and I am glad I did. Using three different types of flowers with large leaves and petals on the orchid the composition and the vase I had placed them in made up the main subject and the background. Placing the largest flowers at the front and the smallest at the back helped me to create a nice three dimensional effect with the large orchid flower taking on the role as the focal point of the drawing.

I used different methods of blending for each of the flowers with layering used on all, the Still Life Group in Tone Exercise early on in this part of the course really helped using 3-4 colours on each flower but starting off with the lightest colour first and working my way to the darkest.

I used long strokes for the orchid to give it a stretching outwards feel and to me it almost seems like it as a life of its own.

Drawing in the Red Roses

For the red roses I coloured them in a spiral motion then layered the darkest colours over the top rubbing out the colour from time to time to let the lighter colours show through.

Flowers Complete
Flowers Complete

The pink roses were the most challenging of the lot with the colours and details being so delicate I decided to tackle them in a different way by hatching then squiggling over the top for the flowers where you can see the petals grouped together.

Aspects of the Drawing I am Satisfied with:

I am really happy with the 3 dimensional feel of the drawing and the way the different solutions I came up with to tackle each type of flower pad off. I am also very happy with way the drawing came together using the practise I had from the Negative Space in a Plant Exercise helped me to piece the drawing together like a jigsaw.

Plants and Flowers in Coloured Pencil

Aspects of the Drawing I am not happy with:

As always I wish I had read the brief again and again until I was clear on what I had to do but then this would have lead to a one or two plant composition  which would have probably been a lot less challenging.

I wish I had practised blending colours in my sketch book if just for the leaves and stems, although not all the leaves and stems are clearly visible I can see that I definitely could have improved on the blending on those parts of the flowers.

The final drawing is very sketchy although this is a big difference from some of the final drawings in part 1 of this and I know I allowed the the sketchy artist I researched earlier to influence me in this exercise I would have preferred a more realistic finished  drawing.

My New Sketch Book and Silpa Bhirasiri of Silpakorn University

New Sketch Book with Silpakorn Bhirasri on the front cover

My old sketch book got full quite quickly so I needed to buy a new sketch book to finish the first part of my drawing 1 course. I wish I new more about what paper to choose gsm/tooth etc, there were a few expensive sketchbooks in the art shop, so I expect the quality was probably top notch but they were sealed and there wasn’t that much information on the wrapping. In the end I settled for a cheaper A4 sketch book with a lot of tooth, it said smooth on the front but doesn’t feel smooth to me.However the reason why I chose this sketchbook in particular was of the photo of Corrado Feroci on the front cover.

New Sketch Book with Silpakorn Bhirasri on the front cover
Silpakorn Bhirasri on the cover of my new Sketch Book

Here’s a short biography of his life:

Corrado Feroci was born in Florence Italy in 1892 and was a sculptor who worked mainly in Thailand after being invited to the kingdom in 1923 to teach western sculptor at the Fine Arts Department of the Ministry of Palace Affairs. Corrado later founded the Silpakorn University (the University of Fine Arts) in 1943.

After Italy surrendered to the allies in 1944, he changed his name to to Silpa Bhirasiri and became a Thai national to avoid being arrested by the occupying Imperial Japanese Army. While in Thailand he married his second wife, one of his Thai students.

Rama I Statue at Memorial Bridge
The Rama I Statue at Memorial Bridge

If you have ever been to Thailand and travelled around the Bangkok streets you will see several of Silpa Bhirasiri’s works including the Democracy Monumenty, the Victory Monument and the Statue of King Rama I at the Memorial Bridge at Saphan Phut.

Democracy Monument by Silpa Bhirasri Bangkok

His photograph on the front helped me choose the notebook, I’d previously bought colour pencils and watercolor pencils by the Thai brand Masterart which weren’t so great,  but I had not so long ago read about Silpha Bhirasiri and knew he was the founder of Silpakorn University so knowing that the university had endorsed the brand for this product I had faith in what I was purchasing.

To be honest my sketchbook hasn’t been that organised so far but I made a promise to myself on purchasing this new book to get things in order for my first assignment.

Still Life – Composition of Natural Objects

Composition of Natural Objects

The brief for this exercise was to ‘Make a selection of natural objects for my composition, such as fruit or vegetables on a plate, and explore the different viewpoints by moving all the objects around in different arrangements and assessing which set up I like best. In my sketchbook, make quick sketches of each different set-up before moving the objects about again.’

I found making quick sketches of the natural objects a lot easier than making thumbnail sketches of ‘made objects‘ in the previous exercise and started out with a good feeling that the exercise would go well. I chose vegetables for my composition which were a red yellow and green capsicum, a tomato and a carrot.

Still Life Composition of Natural Forms
Thumbnail Sketches of Compositions of Natural Forms

I thought about the best place to position myself in relation to the objects and positioned myself slightly above. This was also more comfortable as I had bruised a rib after a fall during the Thai new year festivities (Songkran) a couple of days before, so I propped myself up with a couple of pillows, I couldn’t complain though as it did give me a good view of all the vegetables.

The brief for the second part of the exercise was to ‘Use the information collated in my sketchbook along with written notes from previous exercises to make an informed decision about the organisation of my still life drawing. This would help me to clear my mind and give a sense of order to my work.’

As always due to doing most of my work over different times of day and especially in the evening I worked with a bendy light as a light source, making sure it cast adequate light and shade onto the still life.

still life natural forms 2

  • Mediums used – Watercolor pencil, 2B, 4B, 8B, EE graphite pencil, charcoal, Conté pencil
  • Paper – A3 Canson Watercolor pencil 190 gsm
  • Time taken – 10+ hours

I wanted to get more practice with watercolor pencils and so I initially chose to do this exercise completely in watercolor pencil and so the only size sheets I had were A3 which I bought for the ‘Supermarket Shop’ exercise. However the problem was the composition I chose meant that I had to use the paper length ways but I wanted to get the whole of the plate into the finished drawing with the shadow that it cast and so I knew in advance it would leave a lot of negative space on the paper. Placing another folded sheet of paper under the composition helped me fill up the negative space and I decided that I would also use the TV unit in the background as the background.

I made a very poor first attempt at the still life completely in watercolor pencil, it set me back a good few hours and did not put me in the best of moods but did teach me some valuable lessons.

  1. I did not have enough practice with this medium to get it perfect.
  2. Blending colours with this medium was more difficult than I thought.
  3. You can’t erase watercolor pencil once it’s in paint form and if you try there’s a risk of ripping the paper!

I decided that my next attempt at this exercise would be a great chance to produce my first mix medium drawing and if I couldn’t perfect the colour, shadow and light of the vegetables I would do my best  and then really make the composition stand out by the drawing everything else in graphite pencil.

On my first attempt at this exercise I started out sketching the dark parts of the vegetables in watercolor pencil first but on the second attempt I started with the lighter colours, although the second attempt was easier and looked better I have yet to perfect my technique.

When it to the lighter shadows in the drawing I took it very slow, using the pencil very lightly and holding it at the end and letting it almost dangle, only occasionally did I have to resort to blending with my finger. For the darker shadows on the plate I used 4B and 8B pencil.

All was going well until it came to the  background objects, my 7B, 8B and 9B pencil kept snapping so after an email to Derwent to complain about the quality of pencils in their 24 graphite pack I continued with an EE pencil. I found the EE pencil no replacement for the 9B pencil and was hard to produce different tones so I finished the background off in Conté pencil and charcoal.

Still Life Composition of Natural Objects

I was a bit disheartened at times after starting off so well, especially having discovered that I drew the composition in my second try on the the wrong side of the paper thinking they were the same. Luckily enough it turned out to my advantage as it was easier to draw in graphite and the paper did not warp as much when wet plus the colours seemed to be a lot brighter when they bled.

I was also a bit upset that I had to use more than two mediums in this drawing and found it frustrating when things kept breaking. The end result of the watercolor pencils is not what I had in mind but I thought the contrast between the colour and the graphite pencil was excellent.

Composition of Natural Forms - close up
Composition of Natural Forms – close up

The good news is Derwent did get back to me and admitted there was a problem with the old batch of graphic pencils and are sending me replacement 7B, 8B and 9B pencils.

Still Life Sketches of Made Objects

exercise: still life of man made objects

The aim of this exercise was to create a small still life composition from a small themed selection of made objects, of which I chose personal hygiene as my theme and the objects that I chose were, a tube of toothpaste, a toothbrush, a Bic Razor and a bottle of mouthwash.

Then with a pen, pencil, or ballpoint use a technique such as hatching. I used a 3H and a HB pencil (to show the darker shadows).

Then I had to draw two or three thumbnail sketches in my sketchbook of different arrangements from different view points, using my light source to help create strong lights and dark shadows on the surfaces of the objects. I had to include tonal values to indicate form in my sketches as well as shadows seeing as they can also play an important part of a still life composition.

Then I was to make notes on or around my sketches about the technique I used and why I had used it. And make notes on anything else I felt was important.

I did two initial drawings that I have to admit were not exactly thumbnail size, I think this was down to miscalculating proportions of the first objects I started on in each composition and then having to keep up proportions,

exercise: still life of man made objects
First attempt at this exercise

In the first drawing I started on the toothpaste tube as I always end up working clockwise, I think this is force of habit. However, because of this I misjudged how much paper I would need for the mouthwash so squashed the lid to fit the rest in; so when I came to the second drawing I worked from  the mouthwash down.

On the first attempt I forgot what I was instructed to do in the exercise. Instead of writing down about the techniques I used I totally ripped the sketches apart fault by fault, only actually remembering what I was supposed to do after I took the photo to upload to my working log. I decided to do the exercise again and this time do it right.

In my second attempt I scaled the drawings down and was less worried about every detail. My hatching technique also seemed to improve a lot in my second attempt, using a variation of cross, vertical and horizontal hatching as well as swooping lines to follow the contours of certain objects.

exercise 2 still life of made objects
Second Attempt at this exercise was much better

This exercise was probably the first time that I made no attempt of smudging in the pencil lines instead I practiced the pencil holding techniques I used earlier in this course, from the tip, from the end etc…

The hardest thing to draw in the composition were the toothbrush and razor and I felt like abandoning the objects and using something easier to draw but stuck at it and did a reasonably good attempt at getting proportions and details right all 4 times.

Observing Light and Shadow Formations on a Surface

The brief for this exercise was to place two objects together and position a lamp so they are lit from one side, or natural light if its a bright day. Originally I wanted to get out on the balcony during the daytime but housework took me right through to early evening, so I settled for a bendy lamp in the living room and I’m glad I did because it threw more definite light on the objects that I chose, which were a Johnson’s Baby Powder bottle and a ceramic cup.

2 Drawings Light from Alternative Sides

I started with a simple sketch that I knew I could alter as I shaded back through the drawing. I begun with the mid tones but was very tempted to start on the darker tones first. The objects were placed on a glass table, however I put some paper down on the table top to cut down on where the reflected light was came from.

Light from Left Hand Side

I was very happy with the first drawing, the sketch itself took me about 10-15 minutes and the areas of dark and light were very clear so I didn’t think it would take me long to complete the shading, which in the end took me well over an hour. To complete the drawing off I shaded in the background as the edges on both of the objects were quite light and I wouldn’t have been able to show that on a lighter background.

Light from Right Hand Side

For the second drawing I pointed the lamp on the opposite side, which gave me different shadows and light and dark tones in different areas so between the two drawings I think I managed to get quite a lot of practise.

I really enjoyed this exercise but would have probably preferred to do it in colour as the cup looks more chrome than ceramic done in pencil.

My First Self Portrait (From a Photograph)

It was lunch time at school yesterday and as usual I sat on the top floor looking for something to draw. I decided on a self portrait, I’d never drawn a picture of my own face before and wondered how long I could get a drawing looking anything like me, so I took a photo with my mobile phone and started sketching away.

Self portrait in my 6 x 9 Sketchbook

I started on my right eye, left in the photograph working down to the tip of my nose then with my nose complete moved onto my left eye. Within 40 minutes I had my drawing looking something similar with the eyes and nose almost perfect. However the mouth was a little to high and so it put my face out of shape a little making it more round than long.

Photo on my Mobile Phone

For a first attempt I’m quite satisfied and even though my face was slightly out of shape I know I can only improve.

Basic Shapes and Fundamental Form – Check and Log

Are the objects in your drawings the correct size and shape in relation to each other? 

In most of the drawings in these three exercises, especially Boxes and Books, the objects were the correct size and shape in relation to each other apart from when I started to use pen for the Jugs and Jars, but with a bit of practise I managed to get them in proportion, a better quality pen helped.

Do the shapes between the objects look correct? 

Yes, one thing I don’t seem to have a problem with at this stage is the space between the objects, it helps to get them right the first time and then make sure you are looking from the same angle as you continue to draw.

Do the objects in your drawing look solid? 

Yes the drawings in the Supermarket shop exercise all look solid, however the objects in the watercolour pencil drawings do not look as sturdy as the others, but with more practise I will get better at drawing with these.

Have you managed to create the feeling of depth? 

I would say that in all three exercises I managed to create a good feeling of depth but more so in the charcoal sketch and the colour pencil drawing of the Supermarket Shop exercise