How successful were you in copying the lines from the smaller squares to the larger squares?
I thought I was very successful indeed however even though I enjoyed this project and was almost to perfect the enlarged image I can see where things can go wrong especially on curves over a line of the grid.
Are you satisfied with your larger replica of the image? What would you differently next time?
I am very satisfied with the however maybe I would divide the grid up in to smaller squares on the larger image which would make it a lot easier.
For this project of ‘Enlarging an Image‘ I was instructed in the course materials that I needed two acetate grids, one with small squares across it and the other with large squares printed on it.
As instructed I went out and bought a roll of acetate and card and made myself two acetate grids, one small and one big and glued them to card so I could use them as view finders. I managed to slice my finger open with a Stanley knife while making the big one so you can see the dodgy line where the CD marker hit the big chunky bandage.
Acetate Grids for Enlarging an Image – My new scaling tools
Unfortunately I didn’t get to use them as I didn’t really need to because I was also instructed to draw a grid with an HB pencil over the small image, where as I could have placed the small grid over the image in my A5 sketchbook instead; but I can see they will be getting plenty of use in the future. The size of the squares on the small grid are 2cm, the size of the squares on the large grid are 4cm, I think I also need to make those 2cm as well.
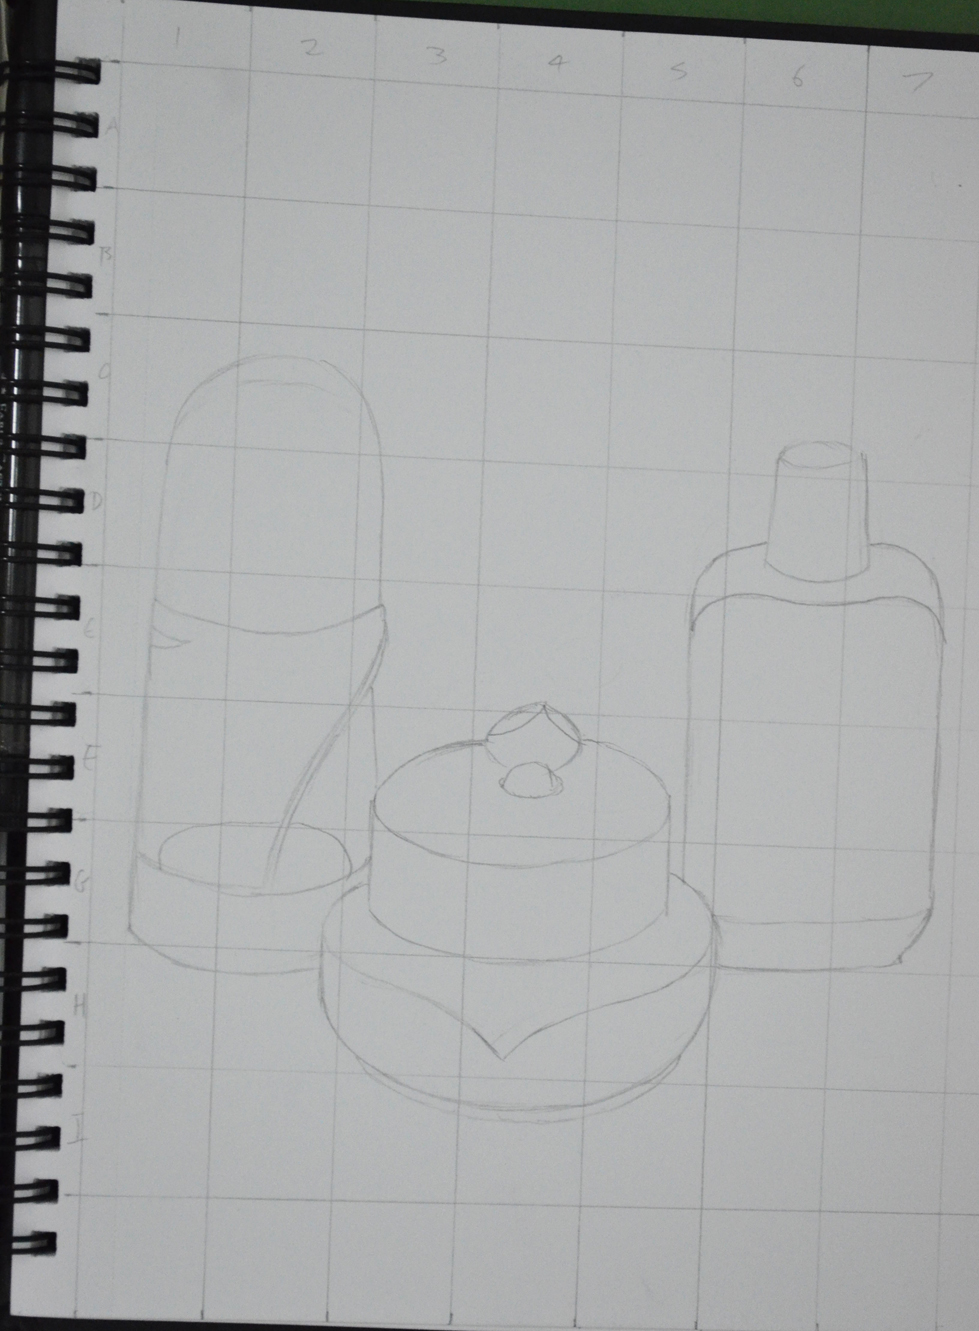
This exercise was aimed to give me further practice in enlarging original drawing with a slightly more complicated structure. For this exercise I chose a fancy jar of face cream (borrowed from my girlfriend), a roll on deodorant and a plastic Nasol bottle.
Enlarging a simple flat image – initial sketches
To get familiar with the objects I did a quick 3 minute drawing of each one before putting them together for the composition in my A5 sketchbook. This helped me to recognise problem areas on the objects such as the top of the Nasol bottle that would have looked a mess too wide or too narrow.
Enlarging a simple flat image – A5 sketchbook
As in the previous exercise ‘ Enlarging an Existing Image’ I drew the composition of three objects in my A5 sketchbook and drew a grid of 2 cm squares over the top of the composition with an HB pencil. Just as in the previous exercise I labeled the squares by writing numbers across the top and letters down the right hand side to stop any confusion to which squares I would be drawing in.
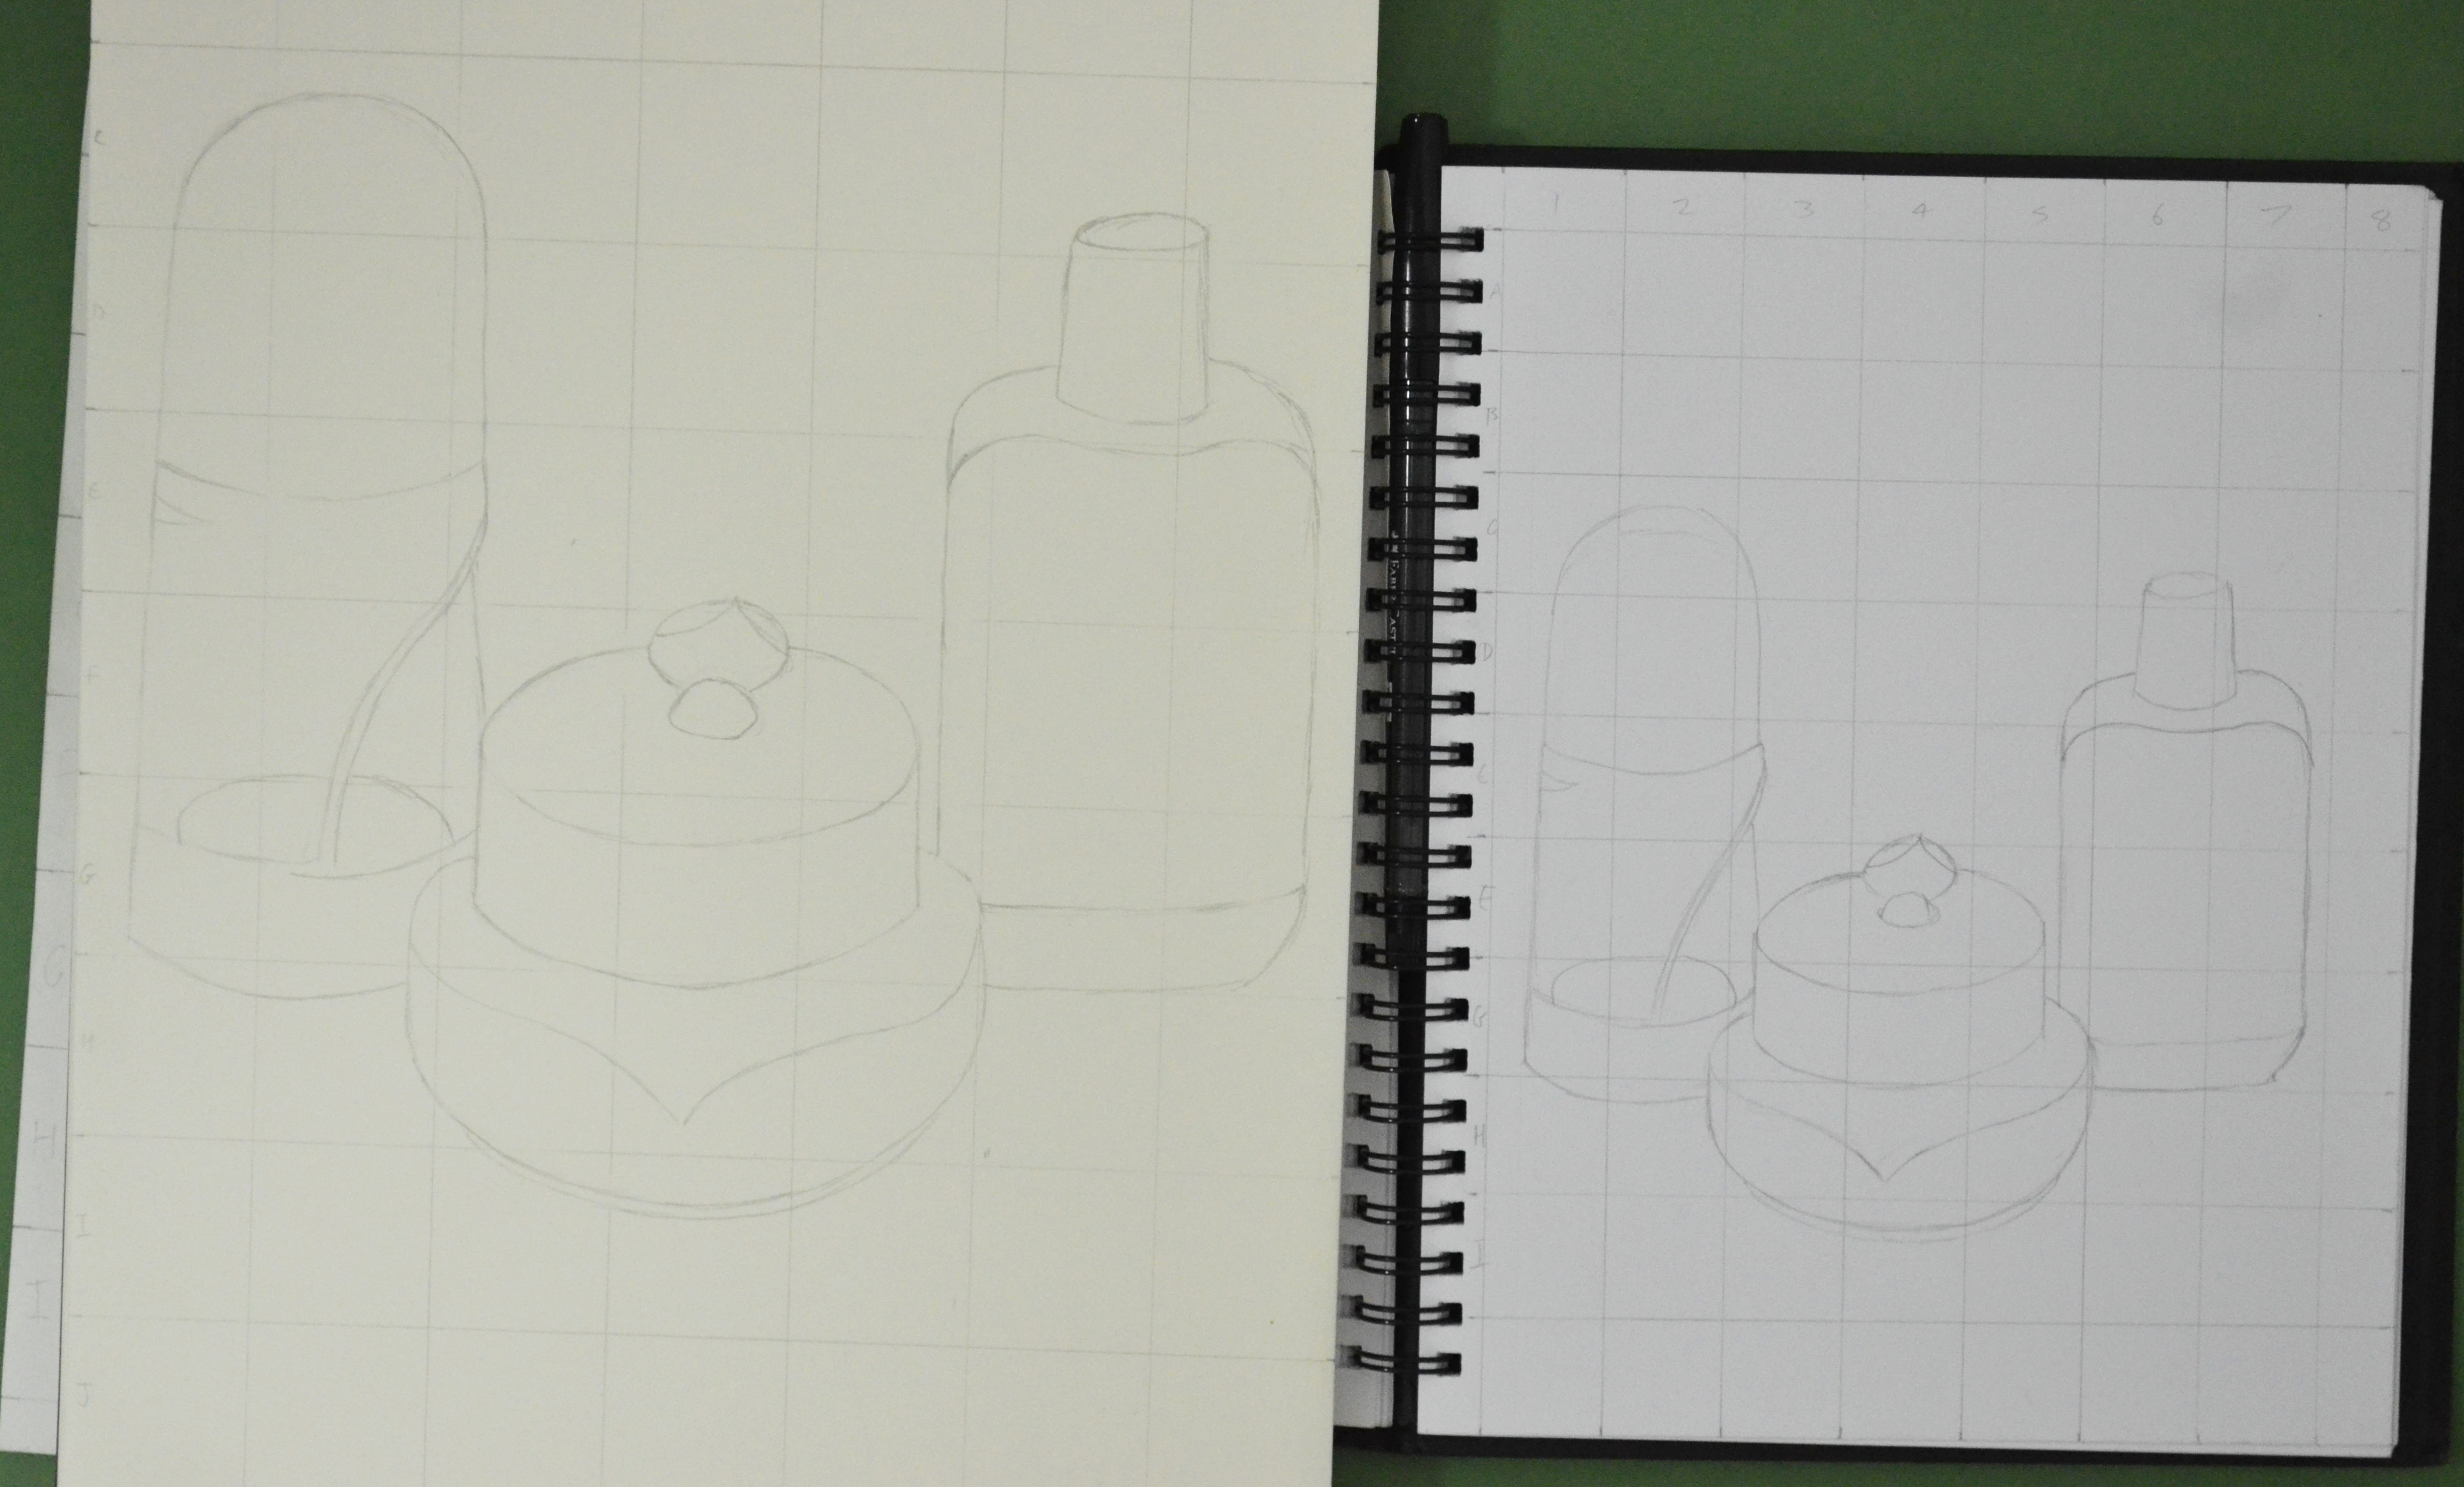
From there I drew a grid of 3 cm squares in my A4 sketchbook, again moving the composition up the page by taking away the A row in the grid then reproduced the drawing on a larger scale.
Enlarging a simple flat image – englarged sketch
Again, I really loved this exercise it was so simple and easy, I erased the odd line due to points of contact on the grid being slightly wrong, but the results of drawing these 3 objects were actually better than in the first object. I think this was down to viewing all three at once rather than trying to look for faults on the angles and curves of one single object.
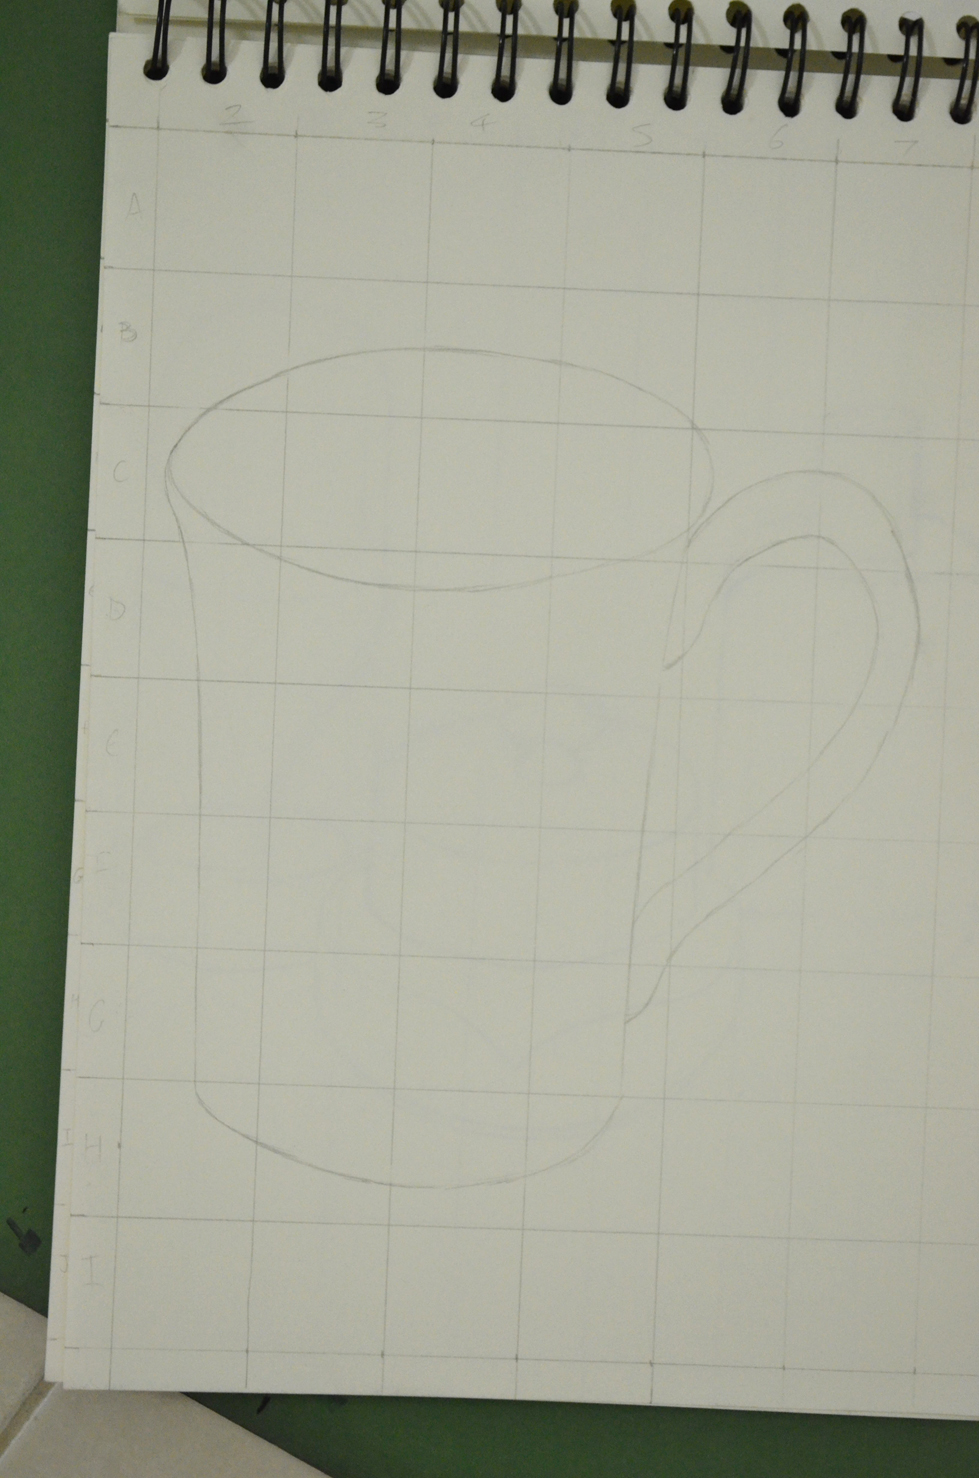
For this exercise I drew a thumbnail drawing of my favourite coffee cup roughly 10 cm square in my small A5 sketchbook, which I’ve barely put to use so was good to fill a page or 2. Once I had finished the thumbnail drawing I drew a grid of 2 cm squares with an HB pencil over my thumbnail sketch.
Enlarging an existing image – A5 sketchbook
In my A4 sketchbook I drew 3 cm squares, deciding they were a perfect size for this object on this size paper, with a larger more detailed composition I would have probably needed smaller squares in both sketchbooks.
Enlarging an existing image – A4 Sketchbook
To make it easier for myself to identify which squares I would be drawing in I labelled the squares with letters down the left hand side and numbers across the top. However the drawing was quite low in my A5 sketchbook so in my A4 sketchbook I started at B instead of A lifting the drawing up 1 square.
Enlarging an existing image – side by side
I loved this ‘Enlarging an Existing Image’ exercise, it was like piecing together a jigsaw puzzle but a hell of a lot easier and as the squares weren’t that big quite easy to judge where a line curves or which point of the grid they would meet. Admittedly I did do a little bit of rubbing out with an eraser but not that much.