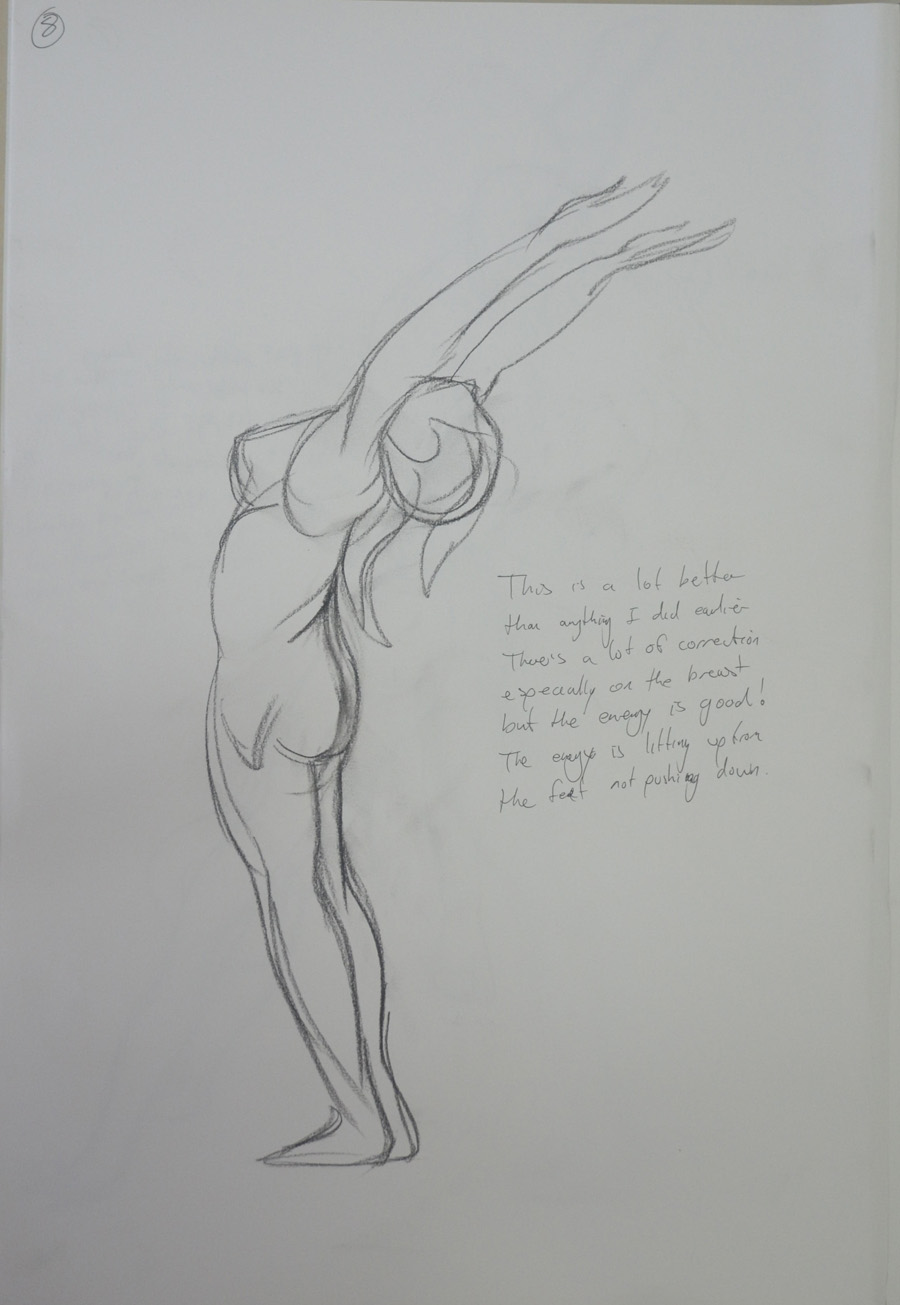
I really think I could have done a lot better in the Gesture project in the last part of this course, my Energy drawings left a lot to be desired and so I decided that I wanted to start this part of the course with a fresh try at drawing with energy.
Drawing 1
I previously only browsed through ‘Force’ by Michael D Mattesi, this time I read it and utilized it. One of the first issues that he talks about in his book was the types of lines and I had been using the infamous hairy line in my drawings and it was time to do something about it.
Drawing 2
Using photos I had taken earlier I was determined to draw with smoother, confident lines putting what I had learnt from the book into practice, concentrating on directional and applied force and the road of rhythm. The results were far better than my previous attempts at gesture drawing and rarely did the hairy line raise it’s ugly head.
I wasn’t completely happy with the gesture drawing exercise in the last project as I didn’t feel I was quick enough with the sketches and so I decided to have another go at the language center I teach at.
1 – Students Writing in Charcoal
The first two drawings were done in a private class and in a small class of four students. The drawing on the right is of my mature private student and on the left a young man of 15 both of which did not know I was drawing them.
2 – Students Standing
The two girls posed for me while I did a 30 second drawing, stance was fine, the proportions are OK but I feel I could have done a lot better and been a bit more confident.
The hands on the one on the right are more like feet as well, I think I am going to need a lot of practice drawing hands, both quickly and in detail.
How well have you managed to capture the pose? what could be improved.
I think I did really well with capturing the pose throughout the project. However I do think that I could have done better to capture the feeling of the pose. Maybe experimenting with different mediums on different types of paper especially in the ‘Stance’ exercise. could have helped me do this. Since working on these two exercises I discovered ‘Bridgman’s Complete Guide to Drawing from Life’ by George W. Bridgman, which I will be reading and hopefully it will help me get more ‘drama’ into the pose.
Do you think the figures balance, if not where did you go wrong?
All but one of my figures balance and that is the first drawing of the model in tree pose, where I centered the entire model. I then redrew the model looking for areas where the model was balancing.
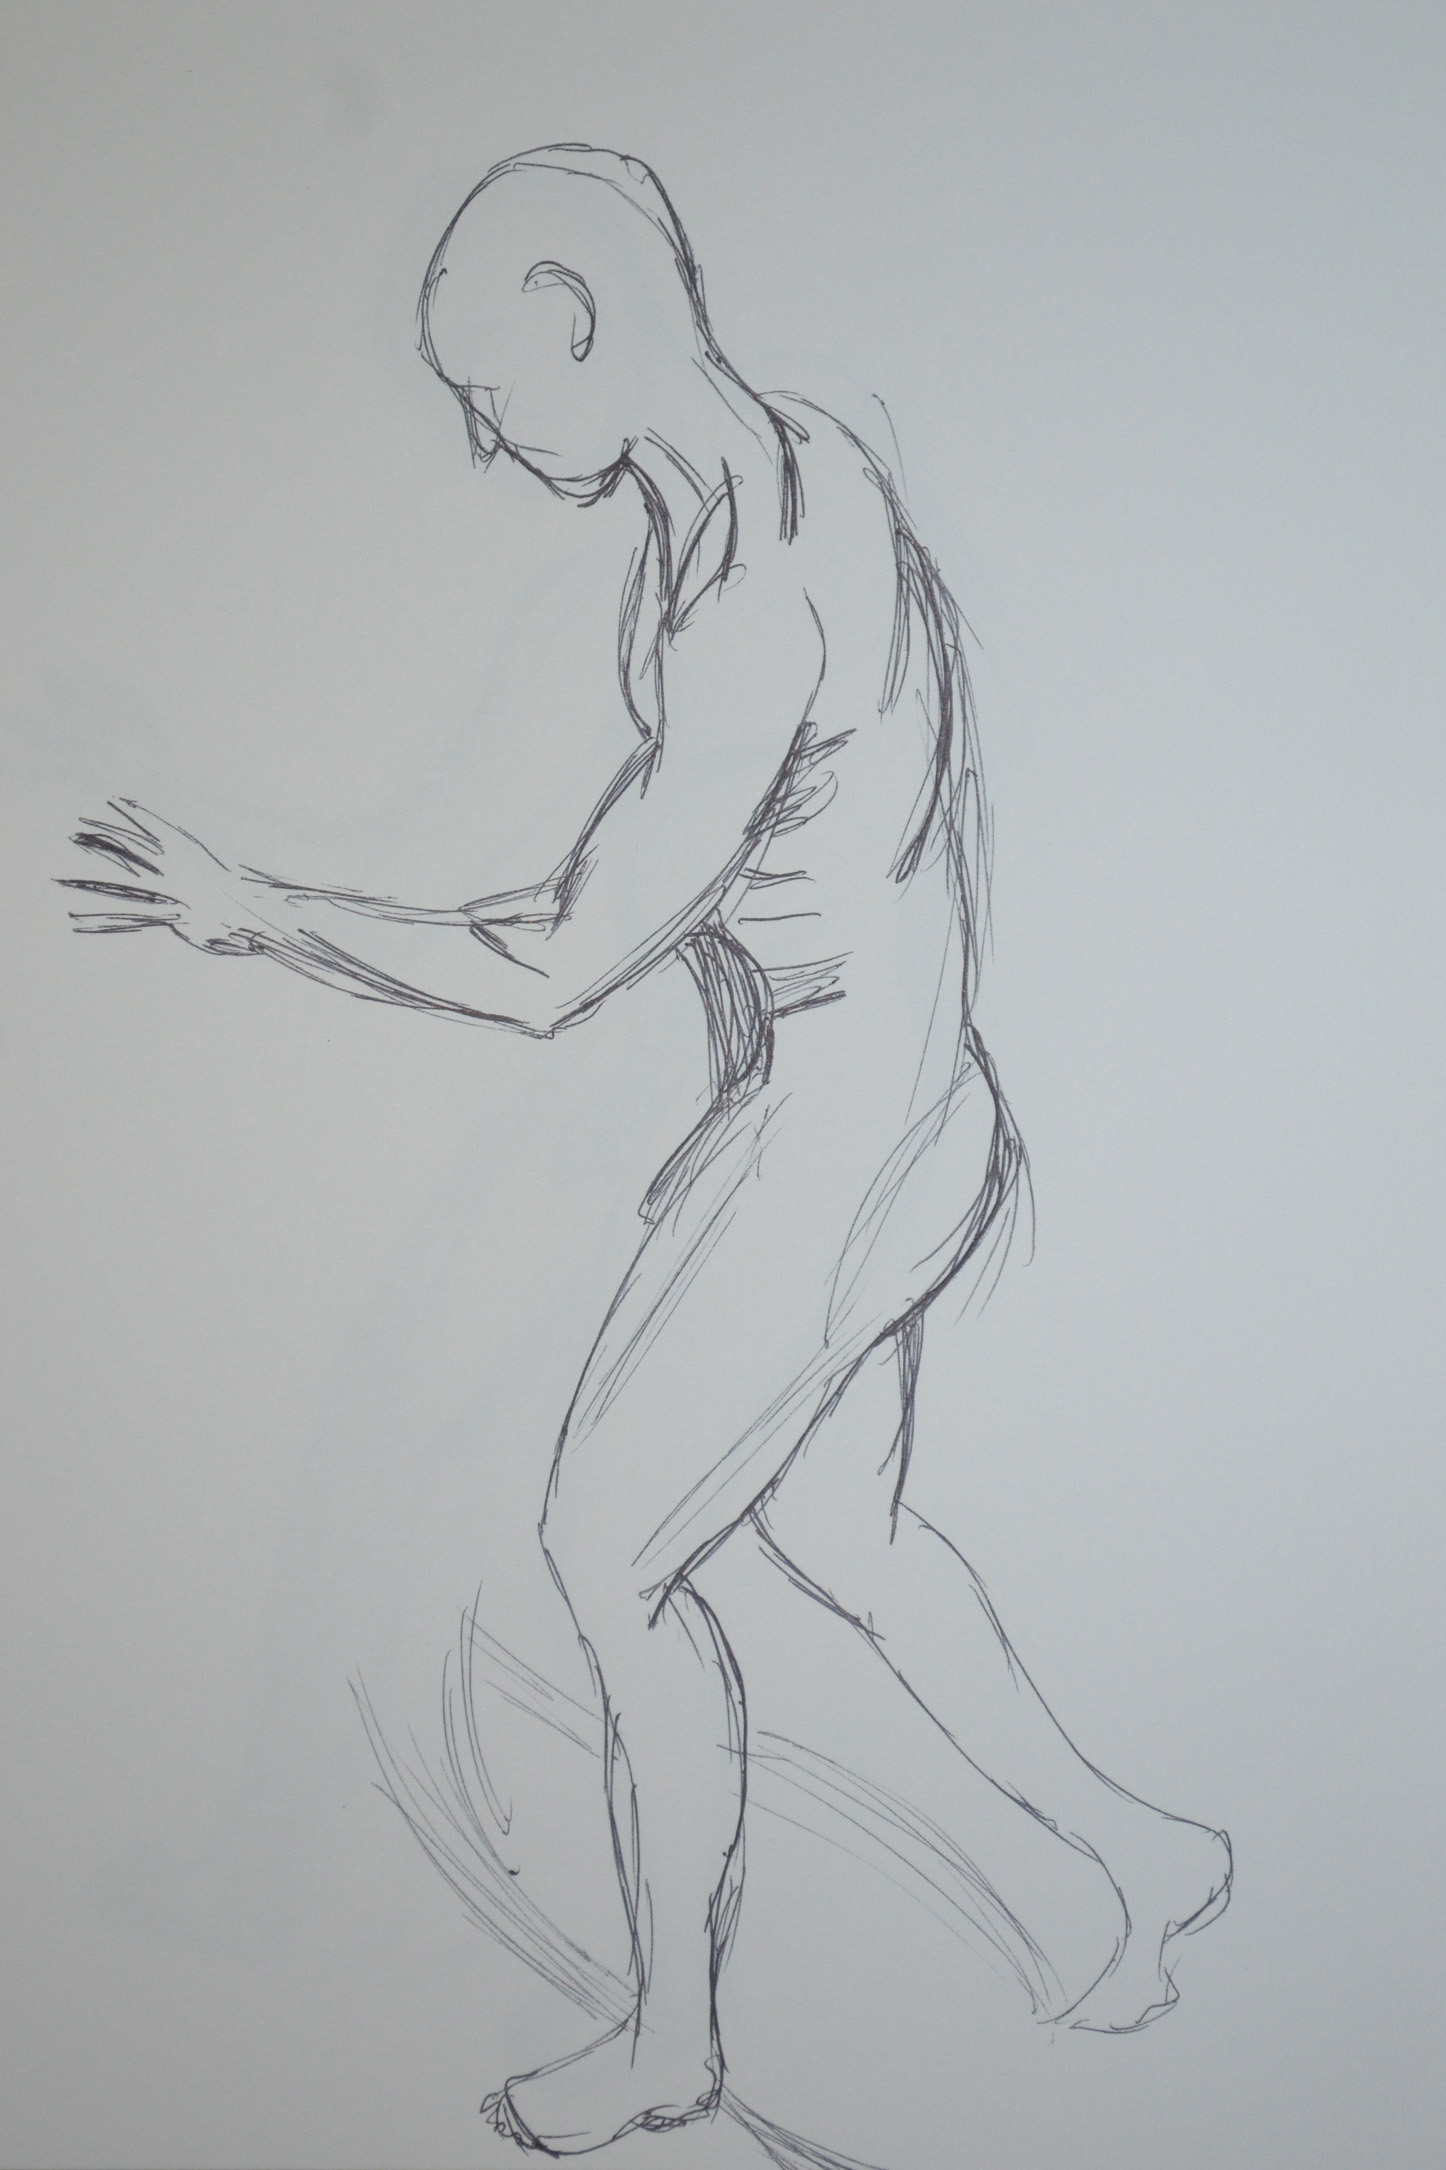
How did you go about conveying a sense of energy?
I explored a few different ways of conveying a sense of energy, I started by sketching really quickly with a 6B pencil and Conte pencil, focusing on poses that would help me capture the model in ‘action’. In went back to these and added swoosh lines as I wasn’t quite happy with them.
From there I went onto drawing the model in ballpoint pen going over and over the figure with more and more lines,
I experimented drawing moving body parts by hatching from side to side over where the body part should be in a rough blurred shape.
I roughly sketched the figure in a lighter felt tip pen and then went over in a black felt tip pen hoping to convey a sense of energy in that the model would look like she was in motion.
Last but not least I drew very quickly with a ballpoint pen in action poses.
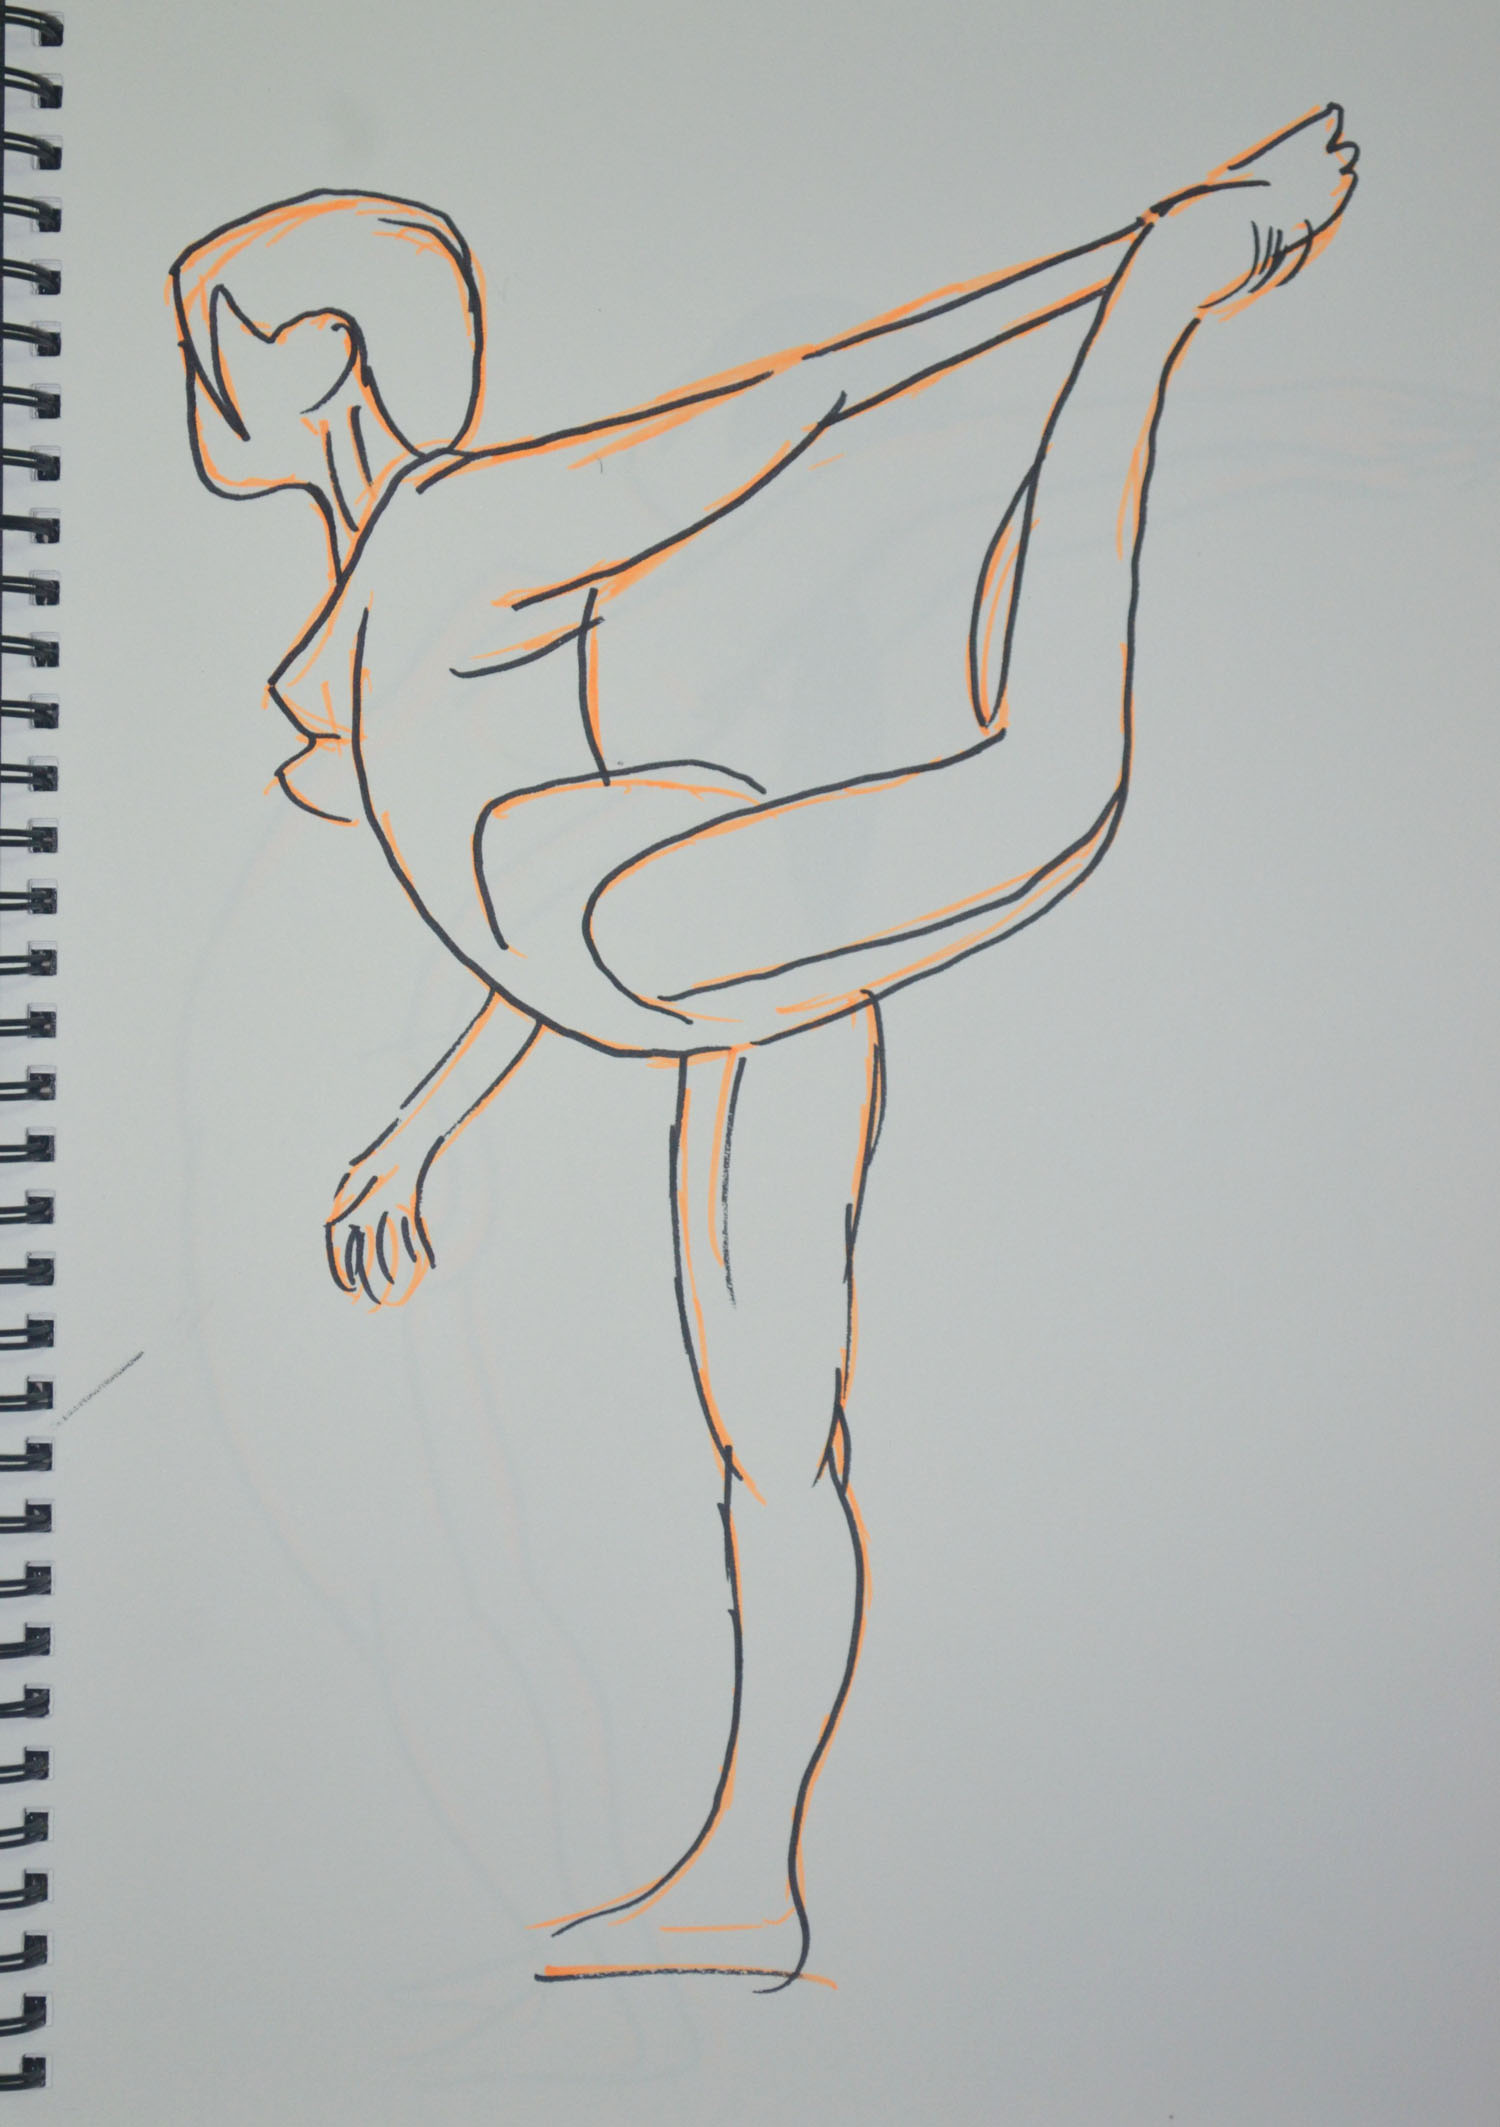
In the instructions for this exercise we were to ask the model to adopt a dynamic pose such as lifting an arm, twisting the hips, turning the head stretching the arms or walking. I had an idea of what I would be doing for this exercise from the start, so I asked my girlfriend to do the sun salutation for me and to hold certain poses that I thought may work well I stayed close with my A4 sketchpad.
Warrior 1 6B on A4
Warrior 1 was easy to draw with the 6B pencil on the textured paper and as can be seen in the enlarged photo . However, I can never seem to use long flowing lines but am really sketchy and use lots of broken lines when faced with the task of drawing quickly within a time frame. The drawing itself would probably would not have expressed energy that we’ll so i added more pencil lines to depict movement.
Warrior 2 in Conte on A4
This was the same for Warrior 2, which was drawn a lot faster and with more energy but I just think it needed a little something so spiced it up a bit.
Cobra Pose 1 Faber Castell Ballpoint on A4
The next pose was the Cobra Pose which after drawing the first one in Faber Castell Ballpoint I decided it was a pose that could be drawn with lots of energy and depict movement quite well if done right so with the girlfriend taking a short break after each one.
Cobra Pose 2 Faber Castell BallpointExploring Cobra Pose in ConteLarger Cobra Pose in Conte
There were a couple that were ok and a couple that were totally out of proportion. The thing about the Cobra Pose is that the legs look longer in the pose especially with mygirlfriend who has quite a short body, or high backside as can be seen in the upward salute below.
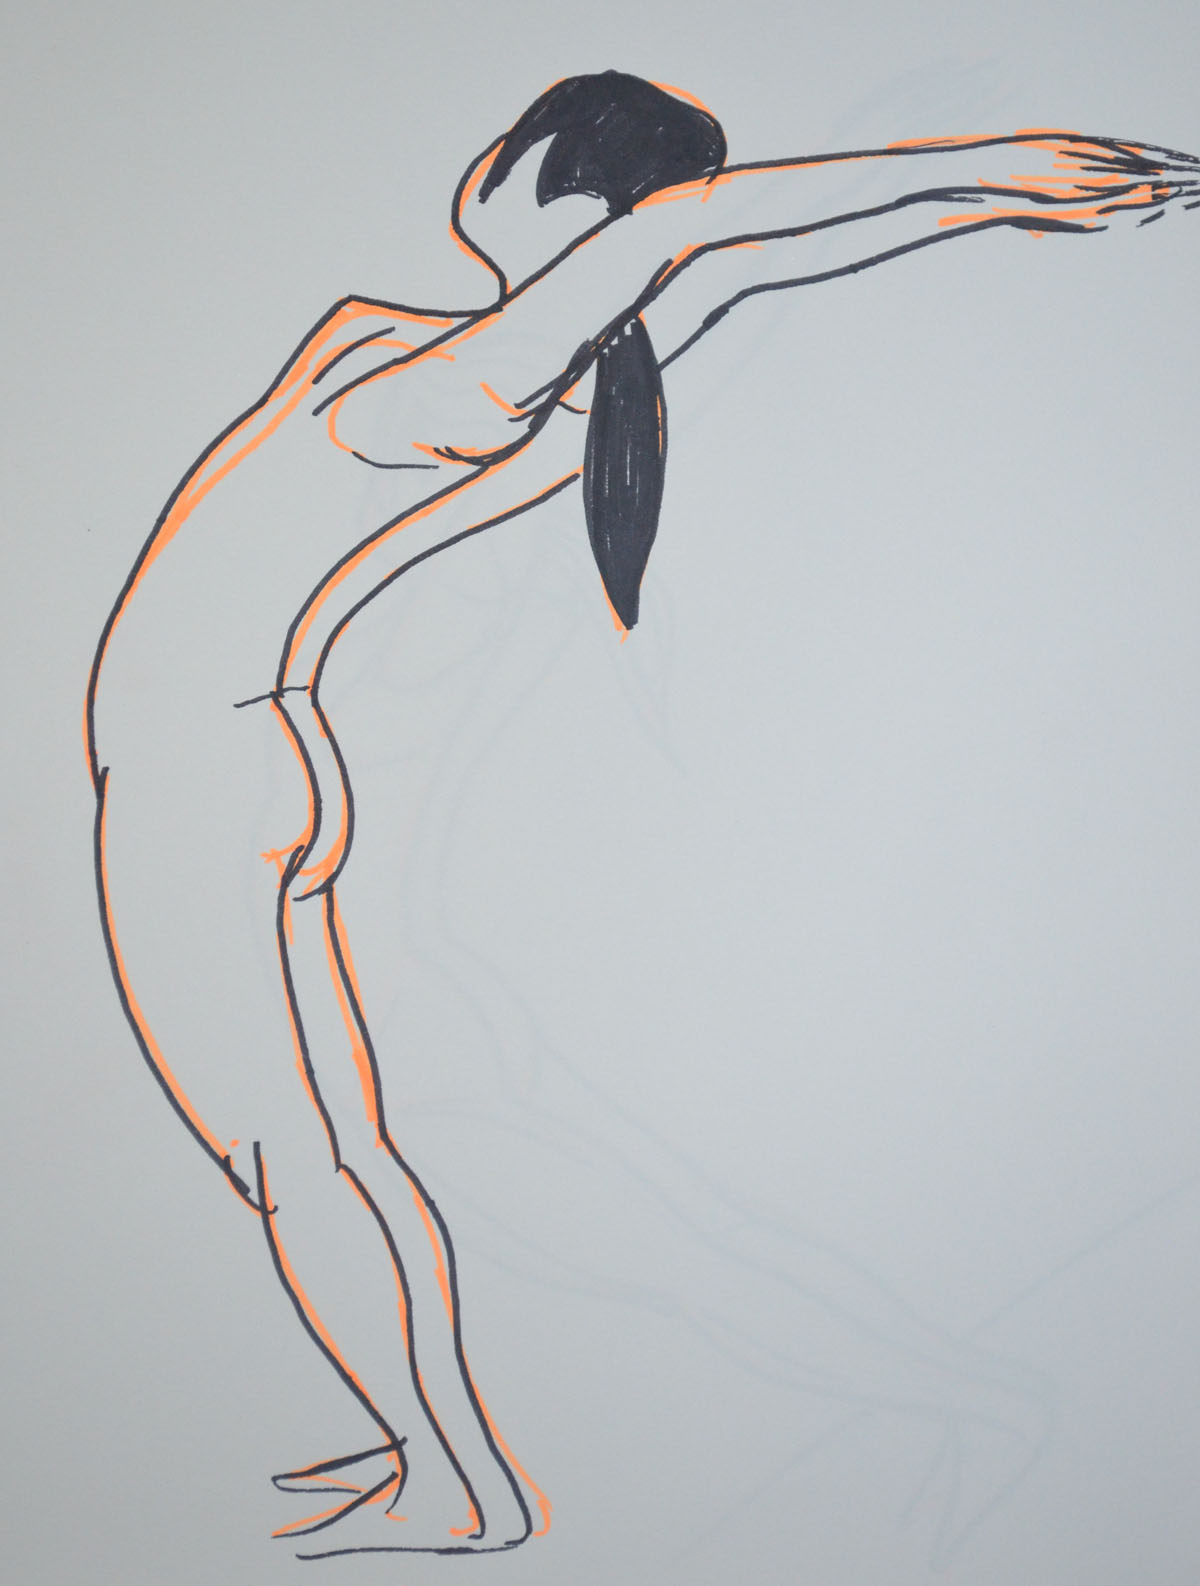
Upward salute 6B on A4
I did a quick sketch with my girlfriend in the ‘upward salute’ pose, starting from the waste I worked down to the feet. I should have done it the other way around and drawn the top first because by the time I got to drawing the top she had eased off the bent back position.
Upward salute Back Bent Further Back
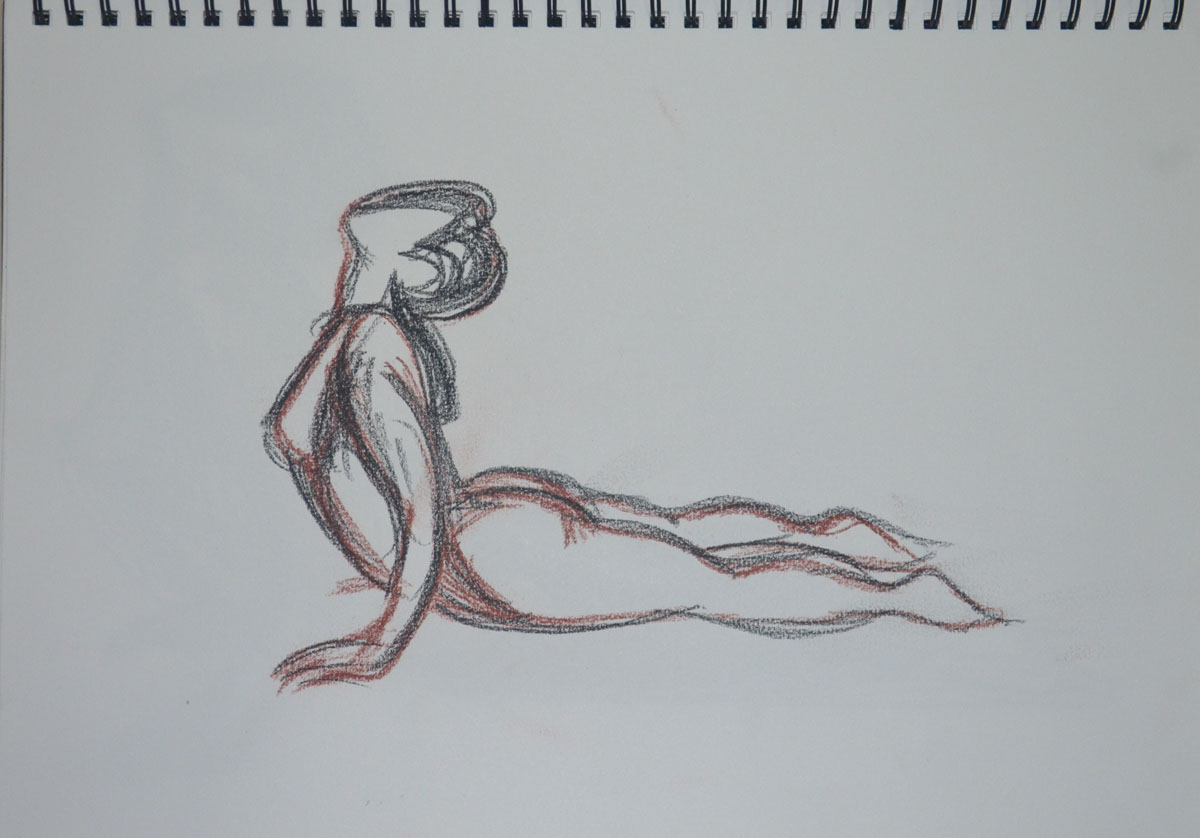
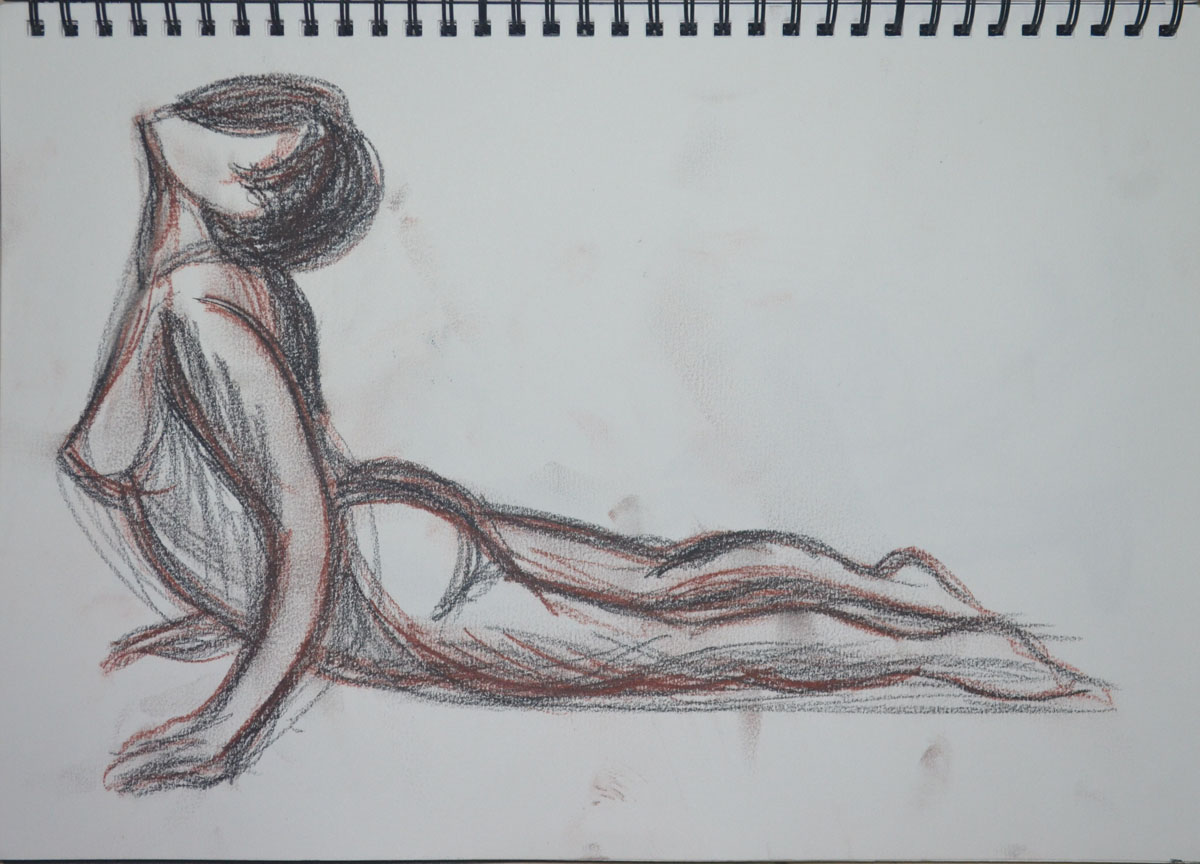
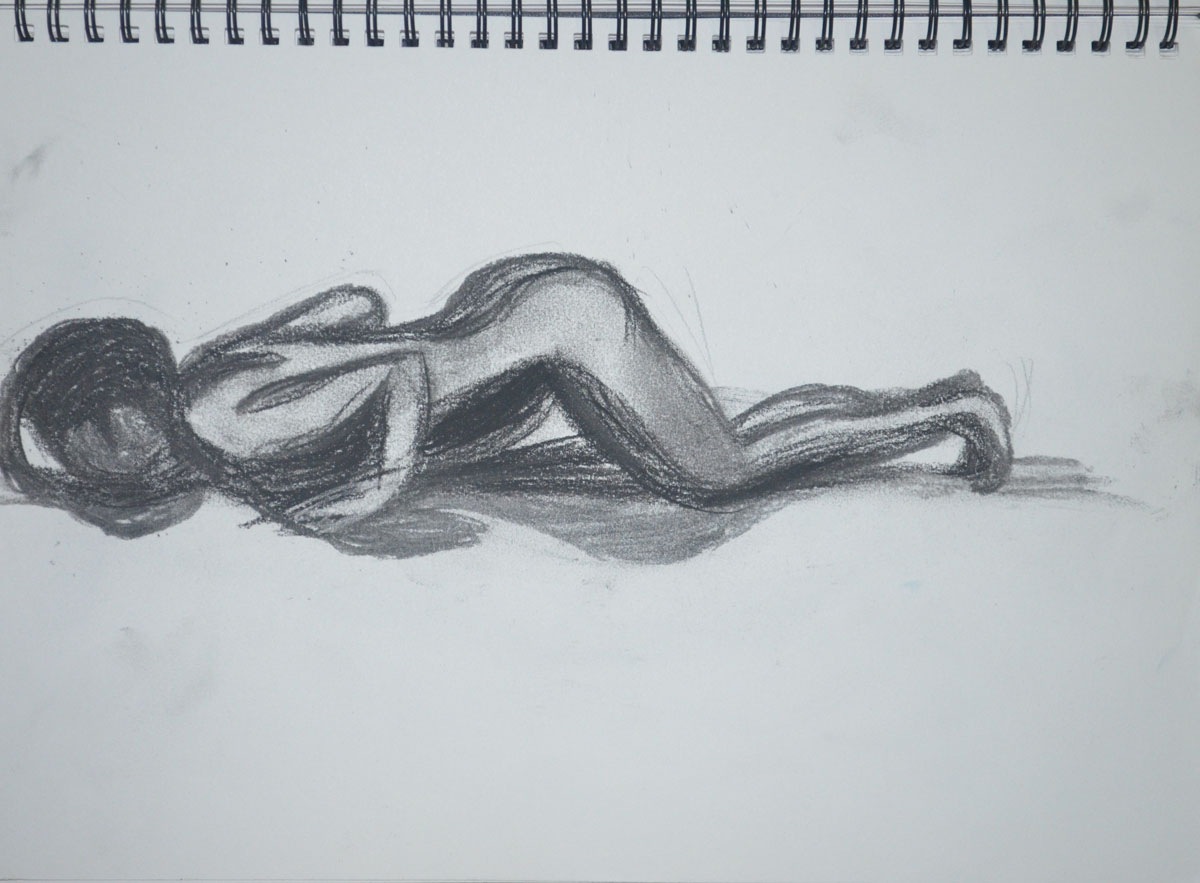
The second drawing of the same pose was a lot easier for us both and this time I started with longer lines from the waist to the breast then from the breast to the wrist then worked my way down to the floor. Her hair flicked back gave me an idea and so i decided to add some trail lines to both drawings, successfully adding energy and movement to the drawings. For the next two drawings we chose the ‘Knees, chest and chin pose’ as I thought, like the Cobra Pose, drawing with energy I may be able to depict movement in the following sketches. This maybe true for the Conte sketch in two colours but not the drawing in charcoal.
Knees, chest and chin pose CharcoalKnees, chest and chin pose, Conte pencils
That was it for the first day but the next day I had some time to kill between lessons at the language centre, so I thought I would try something a bit different. With 6B pencil in my A4 sketch book and working from two photos I had taken from the bed with my tablet the night before I quickly sketched my girlfriend and then distorted the body parts that had been caught in action (moving) in the two photos.
Experimenting with Moving Limbs 1, 6B on A4
In the first photo from what I can remember she was on her way to the toilet lifting her left leg up and swishing her damp hair to one side after making a start on blow drying it. In the second photo she was cooking her log up, maybe scratching the back of the right leg with the top of her left foot.
Experimenting with Moving Limbs 2, 6B on A4
The next day I cycled back up to my girlfriend’s home sketchbook in bag but this time armed with my felt tip pens and my girlfriend went through a few more poses to see which would be best as drawings.
Felt Tip Pens Shiva dancing pose
Actually it doesn’t say felt tip pens on the box, it says wwatercolour Pens and the colours are far more vibrant than felt tip pens.
The Shiva Dancing Pose above is a very static pose but I thought by using the vibrant orange to sketch in the form first before I went over it in black it would give it some energy. I don’t think it does, my students think it does, nonetheless it does remind me of Degas’s ballerinas.
Felt Tip Pens standing salute pose
The last two drawings of my girlfriend were again of her in the ‘standing salute’ pose but drawn from a photo her back was bent so far back that I couldn’t ask her to stay like that for any length of time without her falling over especially with her hands together. The first drawing wasn’t in Proportion as her body ws too long and her arms were too short in order to fit her on the page.
The second drawing was drawn at an angle in order toner her in Proportion and git yer on the page.
Felt Tip Pens standing salute pose at an angle
At the end of our second session I got the girlfriend to take some shots of me in various poses, the following sketches drawn in ballpoint pen was the result. A quick sketch, full of energy and reminding me somewhat of a Scheile painting.
The brief for this exercise was to ‘ Look for the center of gravity in a standing figure. Mark the central axis in your sketches’ and to ‘ change poses every 2-5 minutes’. I divided my A4 sketch book into three panes so i could work smaller and so keep within the 5 minute time frame. Unlike the previous exercises, in this exercise I started from the head down and once I thought the head was in the correct position marked the central axis, which the brief pointed out was from the back of the ear on a side pose, the top of the spine for a back pose and for a front pose started at the top of the head and run down the bridge of the nose.
First three stances 2B on A4
After drawing the head and then marking the central axis I worked to it as a guideline. The benefits of working this small was that I could capture the stance quite well plus add some detail while working within the time frame. The negative side is that when enlarged the drawings are very sketchy.
Second set of stances 2B on A4
The first three drawings took closer to 2 minutes each while 4-6 were closer to 5 minutes and it shows.
Drawings 6-9 2B on A4
Having got confident drawing he different basic stances by now I decided to get a bit more daring with the next 3, hands overlapping behind the head an back twisting to one side in the first two, and the third drawing bending over with one hand on the left calf. This third drawing wasn’t the most difficult nor did it take the longest to draw but it was the most awkward and I wasn’t completely satisfied at first but looking at it now the proportions and stance are perfect it just felt strange to draw what seems like a triangular form.
2 final stances 2B on A4
On the 4th and final page of stances I went for a pose that was a true test to see if I could draw the correct center of gravity…The tree pose. My first attempt would have had the model falling over, while my second attempt was close to spot on, with the knee of the standing leg pushed out to center the weight. Last but not least was the model drinking a class of beer from the back and I even managed to get in some back muscles. I have noticed there is an anatomical drawing coming up and I think back muscles on the right model would be great for it.