Project: Self Portrait – Exercise: Portrait from Memory

2 - Portrait of Putin in Charcoal

I was watching I, Putin a Portrait, when I thought I bet the Russian president was one guy I could definitely draw from memory. I have have come across quite a few blonde Russians while I have been here in Thailand and they all seem to have the same features, long sloping noses, prominent cheek bones, chiseled features and wide mouth with thin lips.

I made some quick sketches while I was watching the documentary, I figured playing it through without stopping would give me plenty of practise so most of the small sketches are fleeting moments.

I also made some notes to help me remember the key features of Putin’s face. My long term memory is great but my short term memory is really poor.

1 - Notes and 1st Drawing
1 – Notes and 1st Drawingu

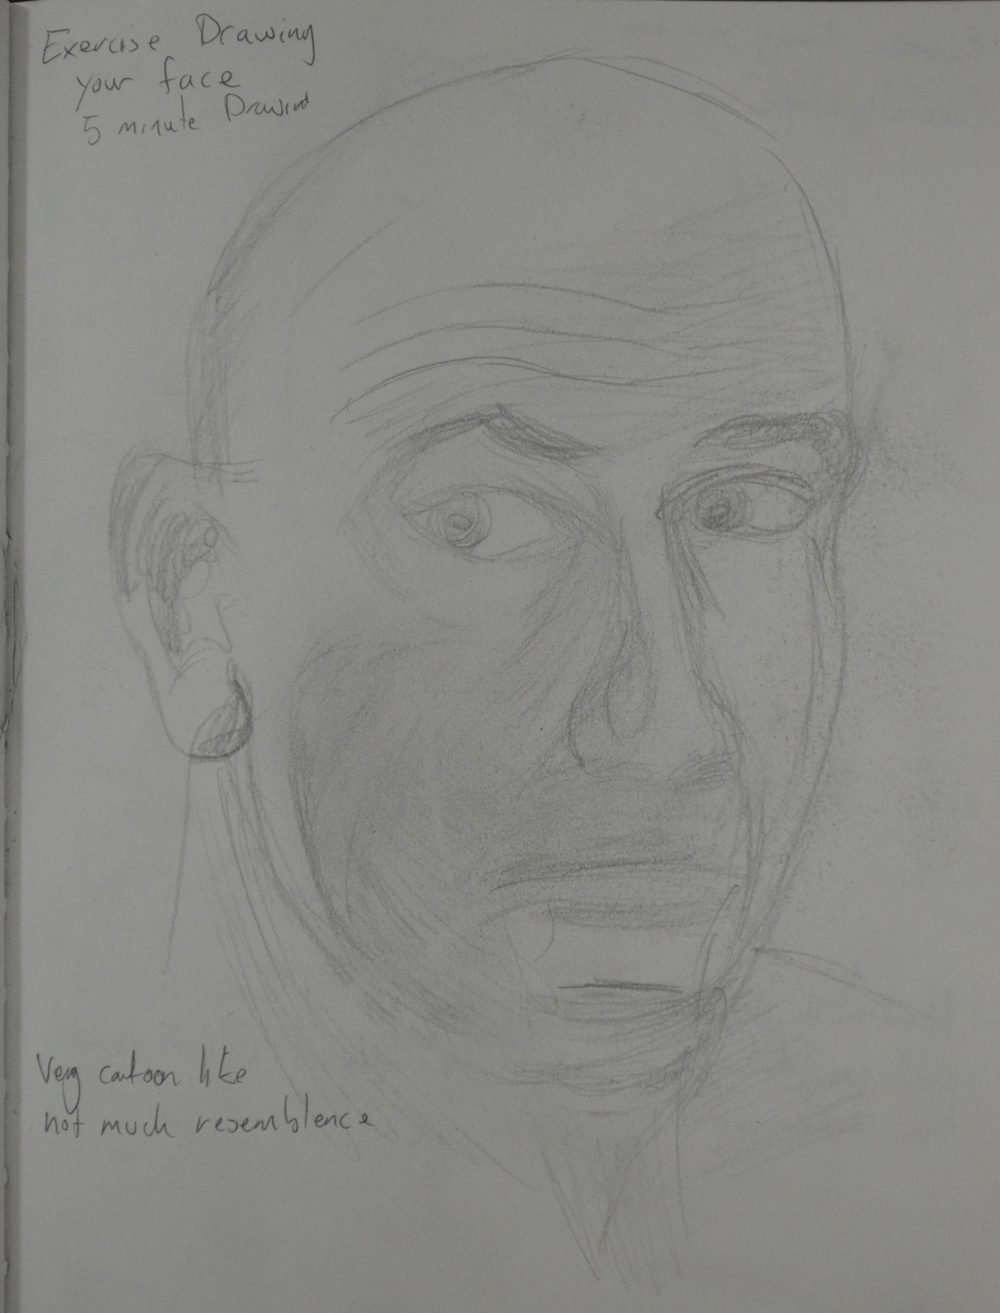
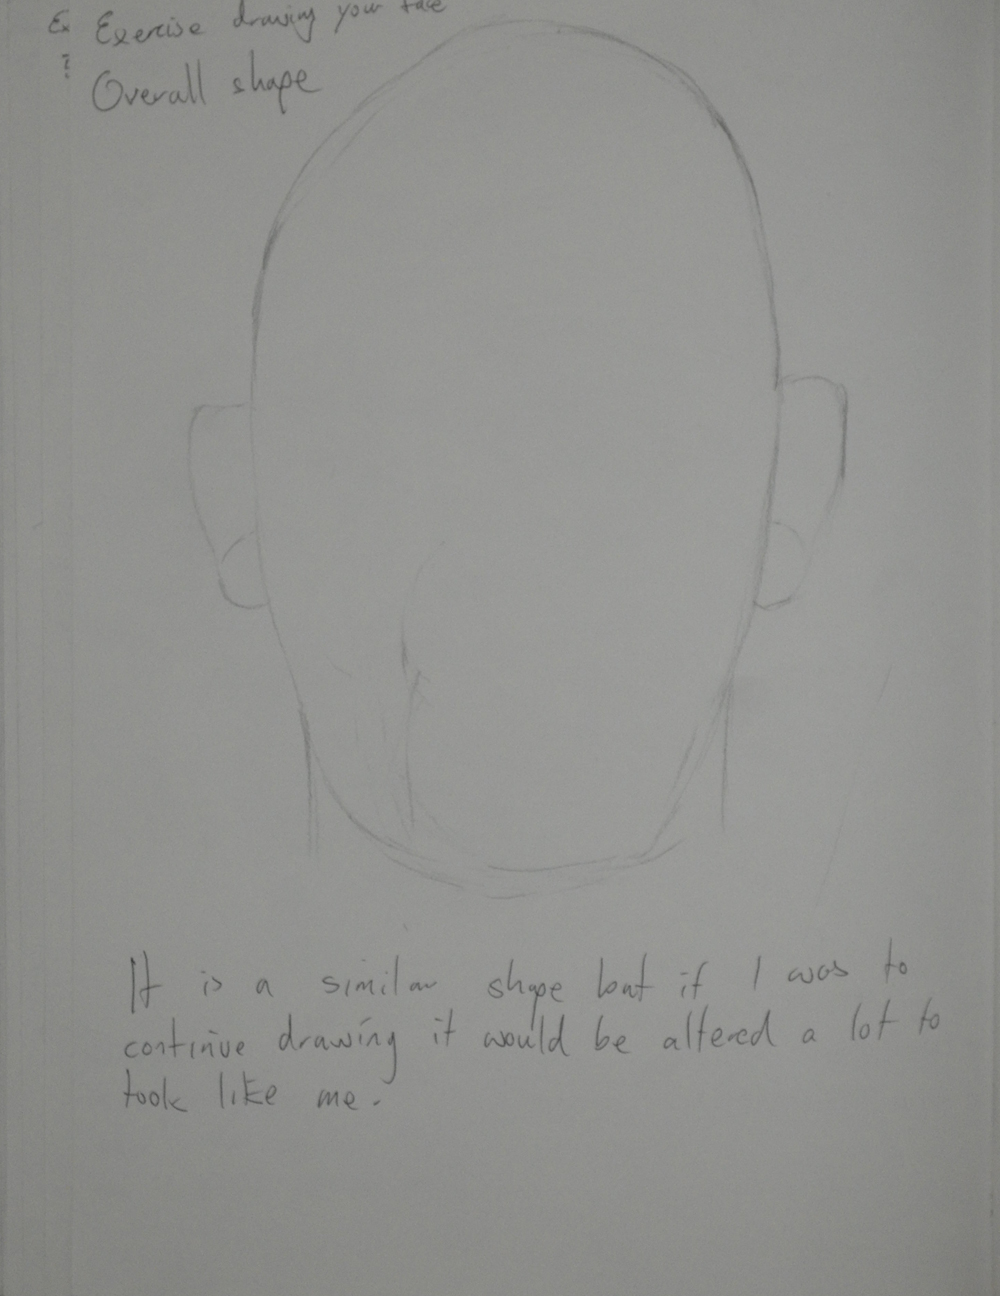
From there I started the portrait from memory starting with the nose and eyes as they were the easiest features to remember. I drew across two pages trying to get the proportions of the head right. When I was satisfied that I had got a likeness with the face I had to decide where is neck started below the chin.

The documentary showed Putin over the last 20+ years and I had produced a bit of a Frankenstein’s monster a drawing made up of images of the Russian president at different ages. I had seen him in a sweater and shirt , camouflaged jacket, shirt and tie and hockey kit.

I decided to put him in a shirt and tie which gave me some idea of how wide his neck would be and how to draw the folds of skin under his chin (turkey neck).

2 - Portrait of Putin in Charcoal
i 2 – Portrait of Putin in Charcoal

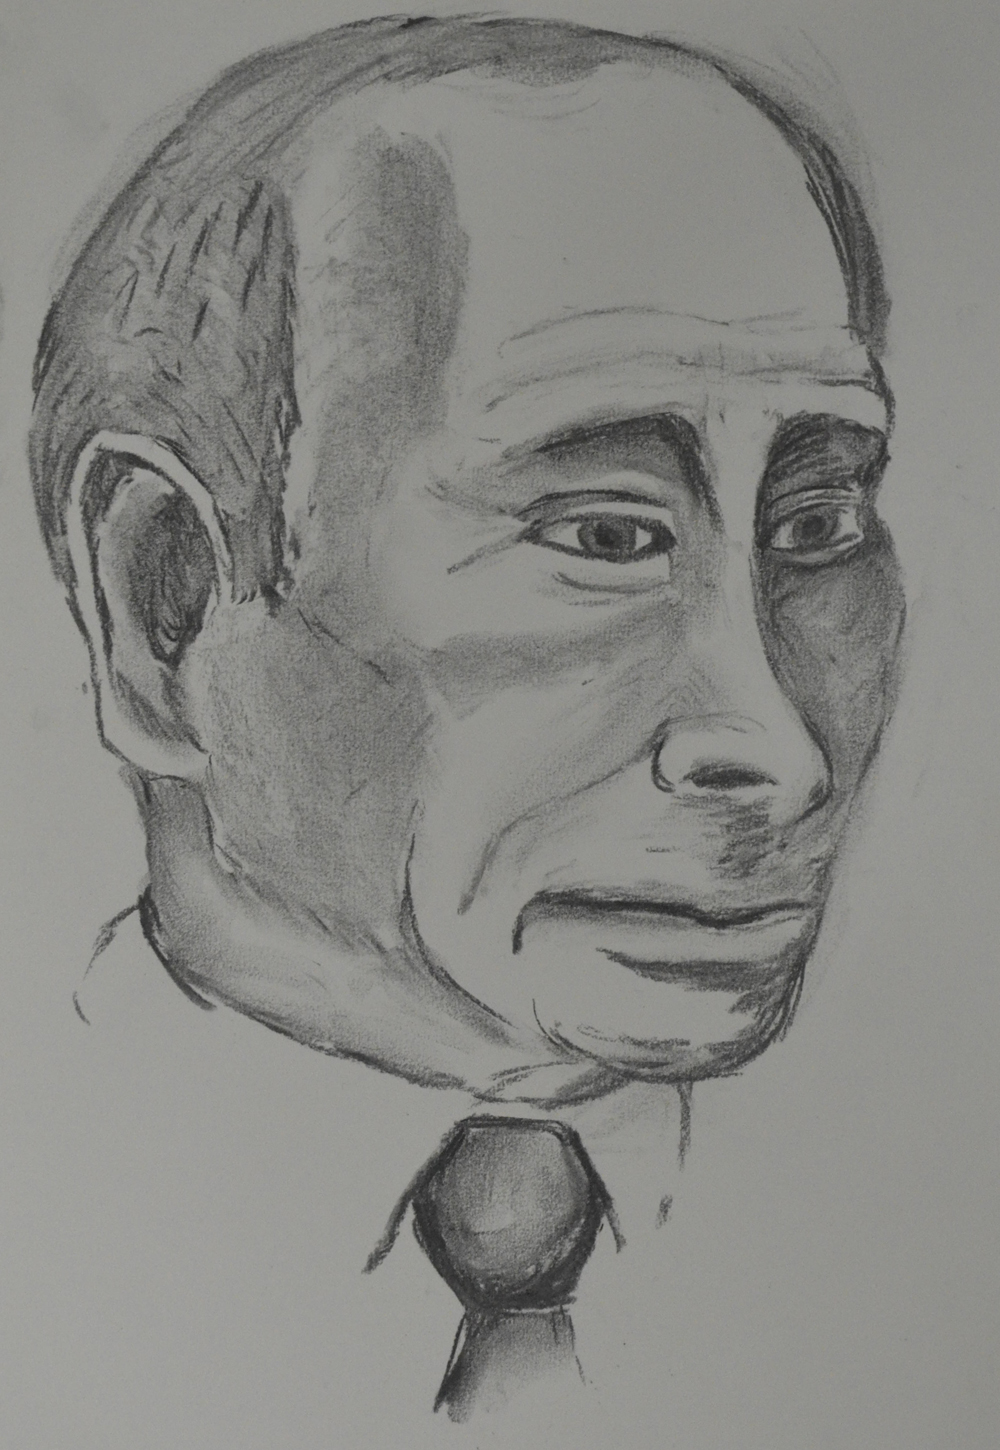
From there I did a larger drawing in charcoal on A3 paper, I was hoping to get more of a likeness with this one but it looked less like Putin than the first.

3 - Oil Pastel and Watercolour Wash
3 – Oil Pastel and Watercolour Wash

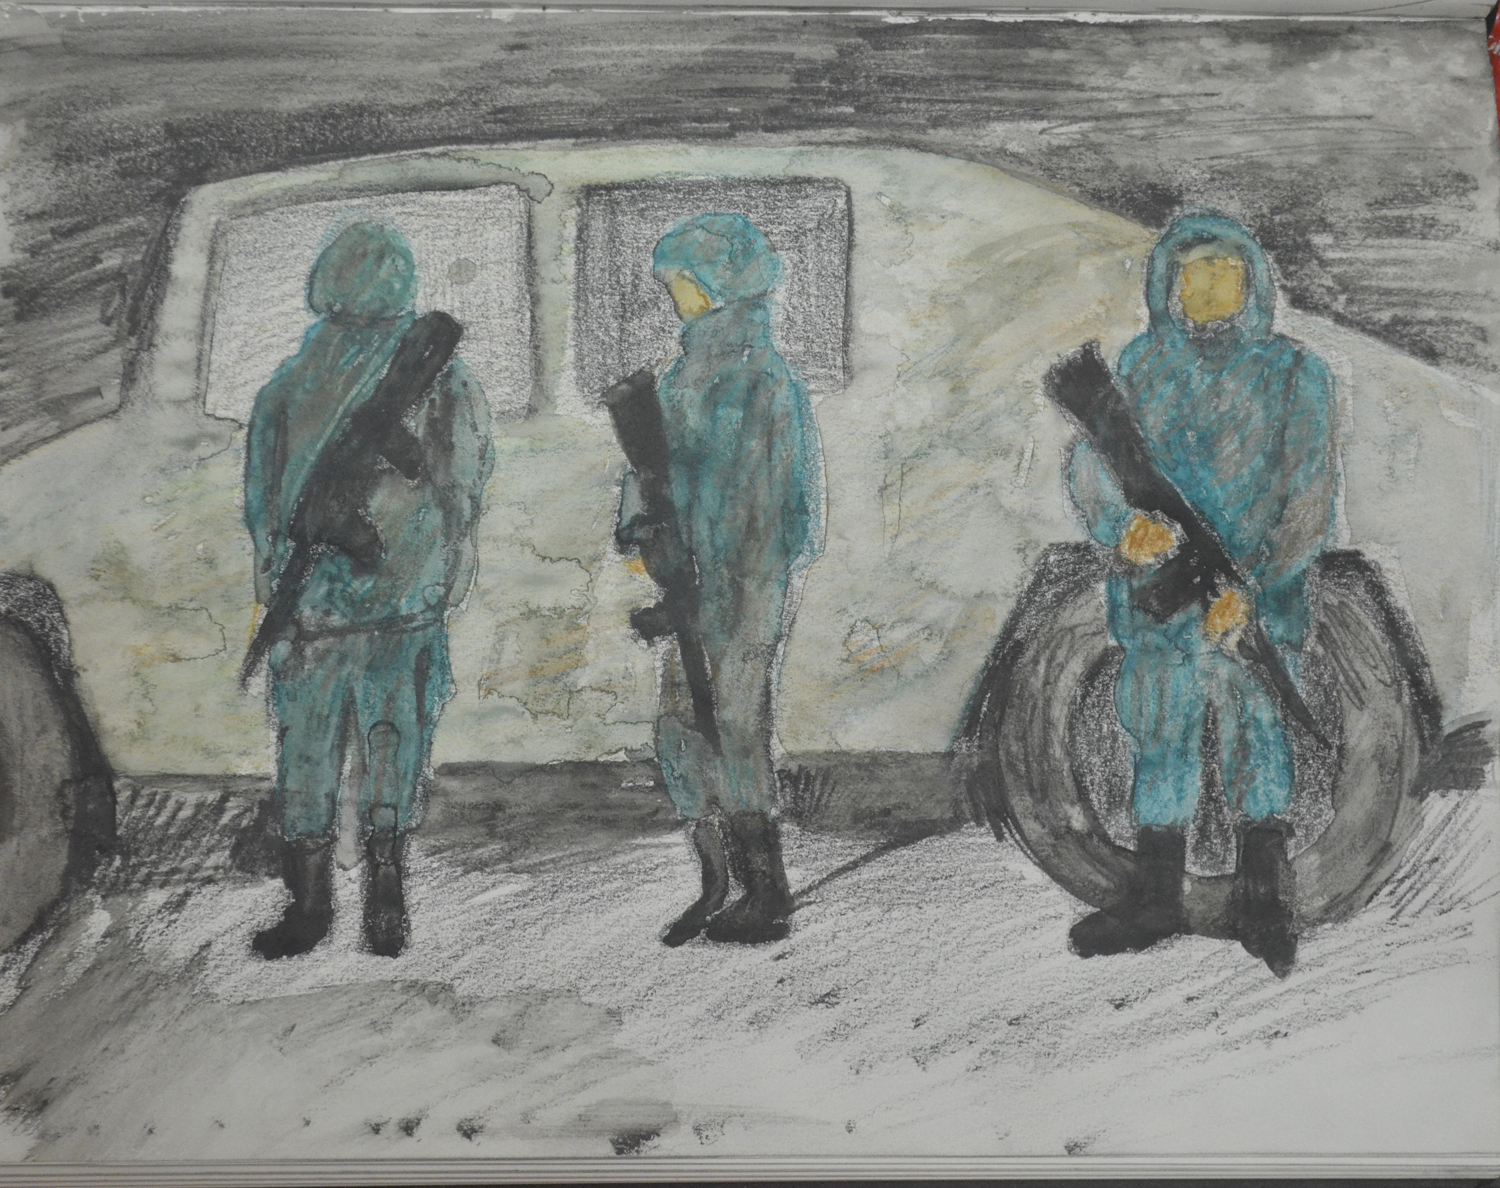
The next drawing was drawn in oil pastel and again it looked less like the Russian president than the first two, It did however have nice skin tone until I decided to experiment with a watercolour wash. I hadn’t done any washes and I had noticed a lot of other students had been doing washes over other mediums and I had never got round to playing about with them myself so I thought this was a god enough chance as any to see how an ink or watercolour wash looked over another medium.

Part 4 Drawing Figures: Project – Self Portrait – Exercise Drawing Your Face

12 - Face ears and kneck

For this exercise I started off with 5, five minute drawings of my face describing different angles of my face and head.

I made the first two 5 minute sketches looking into the forward camera of my tablet that was sitting on the table. This meant I was looking down at it (with my head slightly to the right) so all attempts at trying to give myself a chin failed as it disappeared into my neck (the disadvantage of having an overbite.

1st 5 minute Sketch of my Face

The second sketch was again made looking into the front camera this time with my head level looking forward, which meant the camera was looking up at me and up my nose, which actually came out looking like it wasn’t my nose at all. If I cover up the bottom half of the paper it does look like me but with the dodgy nose…no relation.

2nd 5 Minute Sketch
2nd 5 Minute Sketch

The third sketch was done looking into my bedroom wardrobe door, with the bedroom light on the right of me it cast some really dark shadows across my face. Even though others would probably say that it did not look like me and I actually wrote that it did not resemble me but every time I look at it I see more of myself in the drawing.

3rd 5 MInute Sketch in Shadow
3rd 5 MInute Sketch in Shadowim

Again the fourth drawing was drawn looking into the wardrobe door but this time with my face turned to more of an angle allowing for more light and less shadows. I decided to keep my glasses on again, just like in the first 5 minute sketch and just like in the first sketch my glasses made me look older.

4th 5 minute Sketch with Glasses on

For the last drawing I was facing the other way, the drawing looks more like a cartoon, which I think looks quite good . The eyes however should be looking at me and I just can’t think how I managed to the pupils so far over. There isn’t much resemblance at all, probably because the face is too long.

5th 5 Minute Sketch almost cartoonlike

After the 5 minute drawings I made 5 more quick sketches concentrating on the overall shape of my face which wasn’t an easy task. This time I bought a mirror from the twenty baht shop, and while I was buying the mirror and some toys for the kids my youngest daughter lost their tablet in the shop and they spent the next two hours crying until their mum came to pick them up.

6 - Overall Shape
6 – Overall Shape

Anyway, like I said this wasn’t an easy task, for one reason, as I said before I don’t have much of a chin and so the bottom half of my head is not as defined as the top. I decided that it looked like a cross between an hexagon and an heptagon and so did 5 sketches trying to perfect the shape.

7 - Overall Shape a bit better
7 – Overall Shape a bit better

The drawing above is probably the closest shape to my head but I didn’t realise it until I drew the chin in afterwards with a biro, after I had finished the exercise.

8 - Furthest from any likeness
8 – Furthest from any likeness
9 - Another Dodgy Shape
9 – Another Dodgy Shape
10 - Almost the Right Shape
10 – Almost the Right Shape.

At the time I thought that the drawing above was a better likeness and so I drew the shape across the page trying to get a sense of likeness. This probably did work as I realised it wasn’t the right shape and that it was too wide.

11 - Trying to get the right shape
11 – Trying to get the right shape
12 - Face ears and kneck
12 – Face ears and neck

Eventually I drew something closer to the shape of my head and then drew in the ears and chin and then the neck and continued to correct the shape of the neck until it was spot on.

Part 4 Drawing Figures : The moving Figure – Check and Log

5 - Quick Watercolour Pencil Drawing from Sketch

How did you manage to create a sense of the fleeting moment rather than a pose?

I’m not sure I was successful with this or not, I tried to create a sense of the fleeting moment by drawing as quick as possible, or at least I started off that way, then got carried away. I would have been more successful doing rougher more abstract sketches like in the Sitting and Waiting exercise. Like that exercise oil pastel may have also been a better medium for this exercise.

For me, I think the best drawing for the Fleeting Moment exercise was the watercolour pencil sketch of the soldiers as it was very smudged which helped me to create a blurred image.

5 - Quick Watercolour Pencil Drawing from Sketch
Quick Watercolour Pencil Drawing from Sketch

How successful were your attempts to retain an image and draw later?

I didn’t give myself much chance to do this as I made quick sketches just after, to help me record the image. I have a very good long term memory but my short term memory is none existent so this was necessary.

Where you able to keep to a few descriptive lines to suggest the persons movement?

I made a sketch and a drawing for each image. In the sketch, yes but I weren’t satisfied with them and followed up with a drawing. I refrained from using oil pastel in this exercise as I have used it a lot in this project but looking back at the drawings I have done through this would have been the best medium for this exercise.

Project The Moving Figure – Exercise : Fleeting Moments

7 - Follow up Drawing of Man and a Woman Pushing Stall

On the day I started this exercise I woke up to the first day of my second coupe d’etat while I’ve been in Thailand. Not bad going. The TV wasn’t exactly blank, there were 5 military logos on there with some old be proud of Thailand, very fascist sounding music on from a bygone era. The whole country was on curfew and I was wondering if it was safe to go out. If you ever want to know what it feels like to be on curfew at the start of a coupe d’etat, watch iRobot, because the ‘stay in your homes’ scene is quite close.

1st day of Tha Coupe d'etat
1st day of Tha Coupe d’etat

So anyway, while I was on lockdown, that first morning a memory came into my head that I thought I would try and get down on paper, It was the first day I met my girlfriend, September last yea, to be exact. I remember what we were both wearing, where we were and if she was the first up the escalators from the underground train or not. I just couldn’t quite pull it off in an abbreviated drawing, But it was worth a try.

1 - Drawing a Memory from Last Year
1 – Drawing a Memory from Last Year

That morning I was supposed to be teaching 3 students in a private class but everyone had cancelled, luckily for me I had made some very quick pencil sketches of the three students the day before noting their height and frame and how they were sitting and decided to go over them with a more detailed sketch from what I could remember, clothes, hairstyle etc. I haven’t taught them since so I haven’t been able to check if there was any likeness there.

2 - Sketch of 3 Students over outline
2 – Sketch of 3 Students over outline

All but one class had cancelled, which was my 4-6 pm, so I decided to take my spare computer down for repair in the early afternoon and just as I was having some breakfast preparing to get ready the army allowed the first TV broadcast of the day.

The scene on the TV was the yellow shirts who had been occupying the area near my school for the last 7 months, being cleared off by the army and their was a small, chubby, Chinese/Thai guy doing the reporting. The thing that made me want to draw him was that everything about him was that even though he was fat, which you would associate with being round, everything about him seemed to be square from his head to his microphone. After making a quick square sketch of him, I tried to draw him exactly how I remembered him but changed him a few times as his head wasn’t in proportion and I wasn’t sure if he was holding the mic with two hands or not.

3 - News Reporter 1st Day Thai Coupe
3 – News Reporter 1st Day Thai Coupe

That afternoon on my way to taking my computer to repaired I got my first glimpse of the army, stationed (or hiding from the sun) under the flyover at Pinklao intersection, two of them stood on top of the bridge with their backs to me and three of them stood by a Chinese knock off of a hummer. I made a quick drawing of what I remembered about the three stood by the hummer while the guy checked to see if my computer was worth repairing.

4 - Sketch of Soldiers under Pinklao Bridge
4 – Sketch of Soldiers under Pinklao Bridge

The sketch wasn’t up to much so I made a larger drawing with watercolour pencil in my sketch book the next evening. It was really messy, but by then so was my memory of the whole scene.

5 - Quick Watercolour Pencil Drawing from Sketch
5 – Quick Watercolour Pencil Drawing from Sketch

On my way back from my 4-6 pm private I decided to take a taxi, only to find that their was a traffic jam, after 20 minutes of sat in very slow traffic I got to find out what the hold up was, a man and a woman taking their market/food stall out for a jog.

6 - Quick Sketch - Man and a Woman Pushing Stall
6 – Quick Sketch – Man and a Woman Pushing Stall

I made a really quick sketch of them while I was still in the taxi and the following night I tried to replicate the scene with a better drawing.

7 - Follow up Drawing of Man and a Woman Pushing Stall
7 – Follow up Drawing of Man and a Woman Pushing Stall

Finally the last drawing was of two of two motorbike Taxi riders who I have known for the best part of 12 years, I made a very quick sketch of them while I was at the motorbike taxi rank and improved on it when I got home. Unlike the others I went over the top of the initial sketch so you can still see the rough sketch underneath.

8 - Motorbike Taxi Riders Waiting
8 – Motorbike Taxi Riders Waiting

Project The Clothed Figure: Check and Log

1 - 6B Pencil in A4 Sketchbook

Did you find it easy to approach the figure as a whole or were you distracted by details of the sitters dress?

The way I chose the poses and the type of cloth that I draped my model in  made it easy for me to approach the figure as a whole. The folds and shadows helped me to accentuate the models shape in both poses.

3 - Colour Pastel on Pastel Paper
3 – Colour Pastel on Pastel Paper

How did you create volume in the folds of fabric?

I would have to say hatching and curved hatching, as well as use of light and shade, I did my best to depict the certain types of folds as researched from George Bridgman and described in the ‘Fabric with Line and Form‘ exercise.

Does the finished drawing give a sense of the figure beneath the fabric?

Yes, every limb and every curve including the gap between the rib cage and the  convex shape of the pelvis.

How would you tackle a drawing like this again?

I would have to say, slower and in a lot more detail, iI liked the outcome of the three drawings but I feel spending a lot more time on them can improve quality of outcome. I would also love to have a go on larger sheets of paper in charcoal.

1 - 6B Pencil in A4 Sketchbook
1 – 6B Pencil in A4 Sketchbook


Project Gesture: More Gesture

1 - Students Writing in Charcoal

I wasn’t completely happy with the gesture drawing exercise in the last project as I didn’t feel I was quick enough with the sketches and so I decided to have another go at the language center I teach at.

1 - Students Writing in Charcoal
1 – Students Writing in Charcoal

The first two drawings were done in a private class and in a small class of four students. The drawing on the right is of my mature private student and on the left a young man of 15 both of which did not know I was drawing them.

2 - Students Standing
2 – Students Standing

The two girls posed for me while I did a 30 second drawing, stance was fine, the proportions are OK but I feel I could have done a lot better and been a bit more confident.

The hands on the one on the right are more like feet as well, I think I am going to need a lot of practice drawing hands, both quickly and in detail.

Project: The Clothed Figure – Form and Movement in a Clothed Figure

2 - White Pastel on Black paper

I spent a couple of days trying to find a white sheet for this exercise, which believe it or not is actually quite difficult in Thailand because all the bed clothes are usually a patterned quilt and sheet set. I thought about a towel but I didn’t think a towel would be crisp enough so I decided to go with the two orange pieces of cloth that I bought last year and had used in several exercises. Being the cloth that they use to make the monks robes out of and using the girlfriend as a model, this was always going to be controversial.

Leonardo da Vinci - THe arm of Saint Peter
Leonardo da Vinci – The arm of Saint Peter

In the last research point an Anatomy Drawing I mentioned a free e-book I downloaded ‘Human Anatomy Drawing for Artists’, in it I came across ‘The Arm of Saint Peter’ by Leonardo da Vinci, where Leonardo ‘uses folds like curving cross-contour lines to describe the cylindrical forms of the arm’ – Dan Gheno, a study that was influential in the next three drawings.

1 - 6B Pencil in A4 Sketchbook
1 – 6B Pencil in A4 Sketchbook

For the first drawing the model was laid on the floor, feet towards me with her head and hands on a bolster pillow, this helped me to draw a partial outline., curving from the elbow down to the waste ‘A figure drawing must first be outlined or suggested before it can be properly drawn’ – George Bridgman. After suggesting the figure, I drew in the outline of the cloth and began hatching with cross-contour lines to describe the box shapes of the chest, waste and hips.

2 - White Pastel on Black paper
2 – White Pastel on Black paper

The second drawing was a tonal study which I( drew from the first drawing not from life, in white pastel on black paper. I was going to draw over the top of this in orange pastel and decided I would do the next drawing in orange on coloured pastel paper…again.

3 - Colour Pastel on Pastel Paper
3 – Colour Pastel on Pastel Paper

The third and final drawing was in orange and brown pastel with the model in a sitting up position, which was not the best of drawings  but it does show off the models figure under the robe cloth and like the other two drawings,

Project: The Clothed Figure: Fabric with Line and Form

2 - Monk Robe in Willow Charcoal

‘Fabric with line and form’, don’t know how I missed that bit. I read it several times as well as in the brief but when it came to the exercise I did two 15 minute sketches using hatching. I can see why we were asked to do it in ‘line only’, so that we would notice the patterns, repetitive folds and the types of folds appear in the cloth.

George Bridgman's 7 Laws of Folds
George Bridgman’s 7 Laws of Folds

In his book A Complete Guide to Drawing from life George Bridgman proposed that there are laws of folds, Diaper, Zig Zag, Pipe or Cord, Half Lock, Drop, Spiral and inert, several of which were quite noticeable in the 2 pieces of Monk’s robe cloth that I screwed up and placed on a stool on top of each other.

1 - Monk Robe Material in 3B Pencil
1 – Monk Robe Material in 3B Pencil

In the first drawing the types of folds that are most obvious are zig zag, half lock and spiral, with the Zig Zag’s repeating across the surface of the cloth.

2 - Monk Robe in Willow Charcoal
2 – Monk Robe in Willow Charcoal

In the second drawing which I drew from the other side and at a distance in charcoal these folds were not that obvious and I found myself drawing the inert folds, and I think, half lock.

5 Minute Drawings
5 Minute Drawings

I kind of cheated for the next part of the exercise, the brief told us to make 5 minute drawings in 5 cm boxes mine were closer to ten centimetres. All of which were 5 minutes apart from the orange pastel on coloured paper which took just over 10, because I got carried away. Again you can see most of the folds that Bridgman described in his book including ‘Pipe’ in drawings 3 and 5 which are almost the same section of cloth.

Project Structure – Three Drawings

3 - Lying Down - Conte Stick and Compressed Charcoal

For this exercise I was to make three drawings, 1 seated, 1 Standing up and 1 laid down looking down the body at a slight angle from behind the head.   I was to try and use a different medium for each drawing.

Again, my girlfriend volunteered to be my model for this exercise and for the first drawing, which I decided to do on the Canson pastel paper I had left over from my last research point, an anatomical drawing, she decided she needed some props,  a glass of wine and her trilby.

1 - Sitting, Conte, Charcoal, Conte Pencil
1 – Sitting, Conte, Charcoal, Conte Pencil

I have had no success so far at drawing her profile and this drawing wasn’t any different. I really need to practise drawing profiles. The drawing is on A3 and the thing that consumed the most time was not drawing my girlfriend but the chair she was sat on. I moved around her before starting looking for the best position and even though drawing from the front may have been better for drawing her face, I think that the angle that I chose was the best  or showing all the things we were asked to notice in the brief.

The next drawing was the standing pose and for this I really wish I had had some white charcoal, as my girlfriend in the lamp light against the door looked quite spooky.

2nd Pose 2 - Using Watersoluble Pencils for the first time
2nd Pose 1 – Using Watersoluble Pencils for the first time

I made two attempts in a medium I hadn’t used since I bought them over a year ago, water-soluble pencils. I would have been happy with one but someone decided she looked ugly in the first drawing, the second however, looked a hell of a lot better in every way.

2nd Pose 3 - Water Soluble Pencils Better Proportions
2nd Pose 2- Water Soluble Pencils Better Proportions

For me, the third drawing was the easiest drawing for just about everything. I know I was to try using different tools for each drawing, but I couldn’t think of any other drawing tool that would help me capture the mood as much as pastel on blue paper.

3 - Lying Down - Conte Stick and Compressed Charcoal
3 – Lying Down – Conte Stick and Compressed Charcoal

Just like the first drawing, I spent most of the 1 hour that it took me to draw in the sofa, I was very lucky to get the shadows across the belly, breasts and rib cage right, as they didn’t take much adjusting.