Did you find it easy to approach the figure as a whole or were you distracted by details of the sitters dress?
The way I chose the poses and the type of cloth that I draped my model in made it easy for me to approach the figure as a whole. The folds and shadows helped me to accentuate the models shape in both poses.
3 – Colour Pastel on Pastel Paper
How did you create volume in the folds of fabric?
I would have to say hatching and curved hatching, as well as use of light and shade, I did my best to depict the certain types of folds as researched from George Bridgman and described in the ‘Fabric with Line and Form‘ exercise.
Does the finished drawing give a sense of the figure beneath the fabric?
Yes, every limb and every curve including the gap between the rib cage and the convex shape of the pelvis.
How would you tackle a drawing like this again?
I would have to say, slower and in a lot more detail, iI liked the outcome of the three drawings but I feel spending a lot more time on them can improve quality of outcome. I would also love to have a go on larger sheets of paper in charcoal.
The brief for this exercise was to ‘ Look for the center of gravity in a standing figure. Mark the central axis in your sketches’ and to ‘ change poses every 2-5 minutes’. I divided my A4 sketch book into three panes so i could work smaller and so keep within the 5 minute time frame. Unlike the previous exercises, in this exercise I started from the head down and once I thought the head was in the correct position marked the central axis, which the brief pointed out was from the back of the ear on a side pose, the top of the spine for a back pose and for a front pose started at the top of the head and run down the bridge of the nose.
First three stances 2B on A4
After drawing the head and then marking the central axis I worked to it as a guideline. The benefits of working this small was that I could capture the stance quite well plus add some detail while working within the time frame. The negative side is that when enlarged the drawings are very sketchy.
Second set of stances 2B on A4
The first three drawings took closer to 2 minutes each while 4-6 were closer to 5 minutes and it shows.
Drawings 6-9 2B on A4
Having got confident drawing he different basic stances by now I decided to get a bit more daring with the next 3, hands overlapping behind the head an back twisting to one side in the first two, and the third drawing bending over with one hand on the left calf. This third drawing wasn’t the most difficult nor did it take the longest to draw but it was the most awkward and I wasn’t completely satisfied at first but looking at it now the proportions and stance are perfect it just felt strange to draw what seems like a triangular form.
2 final stances 2B on A4
On the 4th and final page of stances I went for a pose that was a true test to see if I could draw the correct center of gravity…The tree pose. My first attempt would have had the model falling over, while my second attempt was close to spot on, with the knee of the standing leg pushed out to center the weight. Last but not least was the model drinking a class of beer from the back and I even managed to get in some back muscles. I have noticed there is an anatomical drawing coming up and I think back muscles on the right model would be great for it.
This was only the second time working with my girlfriend as a life model and so it was a nice little exercise to introducing her to posing for me for longer periods of time.
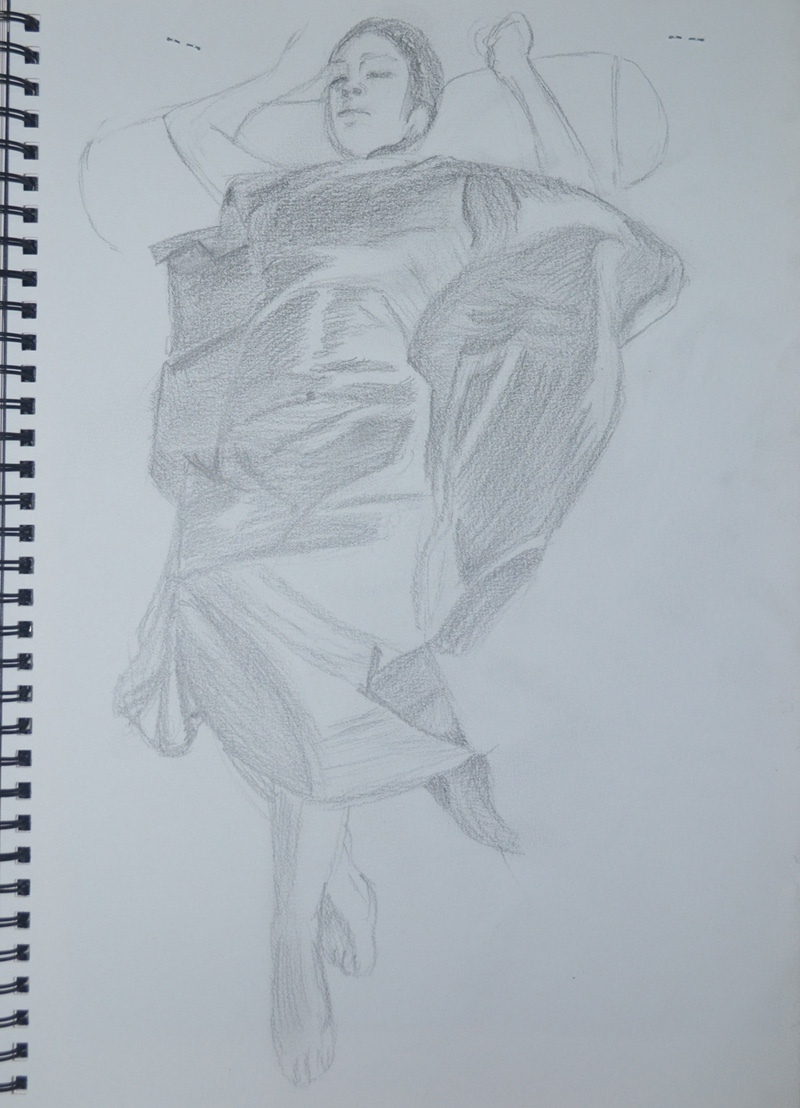
1st Drawing – A Practise with Charcoal
I started with a practise sketch to get me used to drawing with charcoal on the large A2 pad. For this I let the girlfriend sit on the floor with her back against the bed. She lives in a studio apartment which is basically a bedsit. The proportions were out as there wasn’t much measuring going what I really wanted to know from this trial drawing was how well I was going to work with compressed charcoal on the large sheets of paper.
The introduction to this project pointed out ‘basic shapes are used to construct three-dimensional fundamental forms…The head is a sphere, arms and legs are cylinders, and the feet and hand are ellipses’ and with that I decided to puppetize my girlfriend.
With me being new to life-drawing I decided to start with a simple pose where there was only a slight twist in the central axis, this first pose with arms straight down, parralel to the edge of the paper helped me to ‘establish the bulk of the drawing in relation to the space around it’ as suggested in the brief.
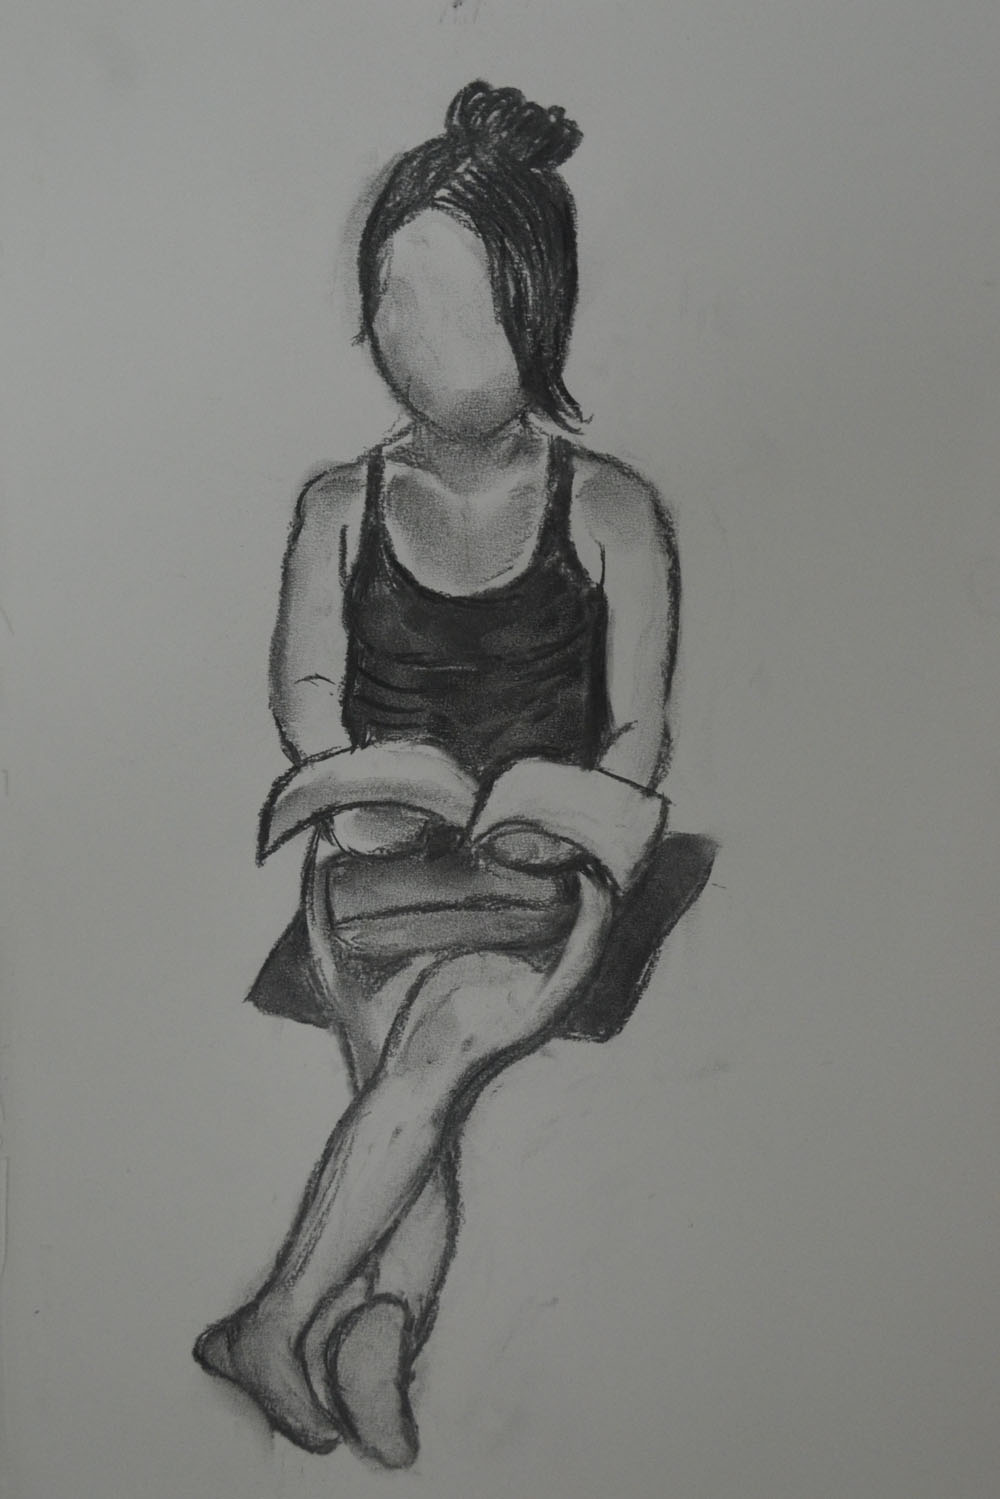
2nd Drawing Sat on Bed A2
The second pose was very similar to one that I didn’t do a great job on in the ‘Quick Poses‘ exercise but this time with ample time to measure, using the head as a marker and remembering what I learnt earlier that the head fit into the torso approximately 4 times to the seat of the backside on the seated figure, the results were satisfying.
3rd Drawing Sat on Bed 1 Leg Up A2
My girlfriend is very small in height, just over 5 foot so for the next sketch I asked her to sit very close to the edge of the mattress so I could draw both her feet on the floor. I started by using a sanguine conte pencil but realised it was pretty permanent and couldn’t mess about with it as much as I could the Conte, the lines wouldn’t erase but it didn’t matter too much and I decided to go over it in Charcoal. The result of this gave me an idea for depicting movement which may come in handy later on.
4th Drawing Charcoal over Conte
I picked up the wrong stick of charcoal for this next drawing that was rather scratchy and almost impossible to smudge in with my fingers but I decided to keep going. This time I thought I would have a go at drawing a face, wish I hadn’t, not in this medium anyway. The girlfriend has an unusual face, she comes from Thailand’s most northern province and probably most northern town and she has a very ‘Thai’ face not like the Bangkok/Chinese faces I’ve been used to seeing over the last 15 years and so any attempt at a face would have to be in a medium that I could play around with.
5th Drawing – Compressed Charcoal and an Atempt at a face
Again I added a few more details toes, fingers, ankles but worked fast and kept the sketch nice and scratchy with squiggly hatching.
6th Drawing in Hard Pastel on A3
The last drawing was from a photo in hard pastel, I was teaching at the language center and popped upstairs to the art store where there were Nouvel Carre Pastels on sale and wanted to see what they were like and also needed to see what could be done in hard pastel in this part of the course.
When I first started this course I went upstairs to the third floor of my school for a bit of sketching practise and did a couple of drawings of the outside of the school building from the balcony. When this exercise came up it was a good excuse to get back up there as the school has a great view of the temple next door.
I actually completed this exercise well over a month ago but for the last couple of months I have been concentrating on drawing rather than my online log as Townscapes as been quite a long project for me with the irregular shapes of Thai architecture making this part of the course quite difficult but also very interesting.
So anyway it was the start of the cool season and clouds were getting less and less in the sky and the only chance I got to go out on the balcony was 1:30 pm and the sun was beating almost straight down.
Study of Townscape Using Line first Drawing
The first preliminary drawing took me a little over 25 minutes with a Rotring Tikky Graphic 0.3 and even though it was quite messy I felt that that could have been the final drawing for this study. And reminded me of a couple of the pen drawings in the Urban Sketching Handbook, particularly Singapore by Kampong Glam by Paul Heaston and Nanjing Fuzimiao by Frank Ching, the latter drawn in 30 minutes roughly about the same time as my drawing.
2 Study of Landscape Using Line 2nd Attempt
The second drawing took me from a flowing line drawing to something a bit more technical, with the first drawing everything flowed, I didn’t worry about the marks I was making and I wasn’t trying at all, with the second drawing I started to think about perspective the marks I was making the shapes I was drawing, negative space and everything went wrong. Instead of drawing objects I was familiar with I started to draw them like I was seeing them for the first time and everything went wrong. One of the biggest notable errors is the spire of the temple in the second drawing making it look like a Tibetan temple rather than a Thai temple.
Study of Landscape Using Line – Final Study
The final study was drawn from both of the preliminary drawings, using the temple from the first drawing and the school building from the second drawing every thing else was a mixture of both.
I never had any doubts about what I would use for the fore, middle and background but what lines and marks to use was always going to stress me out. This is the second time I have had to do line drawings in an exercise and the second time I have found it hard not to hatch and even though I know a degree of hatching was needed I know I went over the top with it.
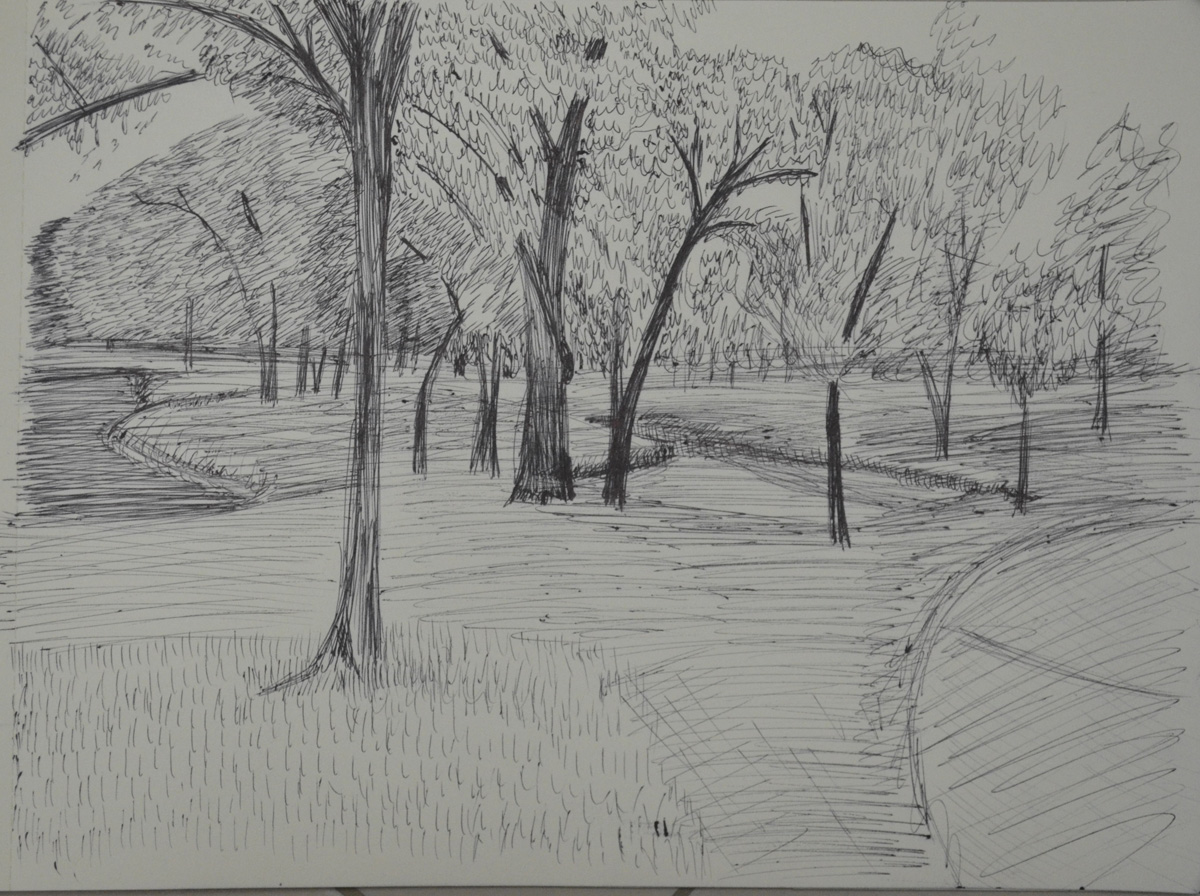
For this exercise I was to choose an expansive landscape where I had an open view in all directions, then using my viewfinder to find a focal point and to frame my view I was to complete a fifteen-minute drawing.
From there I was to turn my stool on the same spot to face West, South and East, each time repeating the process of finding a focal point and completing another fifteen-minute drawing.
With not much choice of expansive Landscapes in Bangkok I knew I would be going back to the park where I did the sketches for the last exercise ‘A Sketchbook Walk‘ but I wasn’t sure when I would get the chance to go back. Then with a stroke of luck the Thai government tried bringing an ‘Amnesty Bill’ in so exiled former president Thaksin Shinawatra could come back Thailand without being strung up, so the protesters hit the streets again and I got three days off.
Well to start with I didn’t have a stool and I would have looked a bit silly getting in the taxi with a buffet but it hadn’t rained for 2 days so I decided I would sit on the floor, so armed with my artist’s wrap, my A4 sketchbook, my small viewfinder and my small drawing board I headed to Suan Rot Fai again. I’d already decided where I was going to sit and I started drawing what I thought was North and what happened next was a series of accidents.
It was pretty clouded and I was pretty positive the direction I was looking was south and there was no need to look at the GPS on my phone so I pulled out my charcoal pencil from my artist’s wrap and started drawing, two trees in I realised I had forgot my cutter and a pencil sharpener was just not going to do the job so I finished the drawing in compressed charcoal hence the two bushes in front of the trees in the background came out looking more like coal slacks than bushes.
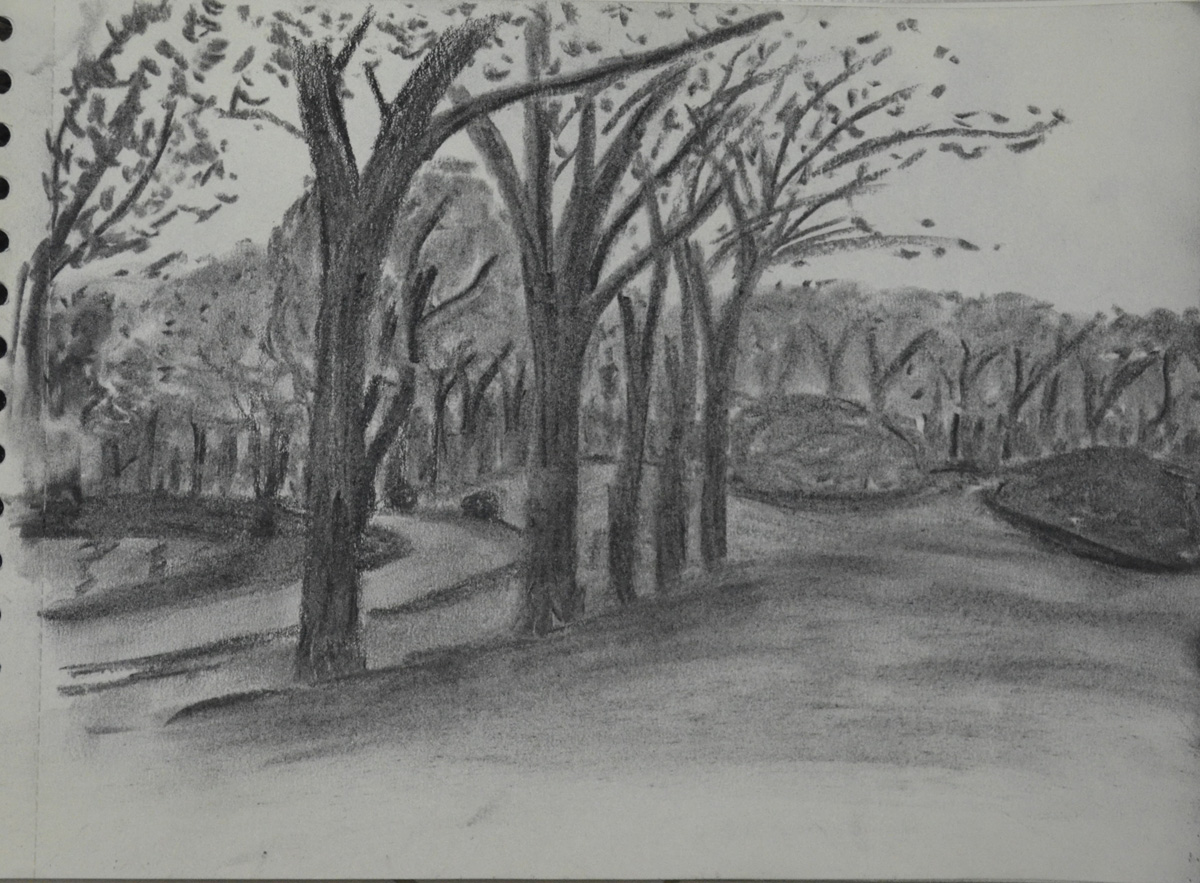
Exercise 360 Degree Studies: South
This first drawing did take me spot on 15 minutes and although I am not happy with the finished drawing as it looks more like Autumn in England than Rainy season in Thailand I thought I did quite well drawing the landscape with this medium for the first time.
Exercise 360 Degree Studies: East
As I turned 90 degrees anti-clockwise to draw what I thought was West I realised that the Sun had come out from the clouds behind me and it was nearly three in the afternoon so I was actually facing East, I’m usually great at guessing where North is…however I decided to carry on. East was very tricky it was the first time I had drawn water and I was facing a lake so I chose not to carry on in Charcoal but to switch to a 4B pencil, a decision I now regret.
Focusing on the tree directly in front of me, that looked like it was bending towards the water to get a drink, I began to draw. The whole process from beginning to end was a rush trying to finish in the 15 minute time frame and I was very lucky that it came out looking anything near the view I was drawing, I was going to leave the buildings in the background out but then decided to add them at the end. I wasn’t looking at the time but I reckon the drawing took me about ten minutes over the 15 minute time frame, the problem…too many trees!
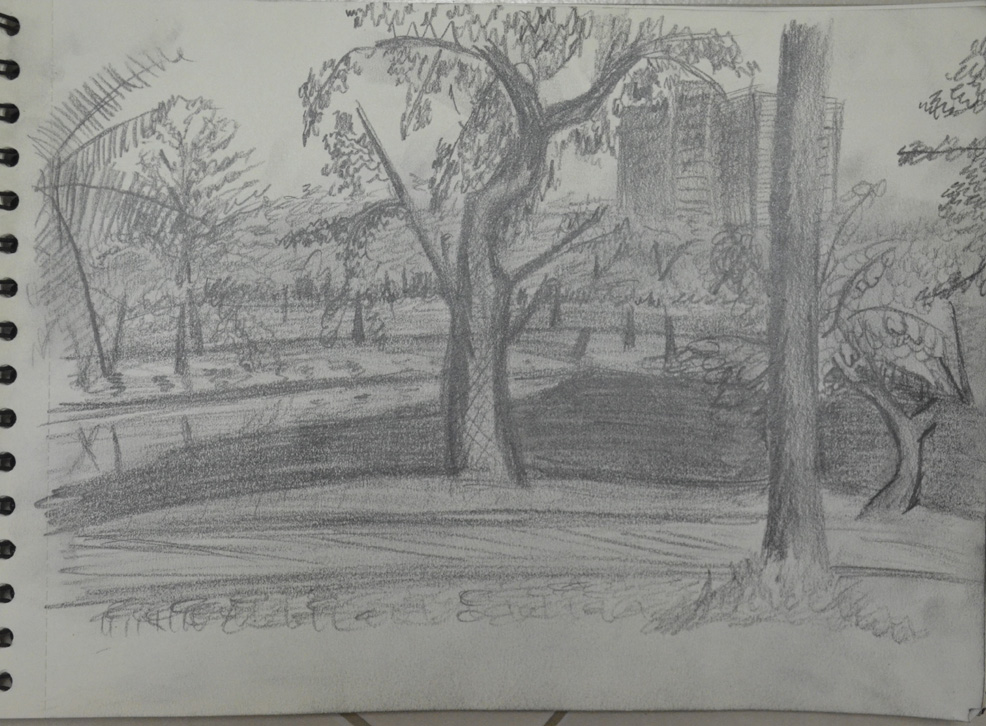
Exercise 360 Degree Studies: North
As I turned North to face more trees, I decided to switch mediums again and this time began to draw in my trusty ball point pen, even though the sun was shining by now and I think I depicted this quite well in the sketch, it probably does look more like an Autumn Scene. It took no time at all to sketch everything out but then another 15 minutes to get the trees looking anything like trees. I feel now that a fine marker would have been a better choice of Medium.
Exercise 360 Degree Studies: West
The fourth and final drawing, which I thought would be the easiest was left incomplete dead on 15 minutes and after going over it about three times in charcoal, the medium that I thought was the safest for this type of landscape given the 15 minute time frame.
I am not impressed with my performance on this exercise, However I do feel that I have learnt something very important from it and that is choosing the right medium for the right job…the job being a 15 minute sketch in this type of environment.
What I did like about this exercise though were the notable changes in the landscape just by shifting my view a little, I could have got many great and very different drawings just by sitting in the same spot. I took advantage of this by finding the focal points that I thought would be best to start from given the 15 minute time frames.
Which drawing media did you find most effective to use, for which effects?
For me I love pencils I’ve been developing my pencil skills more and more on this course and I have got to the stage where I am doing less and less smudging and more and more hatching using my pencil at different angles with different holding techniques. I really think I did well depicting the tone of the wood and especially the bark in the ‘Getting Tone and Depth in Detail‘ exercise. However I was very happy with my stippling with the Rotring drawing pen on the ‘Stipples and Dots’ exercise, not only being able to depict the tone of the leaf but also it’s texture.
What sort of Marks work well to create tone and texture?
I used a variety of hatching to depict the texture of the tree branch with sporadic hatching to depict the bark and fluid lines and hatching to show the stripped wood all these marks worked really well. I thought I had chosen the wrong type of subject for the stipples and dots exercise but I think I showed the texture of the object really well with dots and patterns of stipples to show creases in the dying leaf.
Did you enjoy capturing details or are you more at home creating big broad brush sketches?
I must admit that capturing details with stipples and dots was a bit tedious but I am delighted with the finished drawing and I really enjoyed working on the tree branch in the first exercise so I can probably say that I am more at home capturing details.
Look at the composition of the drawings you have done in this project. Make some sketches and notes about how you could improve your composition.
The composition and the angles of the subjects that I chose were thought about long and hard before embarking on these exercises, I feel I chose the best compositions that I could to not only capture the full beauty of the objects but to fill the paper.
My tutor suggested that I should look at the works of Antonio López García a Spanish painter and sculptor known for his realistic style. As usual I started my research by popping onto Wikipedia to see if I could find some valuable keywords that could take me elsewhere and seeing that he is still alive I looked on YouTube to see if I could find a documentary or interview and i found a small part of an interview here.
It’s not only good to hear the artists voice but it’s also good to check any contradictions.
Antonio López García was born into a farming family in Tomelloso 1936 and was probably expected to carry on the family tradition as a farmer until his uncle, Antonio Lopez Torres a local landscape painter took an interest in his drawing when he was 13 years old.
As he says in his interview “…at 12 and 13 he didn’t pay much notice of me, I did the kind of drawings that all children do and he didn’t pay much attention to me…at 13 he saw something that made him intervene. He told me not to copy illustrations, that this was not good and I should do things directly from nature”
Antonio moved to the Spanish capital in 1949 to study so that he could qualify for entrance to the Real Academia de Bellas Artes de San Fernando, which he did and won a number of prizes while studying at the school from 1950-1955. While attending the school he met his future wife and several friends who would later form a realistgroup together in Madrid. In 1955 he won a scholarship which enabled him to travel to Italy where he studied paintings from the Renaissance.
From the moment i saw the examples of his works that my tutor sent me I realised why my tutor suggested that I look at this artist. Facebook can be a bit of a demon sometimes and since I started this course I’ve been receiving regular posts from various hyperrealism pages which I think have had a big influence on my finished pieces. As a painter I seem to follow a more surrealistic path but this course has taken me in a very different direction. However the negative side of this like my tutor says is that I tighten up while working on the finished pieces.
Antonio López García was regarded by the critic Robert Hughes to be ‘the Greatest Realist alive’ with his style sometimes deemed hyperrealistic and yet his works are still very fluid, something that my drawings lack at this time.
López García has devoted himself to creating images of everyday subjects such as buildings, plants, his bathroom and even the red brick wall in his backyard but then he expresses them in such away that make them both beautiful and captivating.
As the artist explains, “the pictorial nucleus begins to grow and you work until the whole surface has an expressive intensity equivalent to what you have before you, converted into a pictorial reality.“-Wikipedia
At this time I can genuinely say that I can see this artist having an influence on my future work especially now i have discovered new mediums and I am beginning to develop my drawing skills. I have had very similar ideas from time to time but lack of skills and knowledge of mediums have prevented me from putting my ideas on canvas or paper. Two of his works that particularly stand out to me at this time are ‘Antonio López Torres’ House, 1972-75’ which my tutor sent to me in the sample of his works and ‘Sink and Mirror, 1967’.
Antonio López Torres’ House, 1972-75Sink and Mirror, 1967
I originally had the idea to to use traditional Buddhist items for this part of the assignment such as yellow cloth, a candlestick, temple type money box and did go out and purchase them. The medium I chose for the original composition was coloured pencil, but as I laid down watching the girlfriend iron in front of the electric fan with the white wall of my apartment I had a better idea.
Assignment 1 – Made Objects – finished A2
I wanted to show something about my life in Thailand and I felt that the new objects set out in the right composition would describe my life perfectly, a normal working-class life in a tropical country. With 13 years in the country and the last few years living alone I knew these objects intimately but the fan would prove to be something of a challenge..
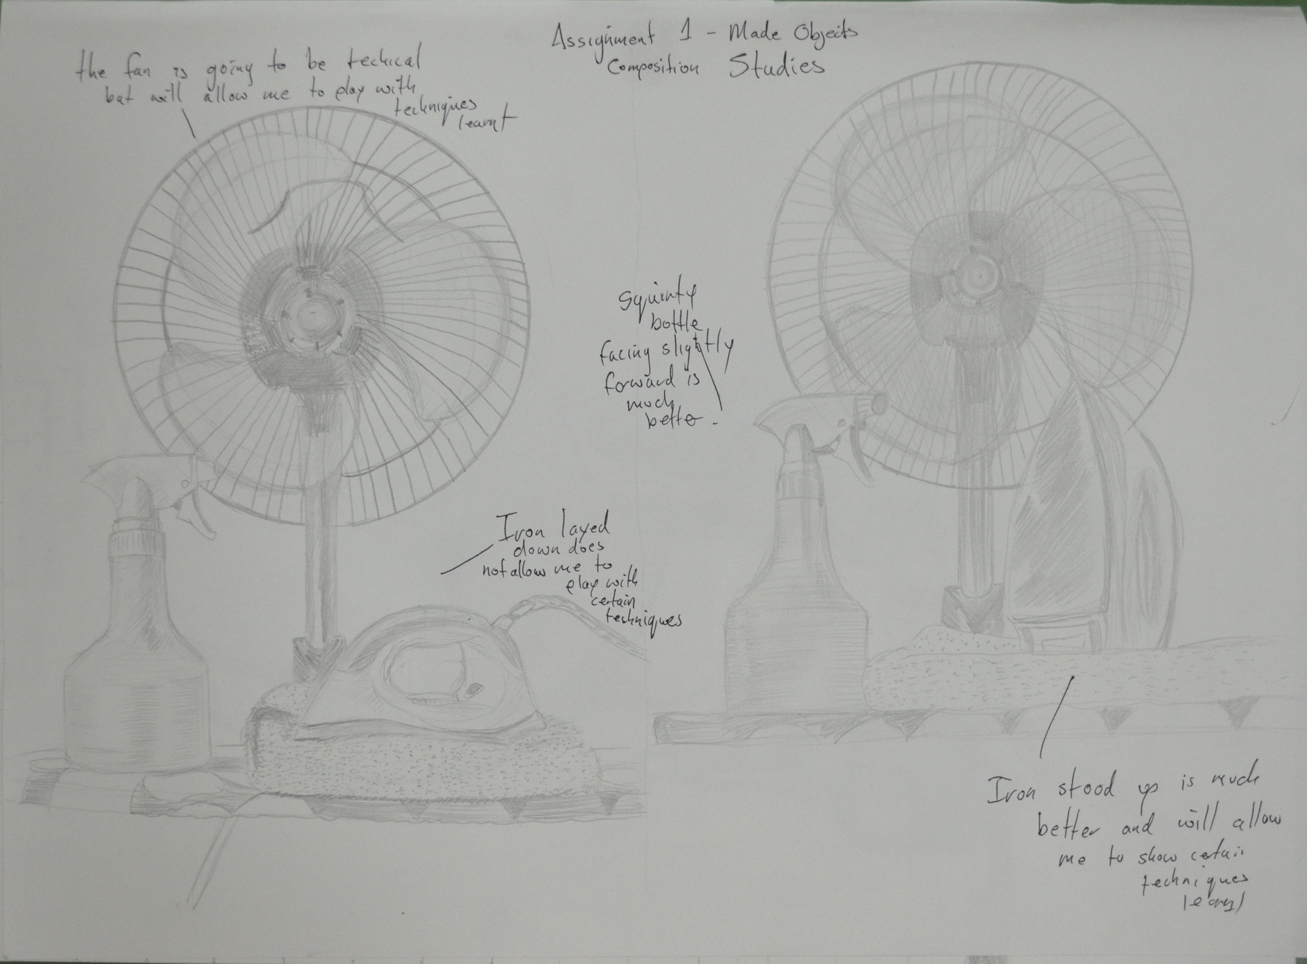
Assignment 1 – Made Objects – composition studies
I began with composition studies in my A3 sketchbook, I found it difficult to come up with more than two variations as I was locked into how i felt the objects should be presented from the start. How every I did vary the composition slightly with the iron laying down in the first composition which I think was actually my first idea and then the iron stood up proudly in the second. The ironing board was lifted up on the table and I was almost laid down drawing the second composition sketch which I liked so much that I decided this would be the one to develop and decided that I would be there for a while so raised the ironing board higher with the ironing board on top of a table on top of another table. We had to do without a place to eat for the next few days.
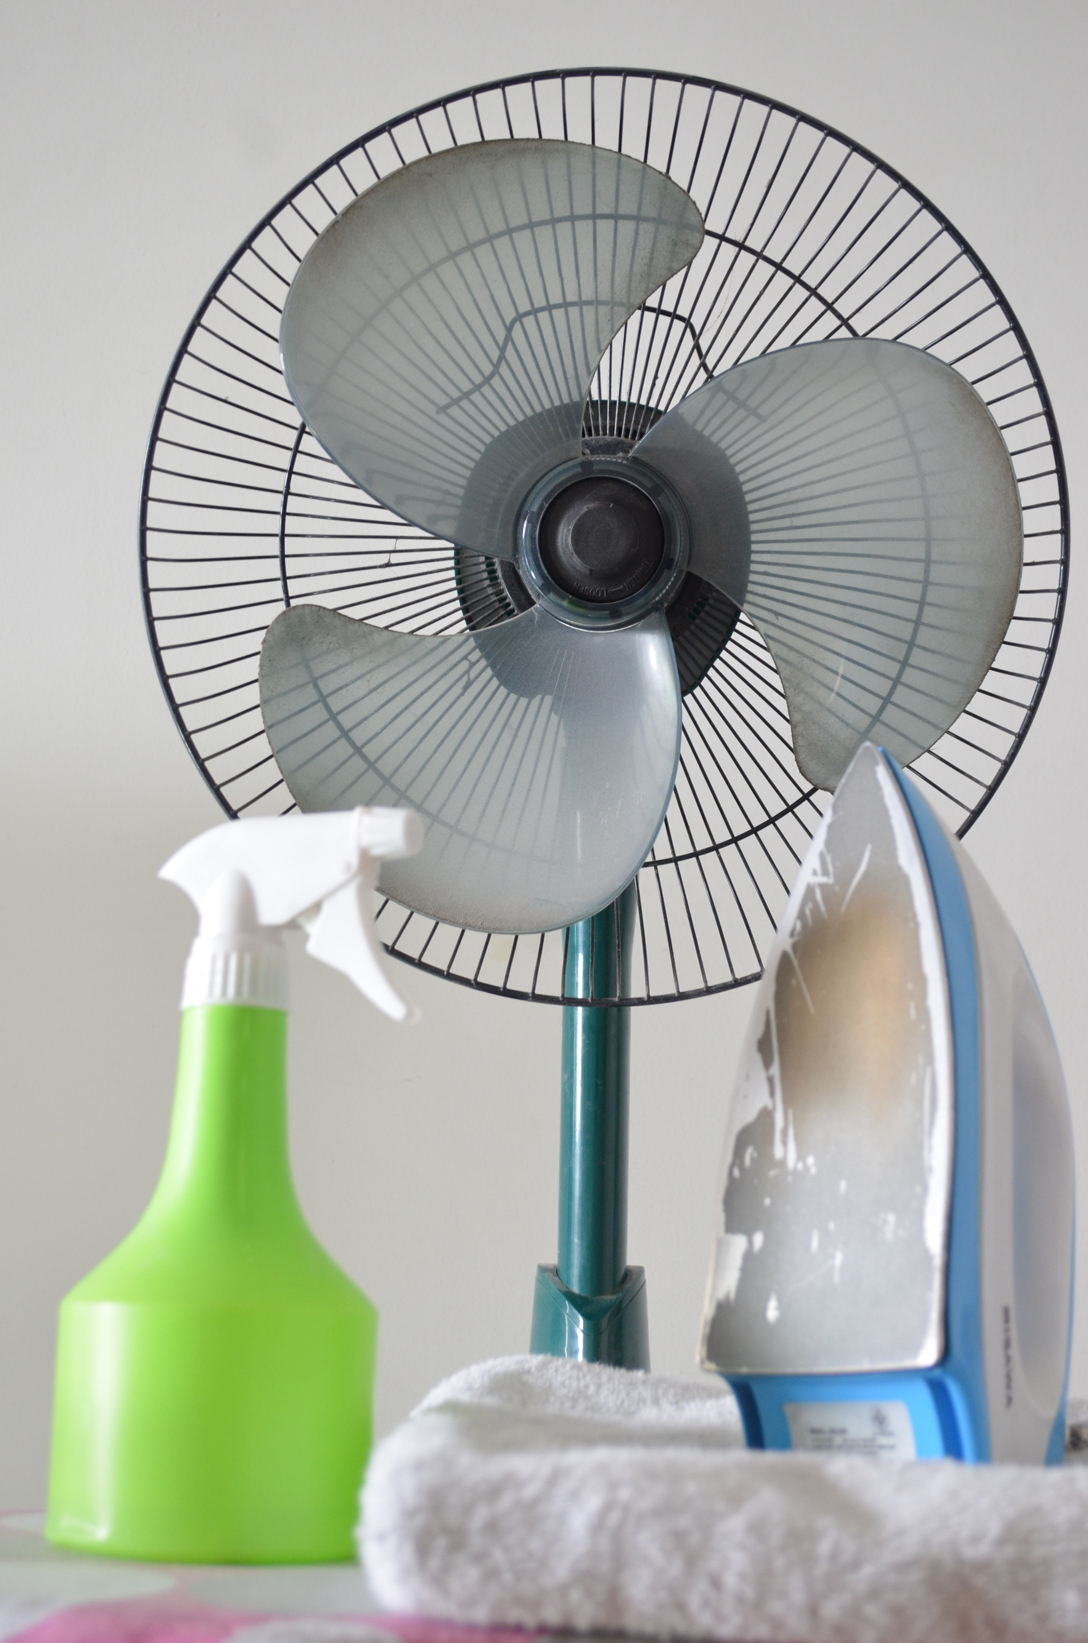
Assignment 1 – Made Objects – Photo of Original Composition
At this stage I did things a little bit in reverse with the composition studies just finished I decided to develop the composition in pencil to get a feel of how it would look in that medium before looking at others. One of the main reasons for doing so was being insecure about whether or not I would be able to demonstrate the techniques especially pencil holding techniques that I had practiced in the first part of this course. I then concentrated on enlarging the image by drawing a grid over the top of the composition ready for enlarging for the finished drawing.
Assignment 1 – Composition Development and Enlargement grid
At this stage I was still not so sure about what medium I would use for the finished drawing, so as instructed on an A2 sheet I practiced with colour pencils and charcoal.
Assignment 1 – Charcoal and Colour Pencil Studies
Charcoal would have been great for the towel and even the water bottle and possibly the iron but on an A2 sheet which I was planning to use this medium proved itself too messy for the electric fan. I did love the way the water bottle looked in charcoal though, rather like stencil street art. Colour pencil wasn’t too bad but didn’t look solid enough for me, I was still trying to get practice with this medium and didn’t feel like I could carry it off in any other medium than graphite pencil and so that was my final decision.
Fan Almost Complete
At this stage i decided the composition still needed more work and moved the squirty bottle further in to create less negative space to fill the rectangle shape of the paper. The layout of the fan was very technical it helped that there was no front on it but still took well over an hour and a compass and ruler for the cage. After everything was sketched out my insecurity about not being able to show the various techniques that I practiced in the first part of the course disappeared as I got into it, swapping between 3B and 4B pencils using different pencil holding techniques and several different forms of hatching.
The squirty bottle was pretty straight forward and quite easy to show tone and form on…eventually after I managed to get the shoulders of the bottle right after several goes, as I had moved the bottle in since the composition development work. This was completed mainly by hatching and cross hatching.
The iron allowed me to use several different drawing techniques including hatching, smudging and drawing the patterns on the blade with a putty rubber. However the shape of the iron varies slightly from the photo above I was having double vision when it came to the iron as my left eye is quite bad but refused to work from the photo.
The towel and the ironing board itself allowed me to draw with texture using short, lines dots and a putty rubber on the towel to dry and fluff it up and cross hatching for cloth ironing board cover.
I’m satisfied that I have managed to make reference to most of the aspects of drawing that have been covered in the first part of the course in this part of my assignment from holding pens and pencils to enlarging an image. Drawing the fan allowed me to demonstrate different pencil holding techniques, the bottle allowed me to demonstrate tone and form while the iron allowed me to show both tonal variation as well as reflected light on the blade. The towel was also a great idea which I originally added to raise the iron and didn’t realise it would help me to demonstrate techniques for drawing with texture.