Pt 5, Option 4, Drawing Figures – More experimenting

Third Try and a lot Better

I have spent the last three weeks getting ready for assessment, preparing my portfolio, piecing everything together and  taking a fresh look at my work coursework as well as having another try at any exercises that weren’t up to scratch; this was one of them.

The last part of the course was drawing and experimenting, I’d done plenty of drawing but not much experimenting, so I had another look through Vitamin D: New Perspectives in Drawing for some ideas. Having a fresh look at the book after following the course was very refreshing, but rather than being influenced by any works in particular I was inspired by how the artists had let themselves go and freed themselves from any chains that had previously bound them. This is what I needed to do.

I had just finished having another go at the Quick Studies exercise and was due to do some more experimenting with colour. However, there were a few pages that I couldn’t use due to the black fine marker blotching on the reverse side of the pages, this gave me an idea.

I took out some of the coloured chisel pointed markers that I had purchased earlier in the course and coloured in the back side of one of the quick sketches, first in red then in green followed by a dark blue. Turning over the page I was very happy with the very random results apart from where I had coloured in with the dark blue but there were some light spaces so went over again with a yellow.

I was really happy with what I had created but I wasn’t going to stop there, just like I did in the Doodling exercise in the very first project in this course I freed my mind and let go.

1 Markers on the Back of a Quick Study
2 Quick Study with Marker Showing through
3 Two quick studies that I experimented with colour on
4 Another Quick Study in Marker
Oil Pastel Over Quick Study
5 Drawing over the back of the reverse side of two marker pen quick studies

The first few experiments in this fresh try at using colour were basically drawing on the reverse side of, or over the top of existing marker pen studies with either marker or oil pastel but the studies weren’t that great and so I started the next 4 drawings from scratch.

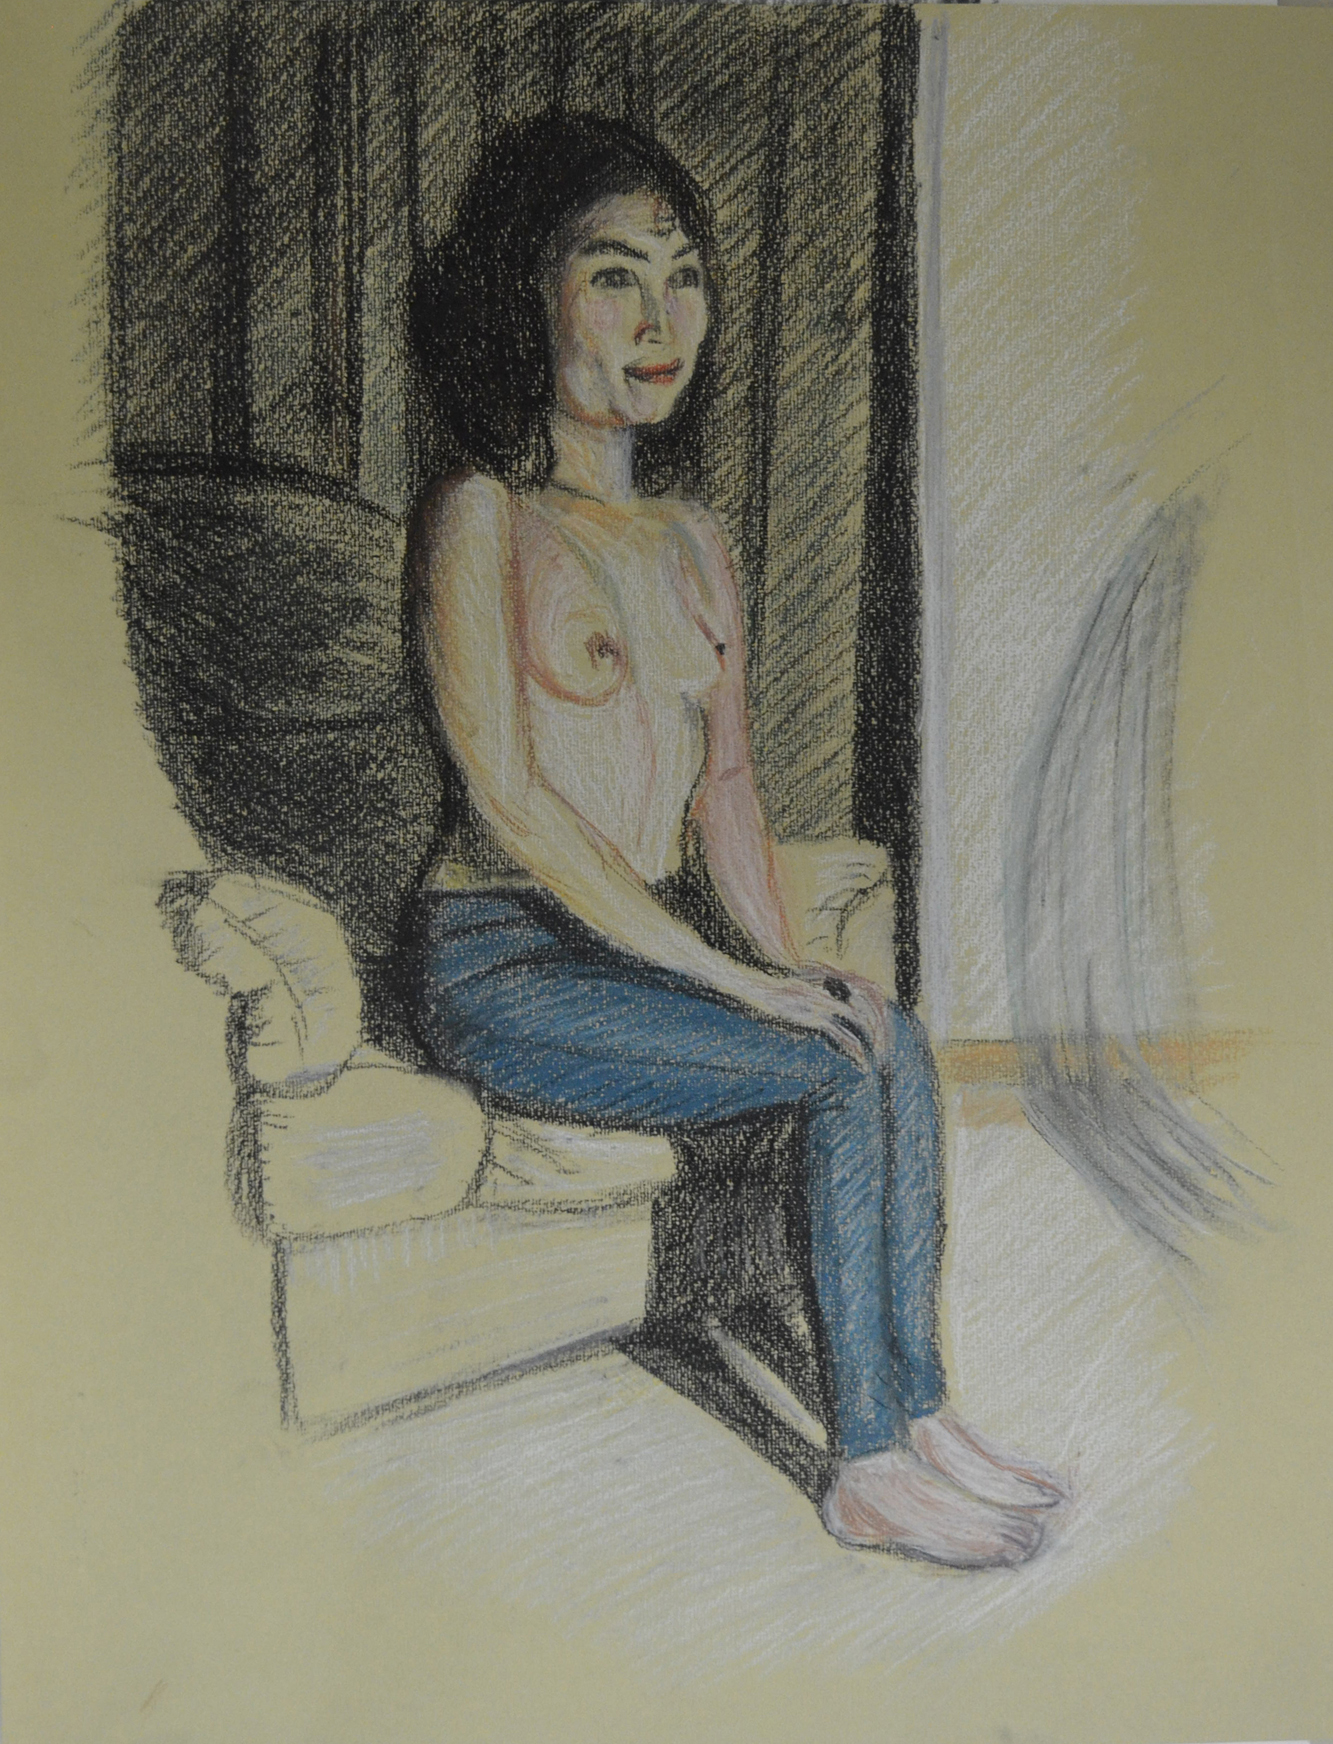
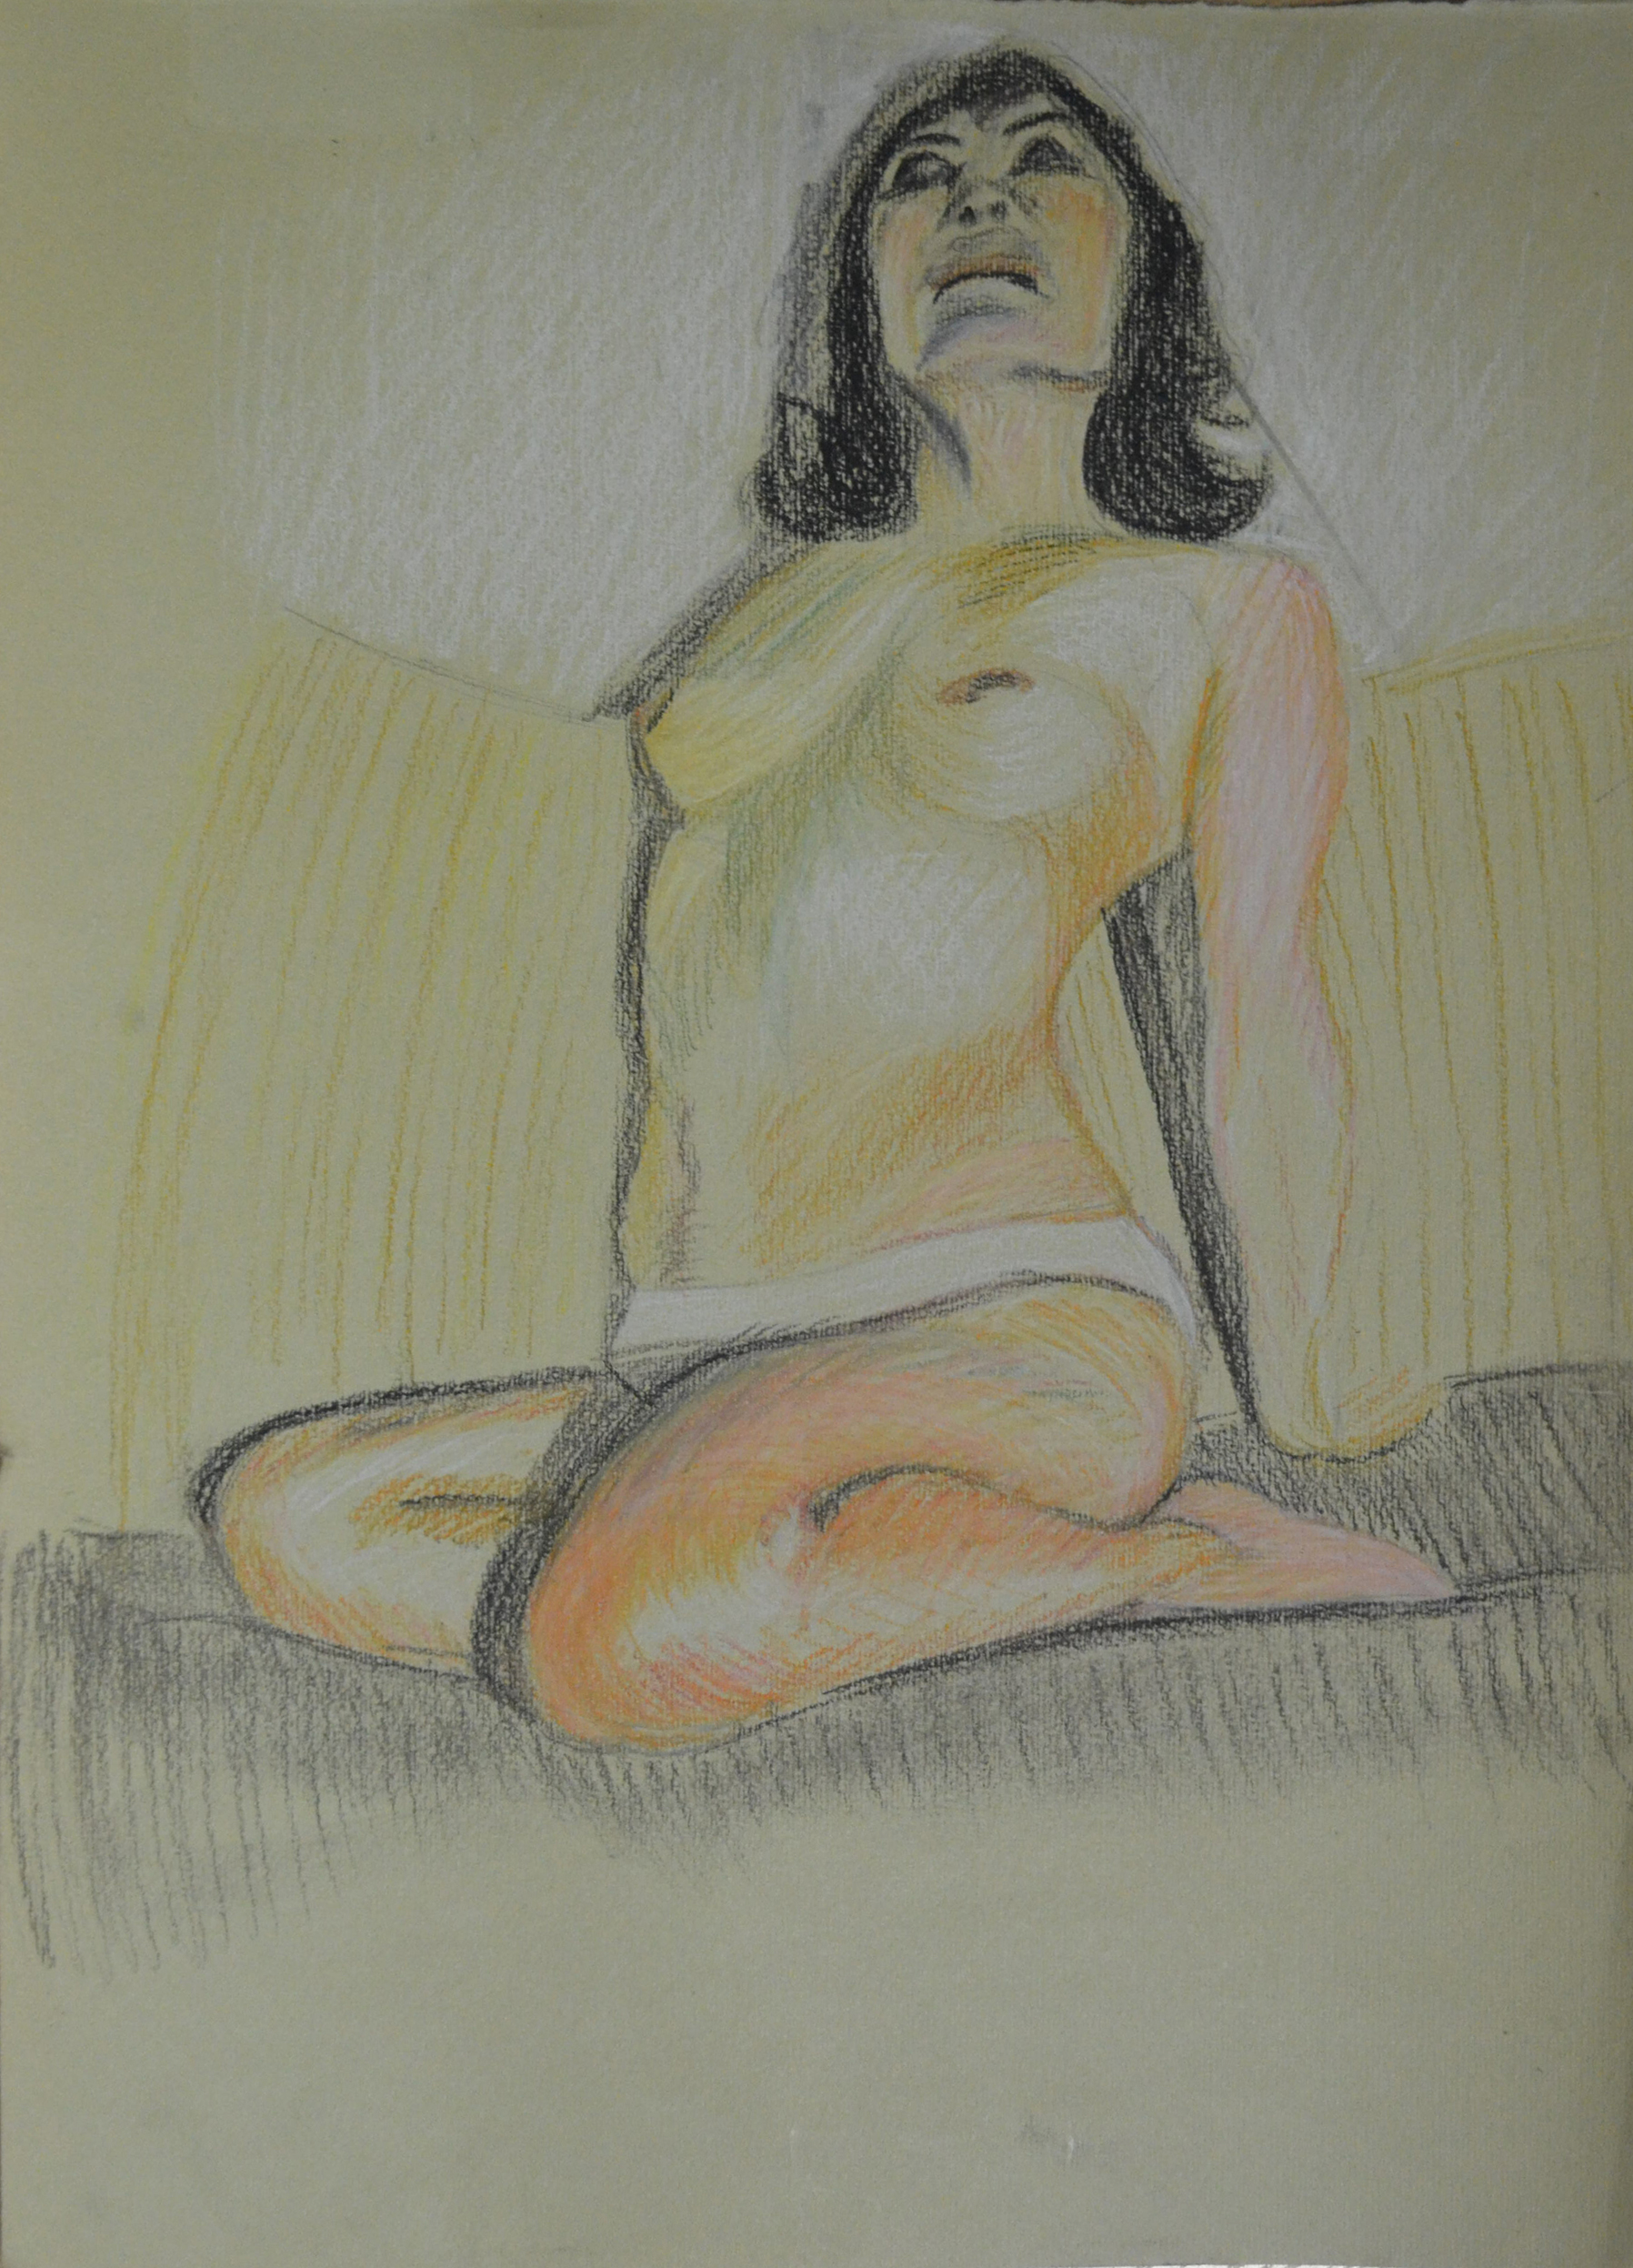
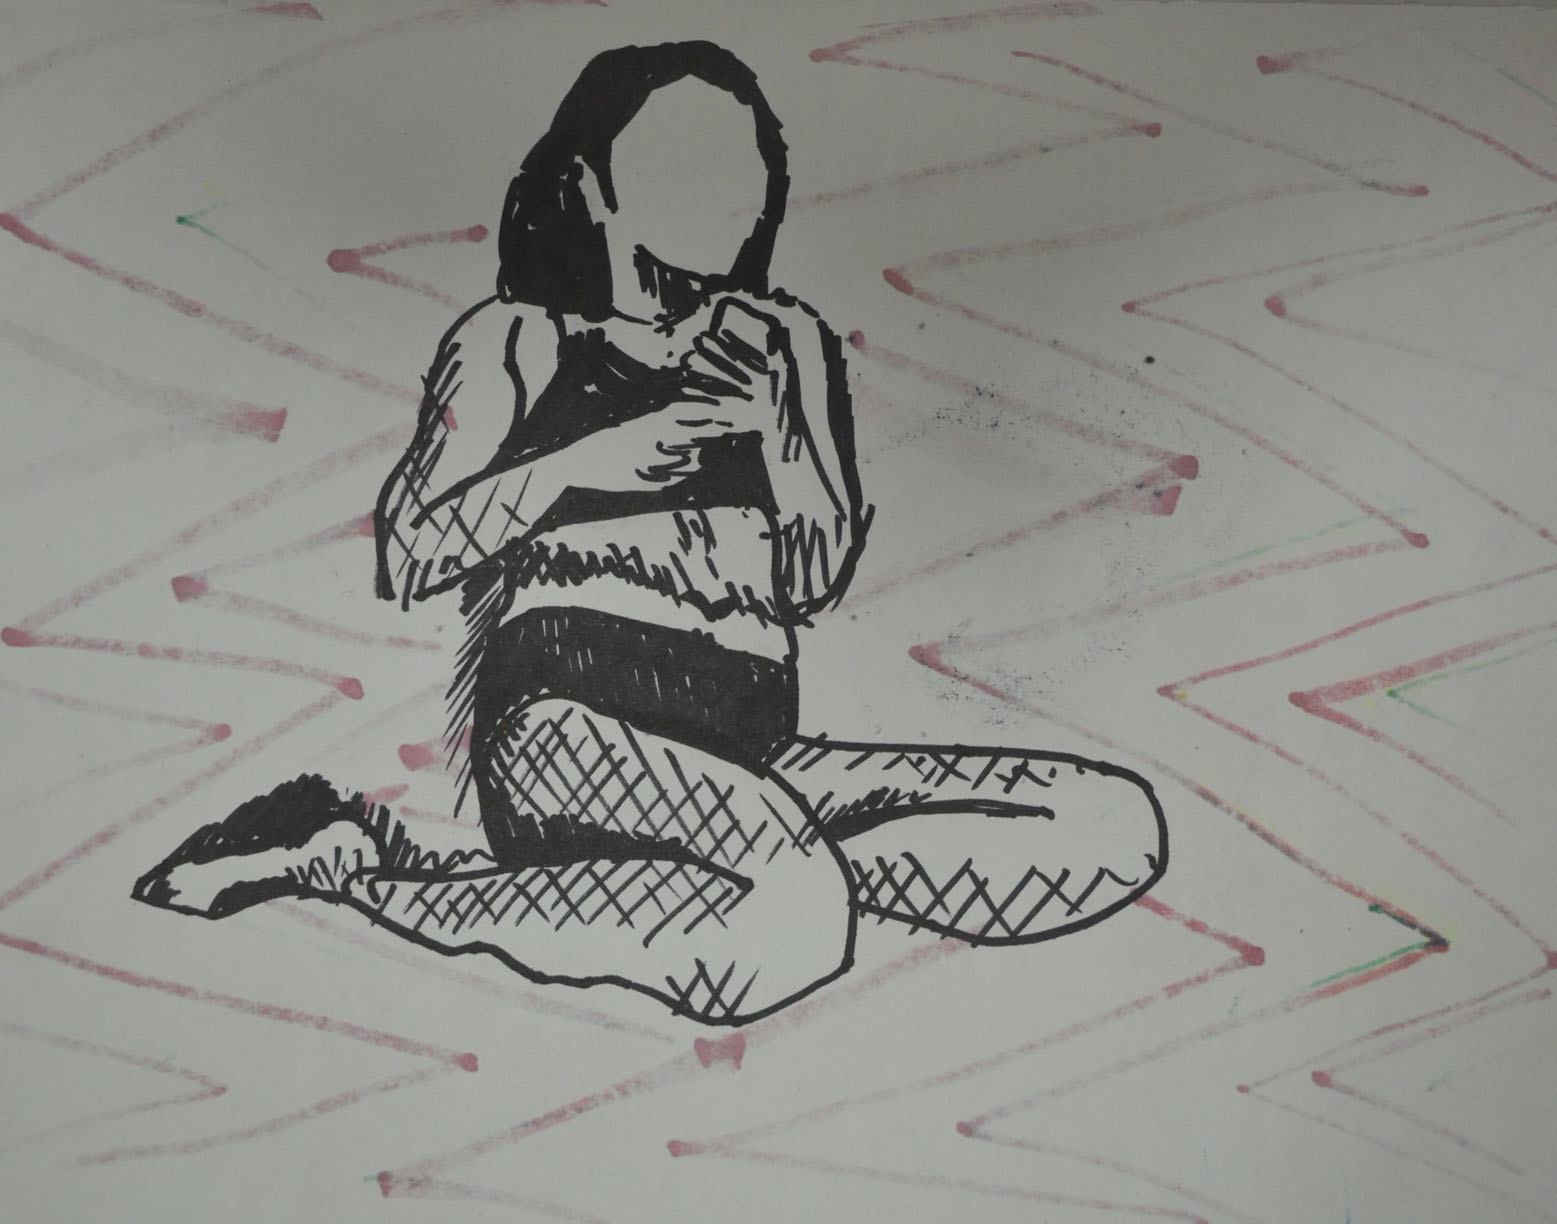
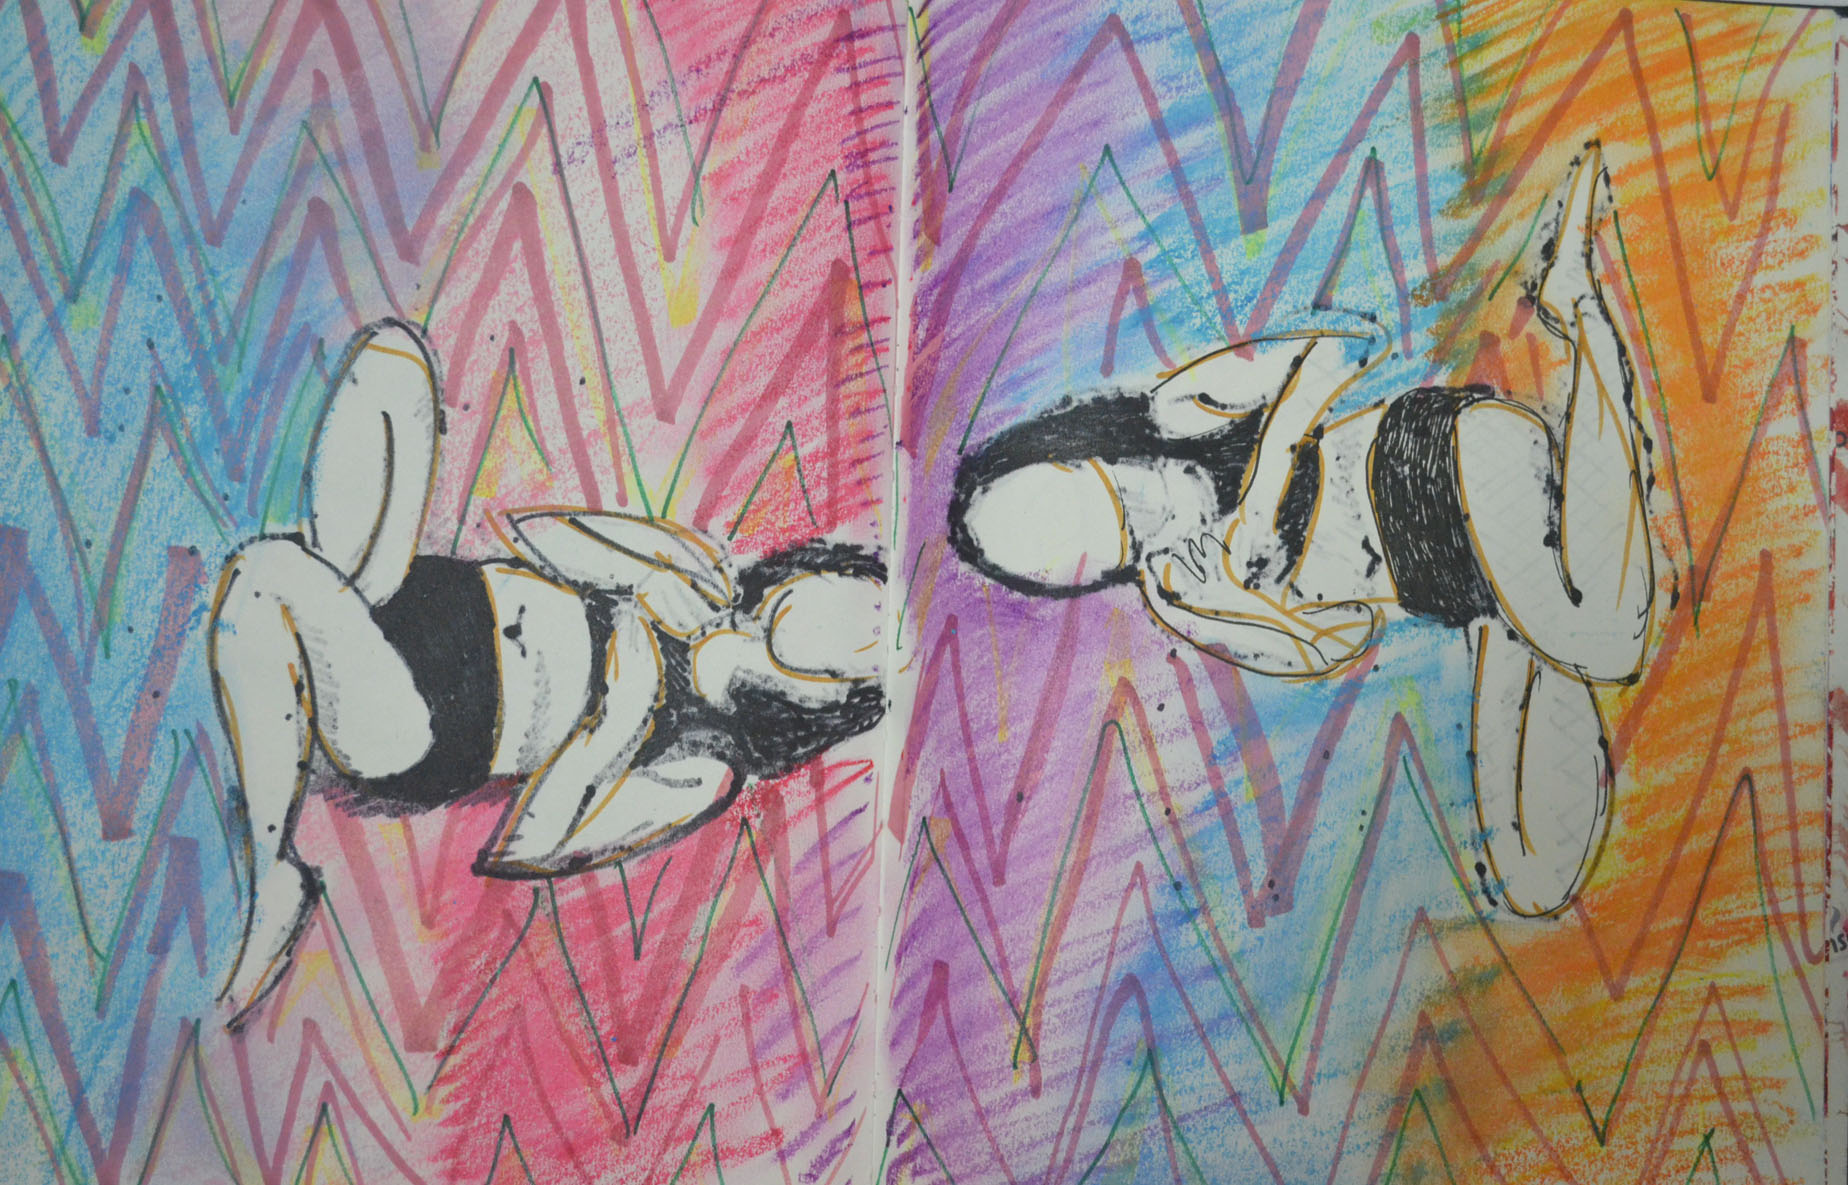
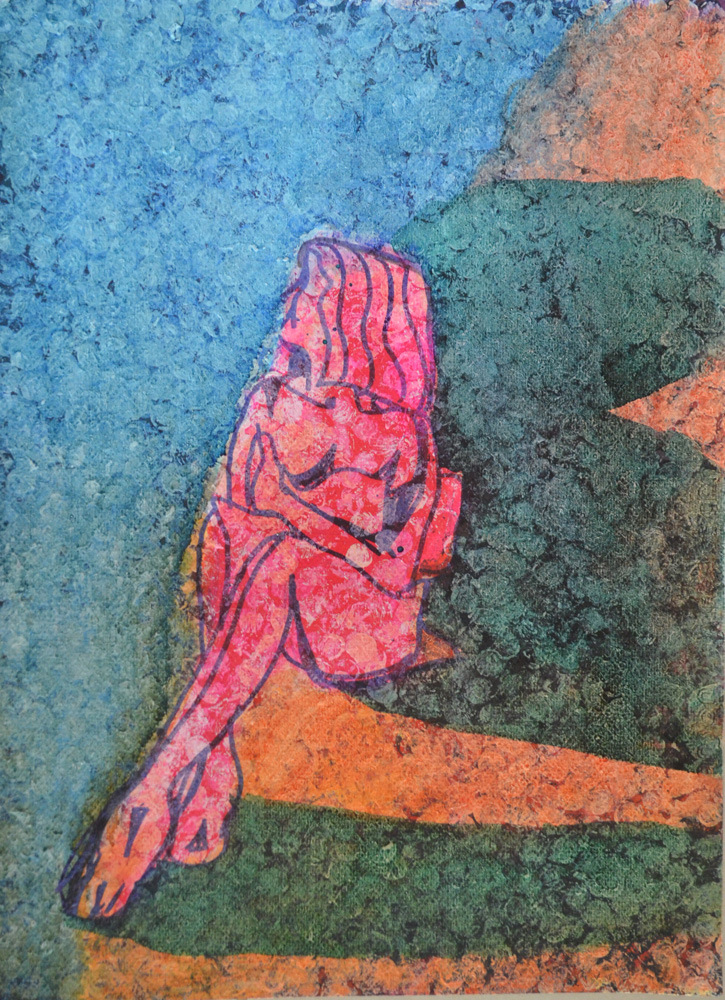
I began the next drawing by laying down random marker lines and then filling in the white gaps with pink, from there I drew a fresh pose from a series of photos that I took on the beach. Then I drew a similar pose on a plain page and then drew within the shape of the body with darker colours.

Both of these drawings worked out great, the first drawing looks like the the model is absorbing sunlight, while the second, even though it was a very similar pose with similar colours, albeit a tan instead of yellow looked very different indeed. This time the subject looked like a tanned figure and to add to it I drew a breath cloud. Thinking about it now they could actually look like before and after figures, tanning and burnt.

5 Quick fine marker over chisel coloured marker
6 Chisel Marker Pen inside fine black marker sketch

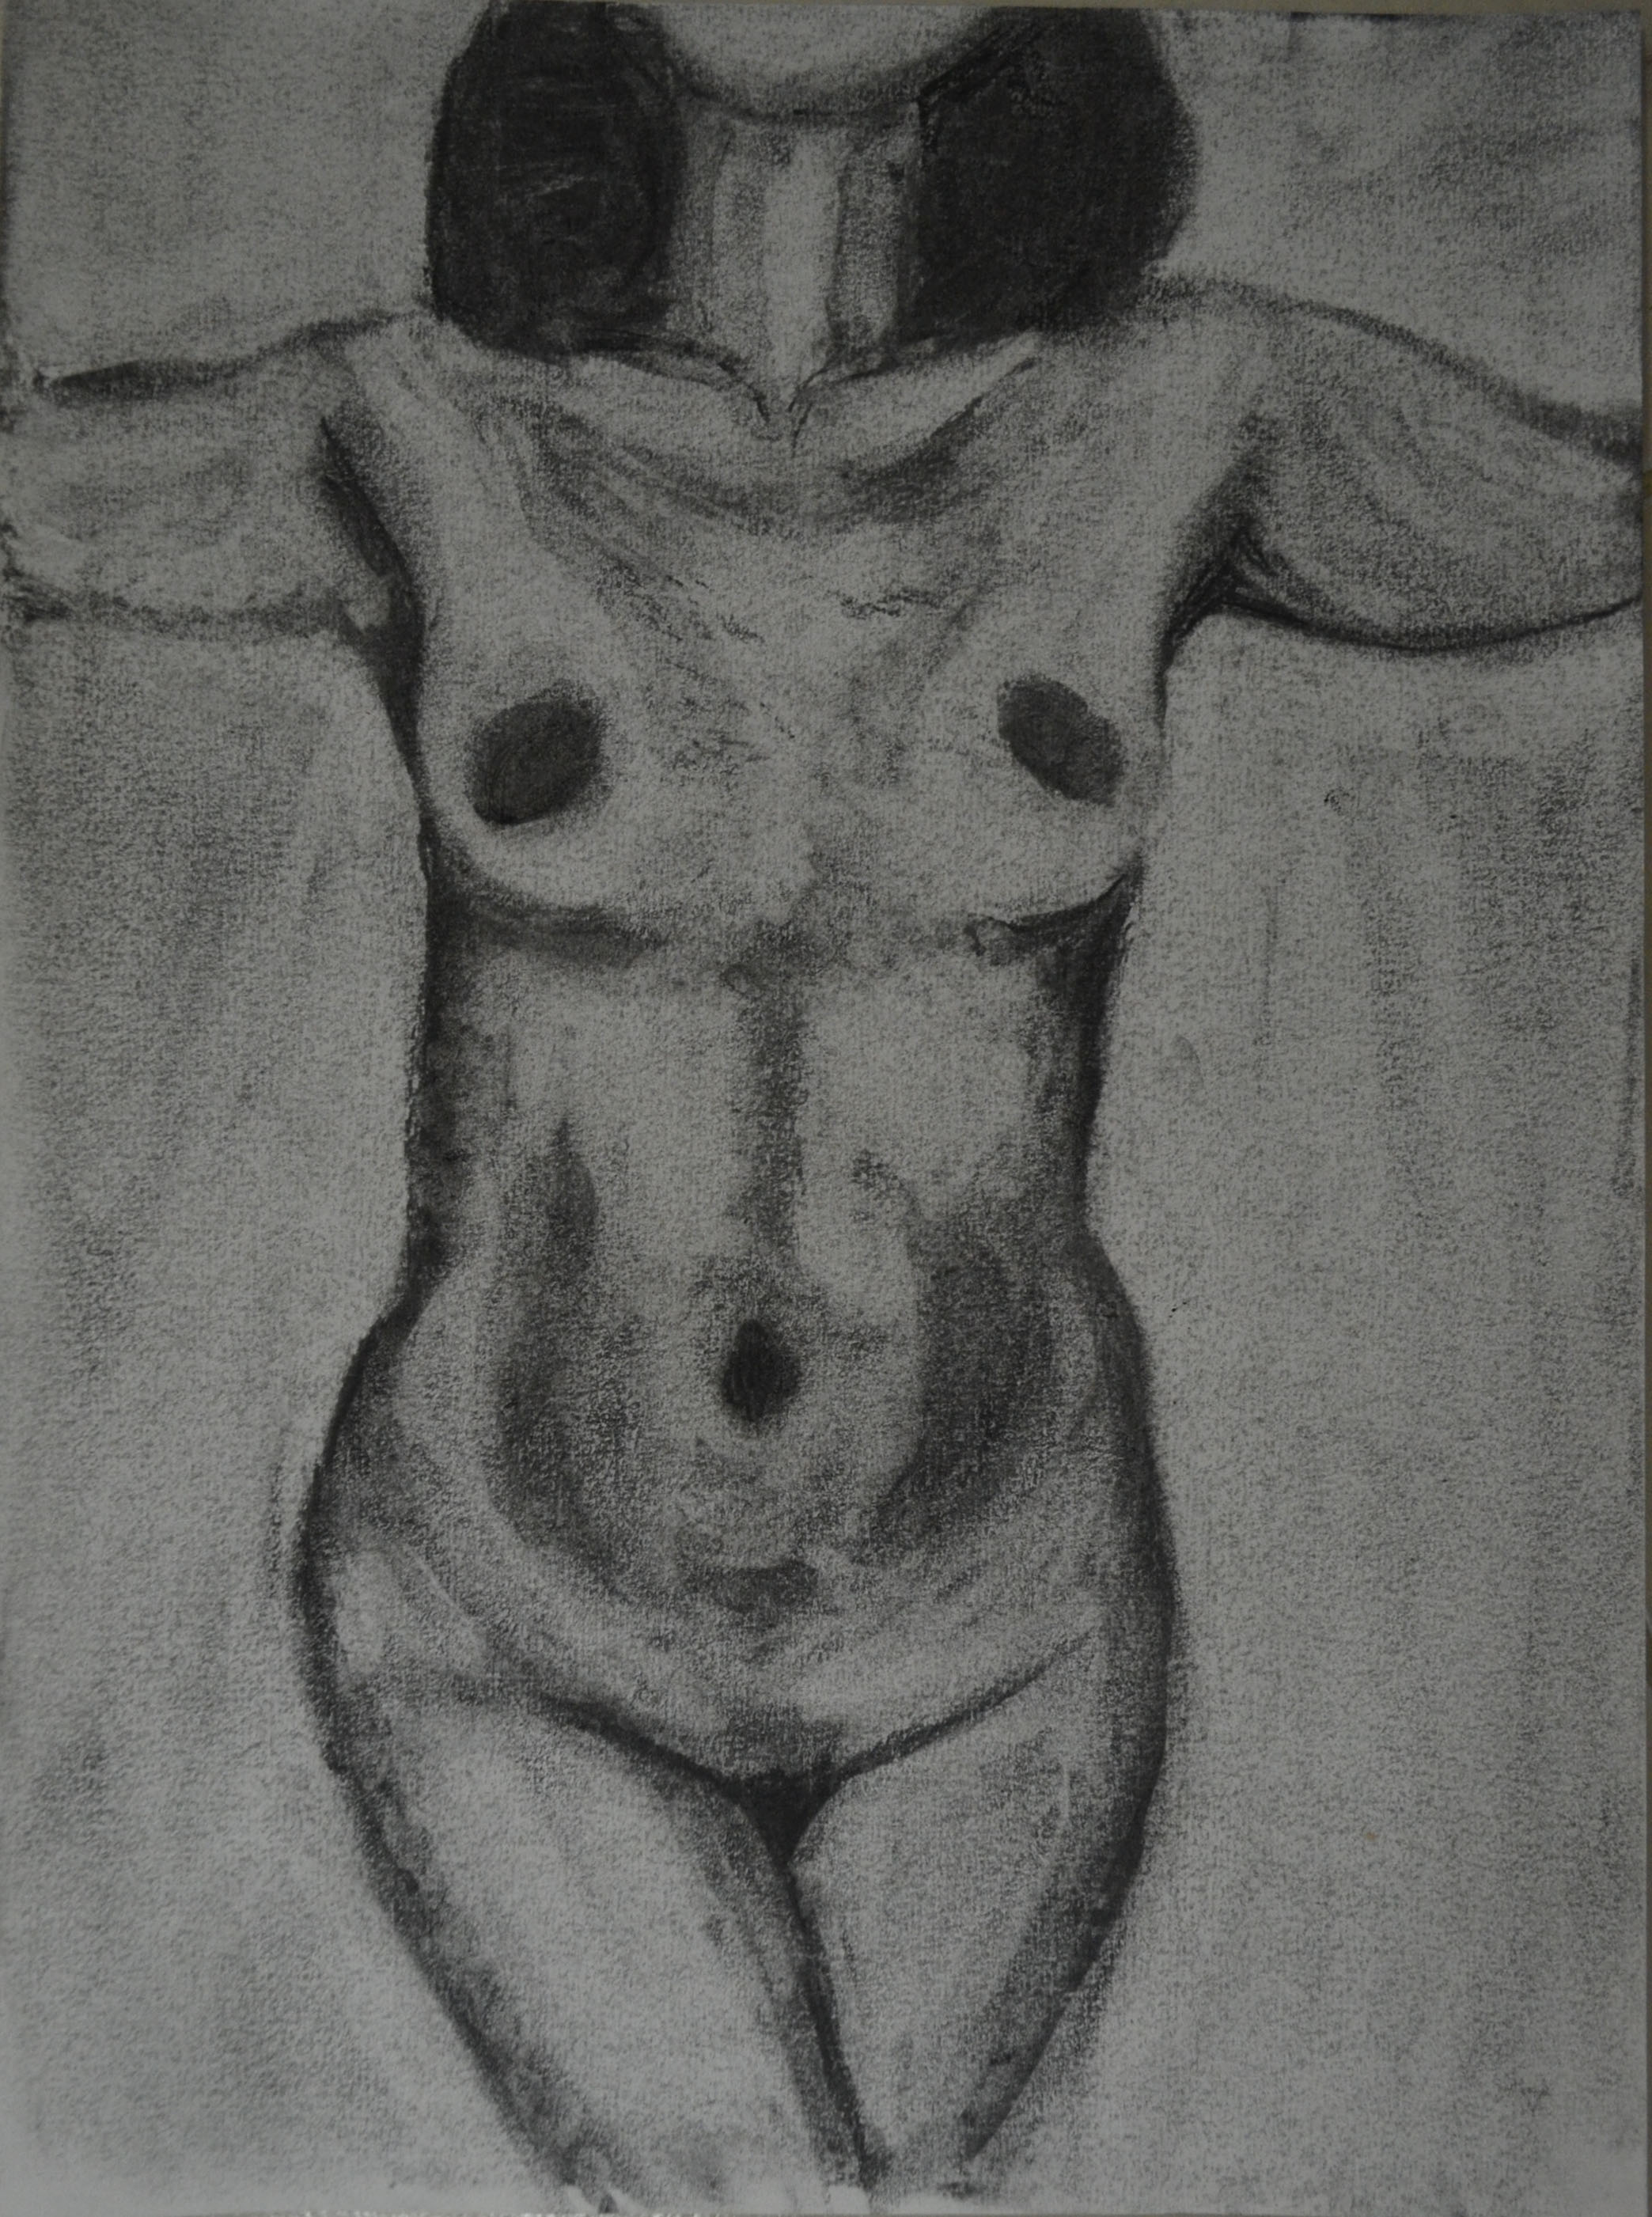
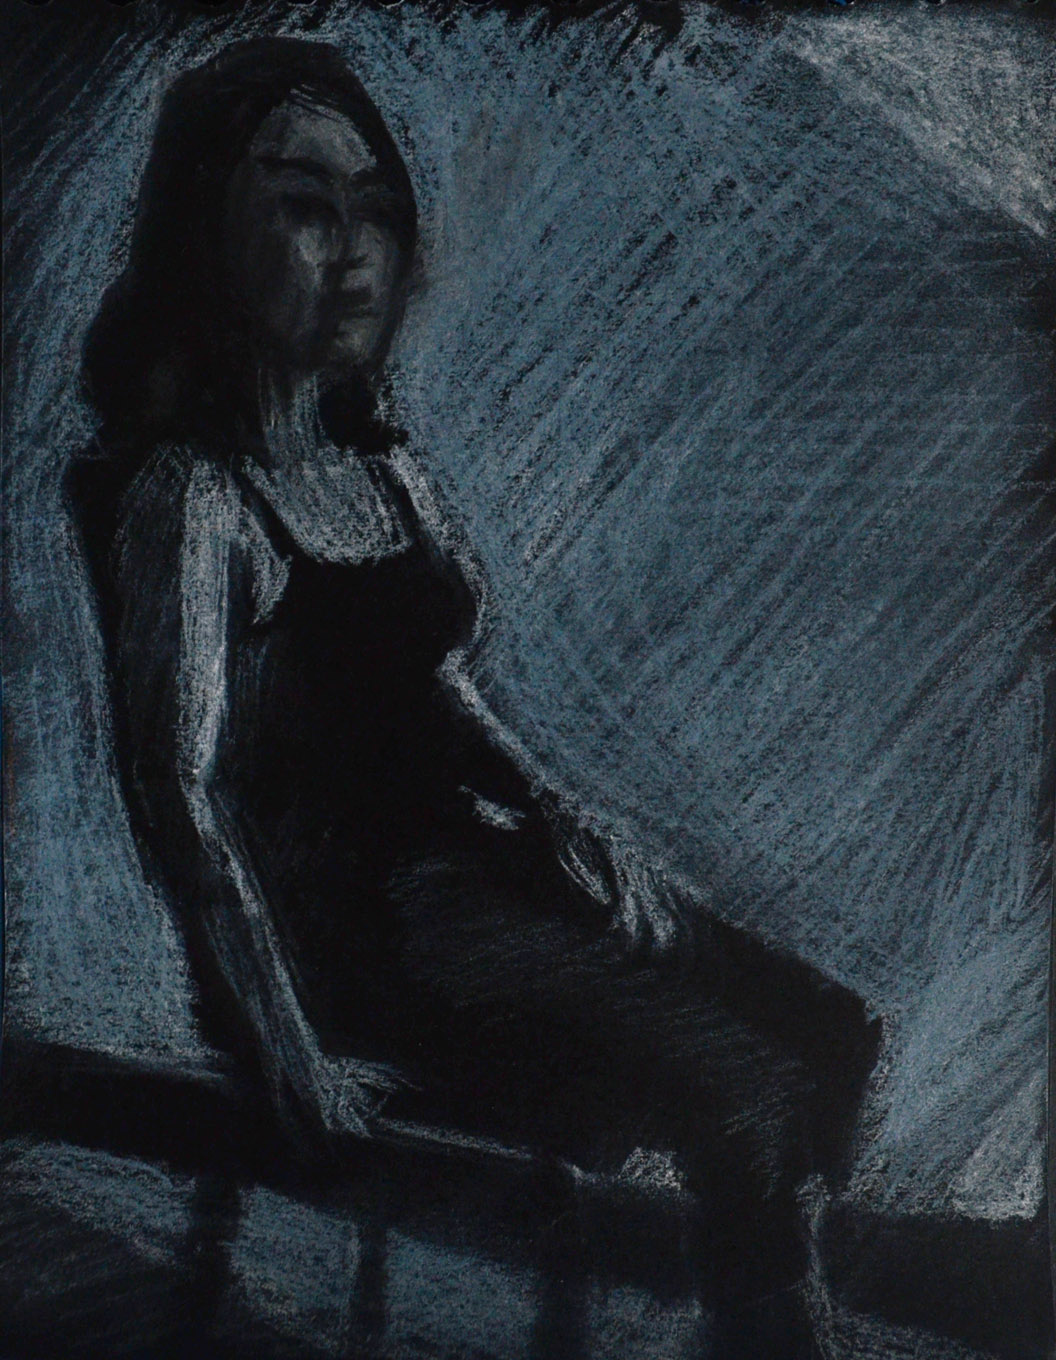
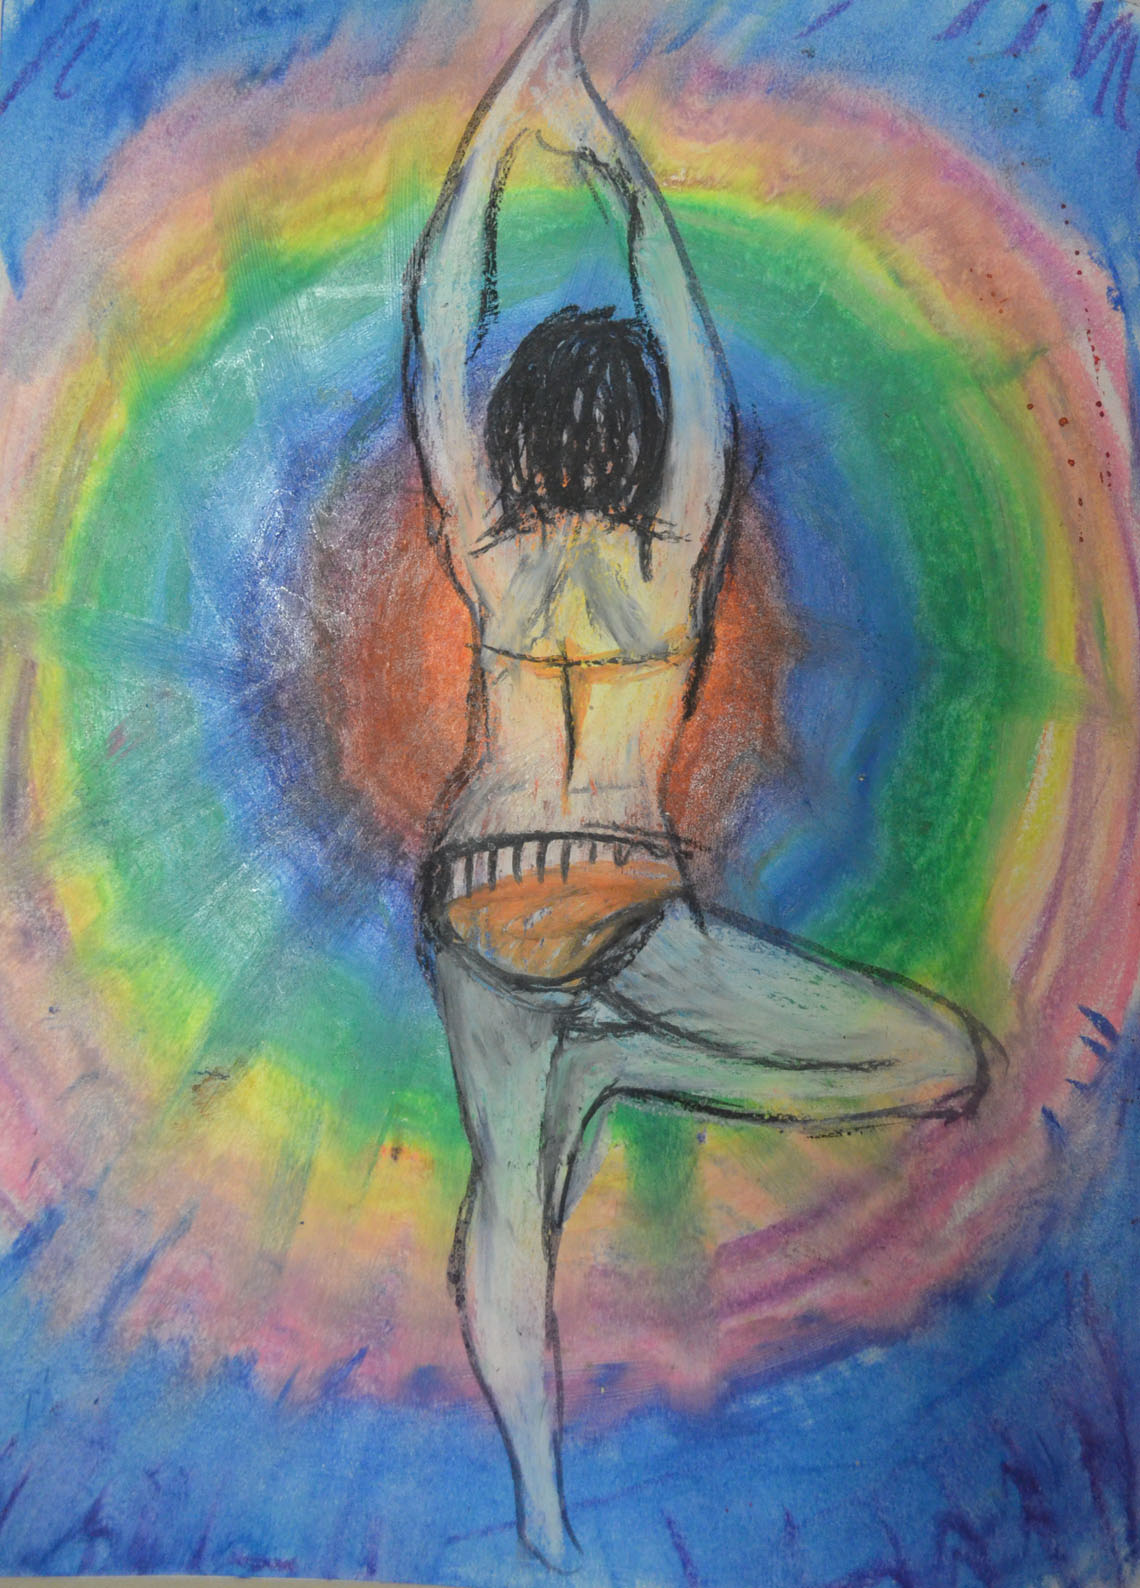
I started the next drawing by drawing in circles with the oil pastels and then blending them with my finger. I knew I would draw a figure over the top but i wasn’t sure which pose or how i would finish the experiment. I don’t know why I chose the pose below but it worked out well. To complete the drawing I first sprayed the bottom layer with hairspray then I drew the figure in a fine black marker before filling the figure in white oil pastel and then drawing in the details. I love the way her back glows due to the yellow in the centre of the bottom layer.

7 Oil Pastel and Marker Drawing Over Oil Pastel

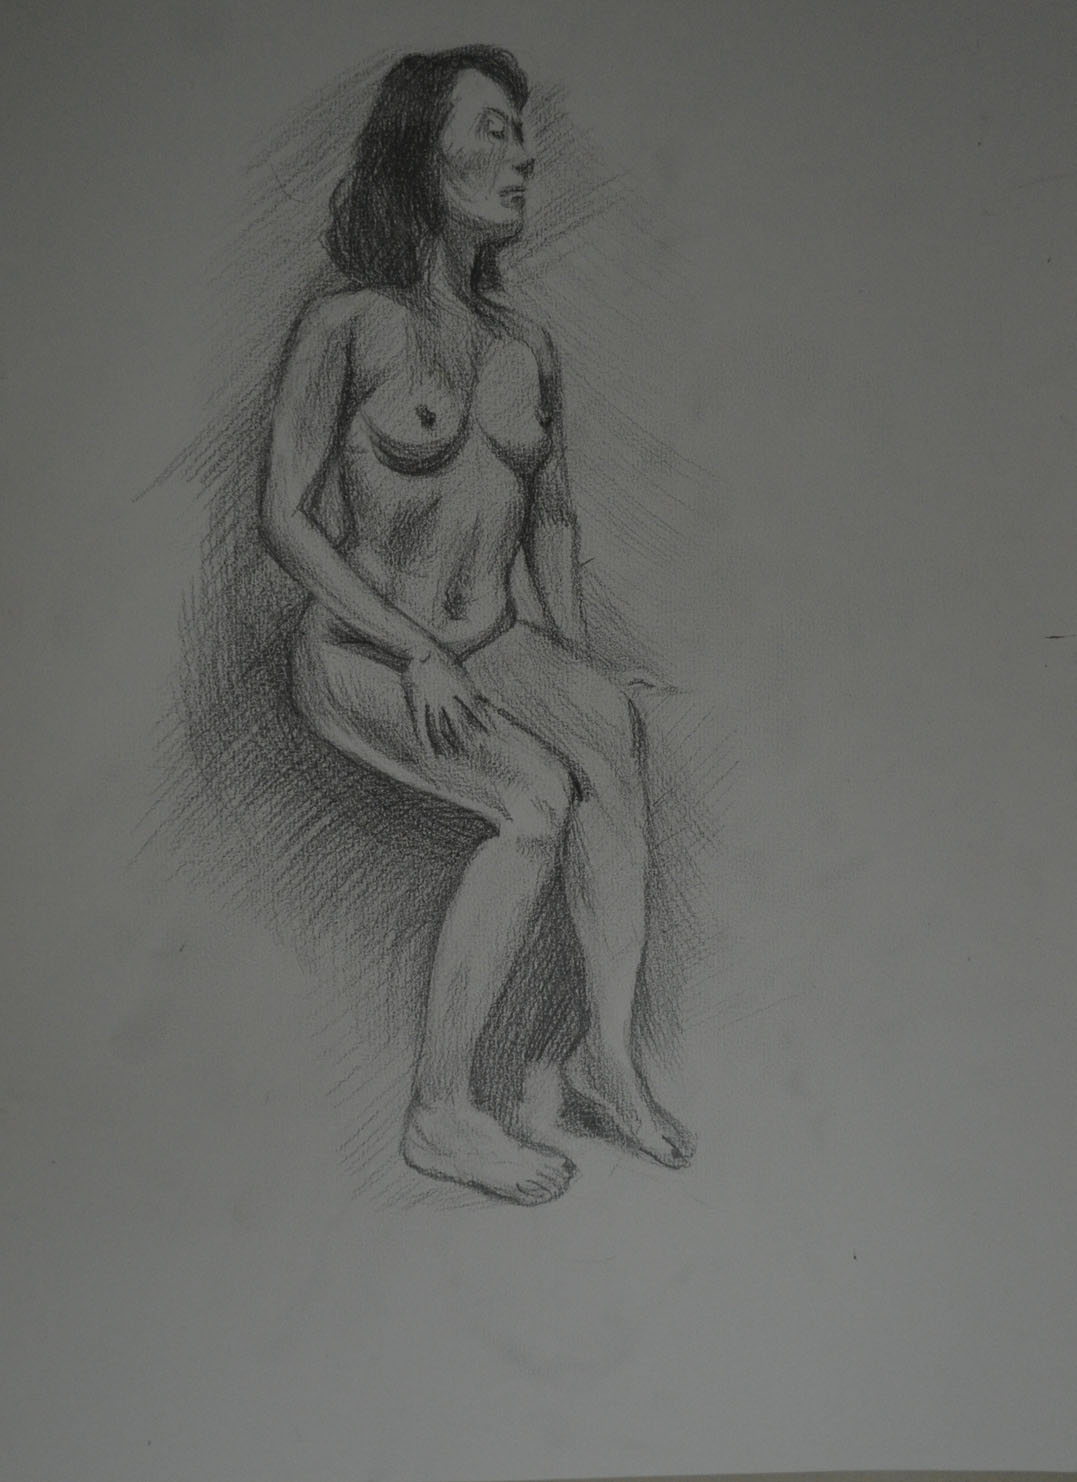
In the last experiment I drew the figure with the same fine marker then applied red liquid watercolour around the figure then brown inside but because I had freshly drawn the outline the black of the marker smudged into the red and brown making the figure impossible to determine so I went over the body in white oil pastel then the outline again in black. The end result looks (to me) like a rotting corpse on either blood splatters or rose petals.

8 Oil Pastel and Marker Pen Over Bubblewrap Applied Watercolour

More Experimenting

I realised that I could never do enough experimenting with colour and I came back for another play, only this time I worked on an existing piece, which turned out to be a bad idea but it seemed to be the start of something that I can could come back to develop in the future and I did.

Earlier Collage
Earlier Collage

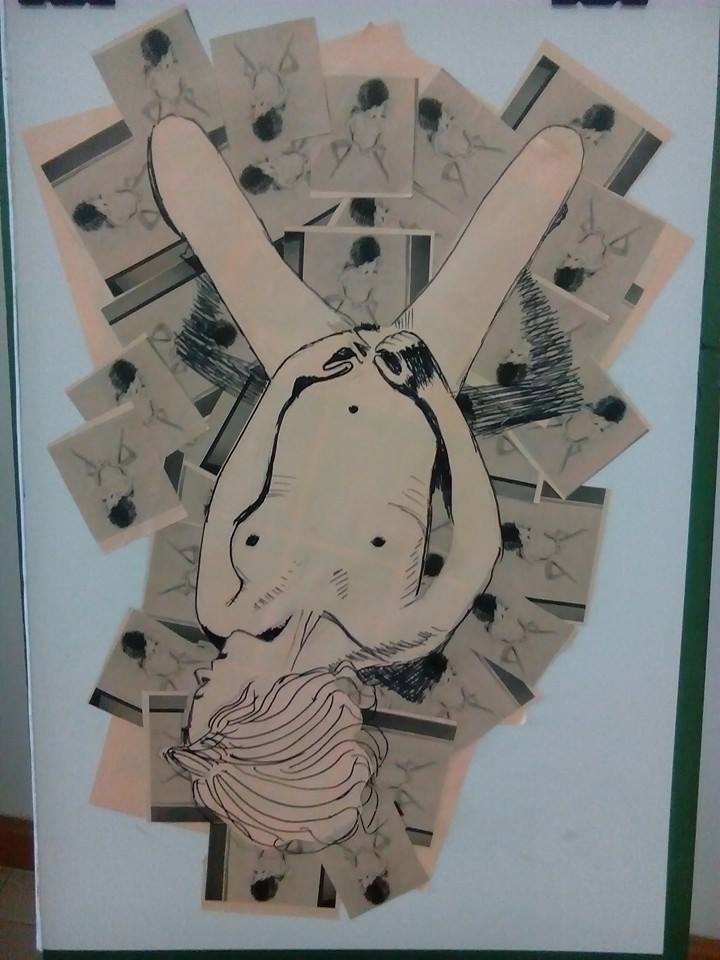
The collage that I made earlier seemed a bit bare and I thought that I could maybe do something else with it. The last experiment that I did in my exercise book gave me an idea. The red liquid watercolour over black and Iooked like blood or rose petals and I wondered if I could work on that idea over the top of the collage.

The problem was I had no red liquid water colour left and so decided to work with acrylic paint, although not a drawing medium it was worth a try to see what it would come out like. I first applied black acrylic with bubble wrap wrapped round a spray can lid that I could use like a stamp, then over the top of that I applied a layer of burnt sienna, followed by a layer of brilliant red, hopefully this would give me a shadow under the red. It turned out looking nothing like what I wanted it to and so I just kept on playing.

Finished Picture
Finished Picture

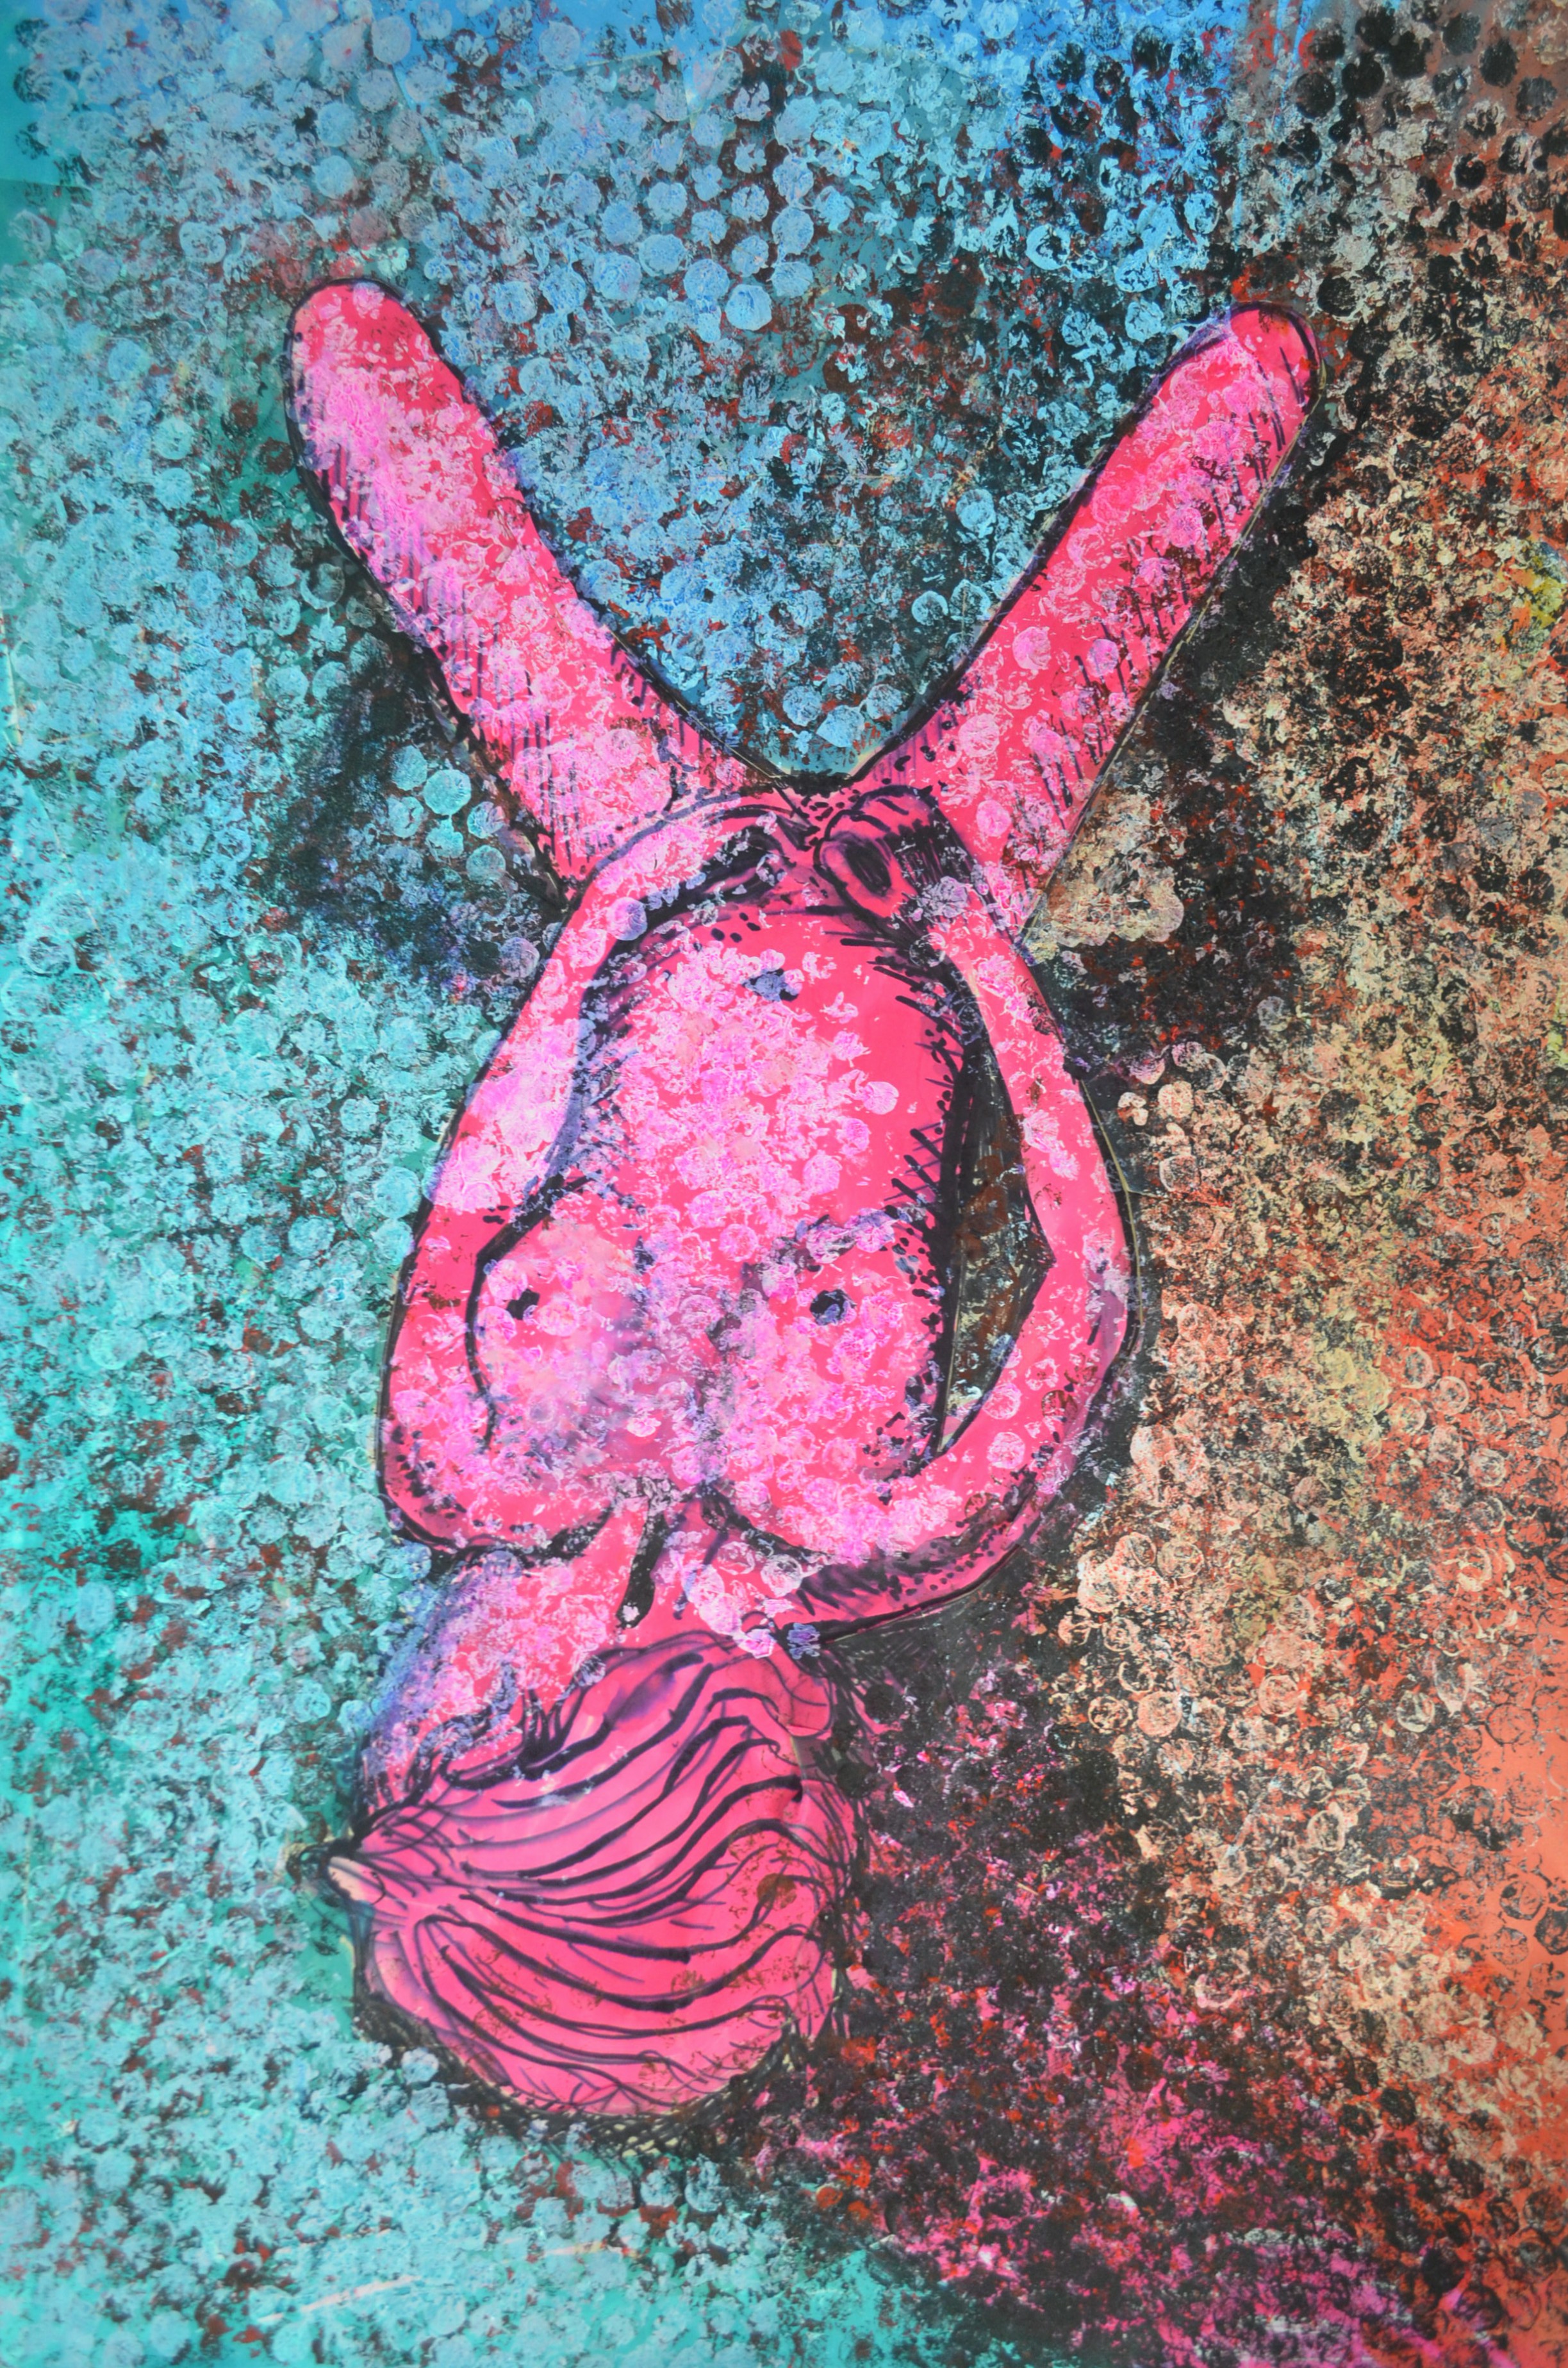
The paint I already applied was just too dark and ugly and so I went over it white acrylic paint and once that had dried or near enough dry I applied ink and liquid watercolour over the top. From bottom right I worked in a clockwise direction first applying green, then blue, red, orange and yellow and let them all drip into each other, finally i went over the figure in pink. The finished picture didn’t look that great but it had potential so I took a photo before it fell apart and unfortunately, got binned. I really lied the way the ink over the acrylic applied with bubble wrap looked like a very colourful snake skin and so I would come back to this.

Ink and Liquid Watercolour Applied with a Cork

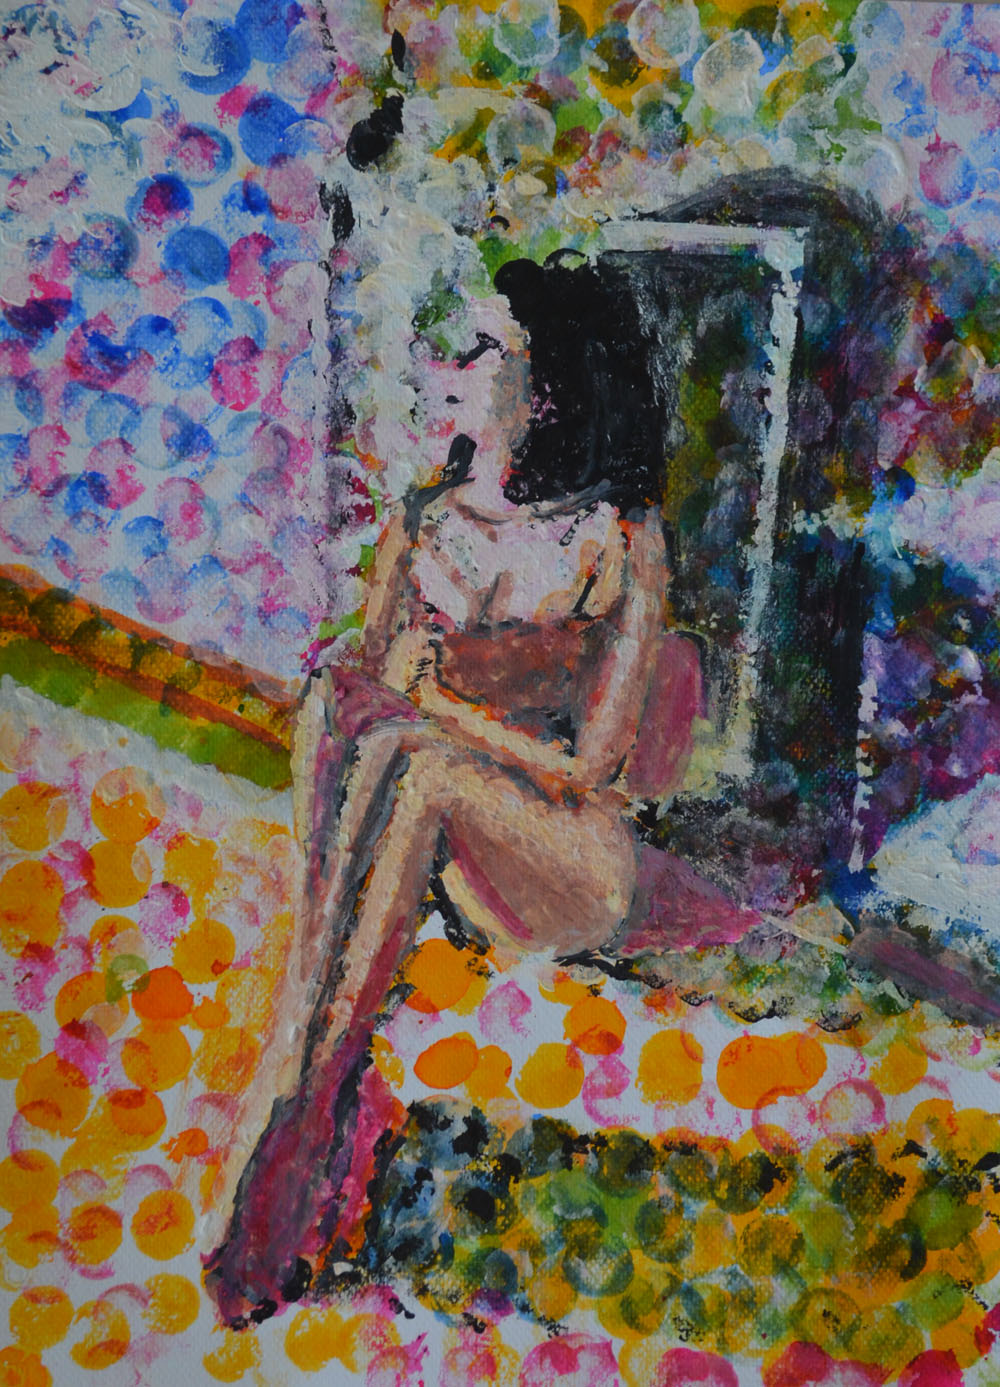
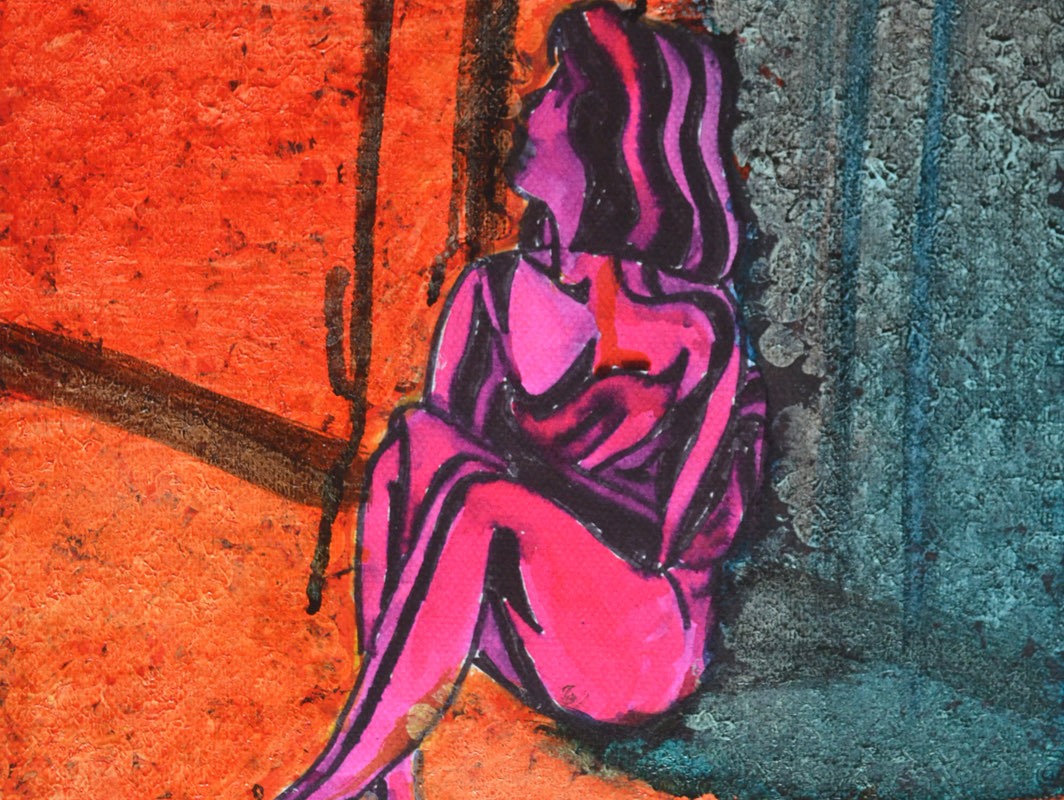
For the next picture I applied ink and liquid watercolour with a wine bottle cork, this was on an A3 sheet of paper so it looked better than I could possible imagine, I used white gouache over certain parts add light to the figure and the door.

Second Try with ink on Acrylic Paint

I decided to have another go at the acrylic>bubble wrap> ink technique as I wasn’t happy that  I had to throw away the drawing and so I did a little bit more experimenting before trying to have a go at a finished piece. This time the colour order didn’t suit the pose as the lighter colours should have been on the left of the figure. I also made the mistake of applying white acrylic to the figure then going over it with pink ink and marker, these didn’t take well over the acrylic and so I decided to have one last try.

Third Try and a lot Better

On the third try I drew the figure with marker and then went over it in pink ink before applying the acrylic this looked patchy as the marker bled into the ink but it still didn’t look that bad. From there I went threw the process of applying the acrylic but this time I added too much white so when it came to painting with the ink over the top it didn’t have the same effect.

When it came to applying the cooler ink colours. I applied a dark turquoise instead of blued which I rubbed off with a paper towel before applying the blue then let the colours bleed into each other. This time the blue dripped over the orange instead of bleeding into each other and so I tried to drip draw the door as well.

Conclusion

Every drawing in this final experiment turned out completely different the first looking like snake skin while the last a stain glass window and even though I haven’t managed to complete a final drawing using this new technique I feel it is something that can be developed further.

Pt 5 – Figure Drawing – Tonal Studies

Tonal Portrait in Pastel

The first drawing I did for this exercise was a portrait of my daughter. I felt guilty that I have used my girlfriend as a muse for most of the figure drawing exercises in this course and so I decided to make it up for it with a tonal portrait  of my oldest daughter.

For this portrait in pastel I used mostly diagonal single hatching on a dark blue Ingres paper. I am really happy with the finished drawing but I seem to be having the same problem with positioning as I didn’t draw an outline first I just went straight into building up the picture with hatching starting at the cheek.

Tonal Portrait in Pastel
1 – Angel in Tone

Ideally I should have done the next drawing in pencil, maybe on a thick watercolour paper but I decided to go with charcoal on a large sheet of paper. The proportions are good but other than that the drawing is quite sloppy.

Tonal Drawing Nude Charcoal
2 – Tonal Study in Charcoal

I did the next drawing in pastel on a beige Ingres paper using the colour of the paper as a neutral tone for the chair and the upper body. The drawing looks slightly out of proportion and indeed it is, but only slightly I was drawing with the board on the easel, I spent most of the time drawing while holding the easel tilted towards me to try and avoid this.

Tonal Study Nude in Colour Pastel
3 – Tonal Study using colour

This is a photograph that I took with my phone of the drawing on the easel tilted back while I was working on it. You can see the difference in proportions.

Drawing with Angled Easel

The next drawing was also a quick one but this time from life in Conte Pencil and White Pastel on eggshell (I think).The outlines are probably too strong tho and it may have been better to build up the background and so I continued to draw until I had a drawing I was satisfied with.

Tonal Study Nude with White Pastel
5 – Tonal Study with Conte Pencil and White Pastel

This time I chose pastel pencil for my medium and beige Ingres paper and working from a photograph I drew with flowing hatching that followed the contours of the body building up the tones with about 8 different colours. The results were great but again the positioning was still not so great and so I decided to improve on this by starting a new drawing, something that I can send of for formal assessment.

Tonal Study in Pastel Pencil
6 – Tonal Study on A3

Working mostly from the last drawing until I got to the face that is I did my best to position the figure on the A3 paper so I could fill as much as the paper up as possible, it was definitely an improvement. The proportions of her breasts and bum in the last drawing were probably more realistic though as I went with the flow in this last drawing. The face is a lot better but I was warned by my girlfriend not to mess about with it and to leave it as it was and so I did.

Large Tonal Drawing in Colour Pastel
7 – A2 Tonal Drawing in Pastel Pencil on Ingres

A Fresh Try at Tonal Studies

Unhappy with most of the tonal drawings above and buy know getting slightly bored of using pastel on Ingres or charcoal I decided to have another go at the exercise and began researching other possible techniques and mediums.

Firstly I looked at lifting off charcoal rather than drawing with it and after completing the drawing below I decided that this technique was suitable to drawings of parts of the body rather than the whole figure.

Charcoal Study Lifting off

I then did a quick tonal study from a photograph in 6B pencil, this was great for hatching and I was able to build up the form really well but it I still wasn’t satisfied knowing that I could find abetter medium for these tonal studies.

Tonal Study in 6B Pencil

Researching the Old Masters

I remembered the studies in red chalk by the old Masters and so I decided to take a closer look at some of these drawings. I looked at drawings of several old masters including Bernardino Gatti, Raphael, Leonardo da Vinci and Michelangelo focusing on studies of the figure rather than portraits.

In several of the studies the artists seem to show light with white chalk and show shadow with darker chalk but it was quite clear to me that it was possible to depict light and shade by layering the one colour. However, because I already decided to do the next set of tonal studies on A3 drawing paper so I could draw on my lap I decided that red chalk wouldn’t be precise enough on A3 but a Sanuine Conte pencil would be an excellent substitute.


Bernardino Gatti Il Sojaro - Study of Horizontal Legs
Bernardino Gatti Il Sojaro – Study of Horizontal Legs
Leonardo da Vinci - Study of a hand
Leonardo da Vinci – Study of a hand
Leonardo da Vinci, A nude man from the front, c. 1504-1506, red chalk and pen and ink
Michelangelo Buonarroti - Seated Young Male Nude
Michelangelo Buonarroti – Seated Young Male Nude
Michelangelo - Study for an Ignudo, Red Chalk
Michelangelo – Study for an Ignudo, Red Chalk
Michelangelo - Nude study for the Battle of Cascina
Michelangelo – Nude study for the Battle of Cascina
Raphael - Red chalk study for the Villa Farnesina Three Graces
Raphael – Red chalk study for the Villa Farnesina Three Graces
Michelangelo - Studies for Haman
Michelangelo – Studies for Haman
Study for Adam Michelangelo

I decided to commit myself to one drawing an evening for five evenings spending at least an hour on each tonal study. The fully nude poses in my quick drawing studies helped me to get the proportions better than the semi naked poses above and so I went with very similar poses for the next group of drawings.

For the first of these drawings was probably the most difficult of the poses and took the longest time to draw. I used a black conte pencil for the darker tones, this was probably out of insecurity than anything else, so to was the drawing of the bed between the legs not believing that I had got the shape of the legs right.

First Tonal Study in Conte

The next drawing was better, this time I stuck to Sanguine and more precise hatching, the light source came from above and there was a lack of shadows but the pose worked well and until this point this was my best study so far.

Red Conte on White Paper

For the next pose was easier as I didn’t have to draw the details in the face. The proportions of the head look slightly out but this is due to the hair, the back of her head is actually flat like alot of Chinese and South east Asians. I liked not having to draw the full feet but getting the soles of her feet and toes right was still difficult.

2nd Pose Red Conte on White Paper

For some of the quick poses she was sat in the chair and I actually drew the chair, for the next drawing I left the chair out and glad I did. This study took almost as long as the first in this series to complete but drawing the shape was the easiest, most of the time was spent building up the layers of colour. This pose worked best for me and once I had drawn the outline I knew spending time on it would be rewarding, this became my favourite drawing to date, it actually reminds me of some of the red chalk drawings of the old masters.

3rd Pose in Red Conte

For the final drawing I chose a standing pose from the back with a V shape between the arms I drew something similar in the quick poses exercise and I knew that by choosing this pose I would get do depict muscle tone which is one of the most appealing features of the red chalk drawings by the old masters. The foreshortening of the feet made this a difficult pose though and I had to redraw the legs due to not getting the proportions right the first time.

Standing Pose in Red Conte

I really enjoyed working on the last five studies in Conte, this can’t be said for the first set of drawings in this exercise which I believe now were ruined due to rushing myself trying to get this 5th and final part of the course done quicker for  an earlier assessment.

It was really worthwhile to come back and have another go at this exercise with a clear mind, a better choice of drawing materials and a better choice of poses.

More Tonal Studies – George Seurat

Madame Seurat the Artists Mother

On advice from my tutor I looked at the works of George Seurat, I was familiar with his paintings but not his charcoal and Conte Crayon studies and so I browsed through Georges Seurat, 1859–1891 by Robert L. Herbert to take a closer look at some of his works and to give me some ideas on how I could approach this exercise differently.

Georges Seurat Le noeud noir
Devant le Balcon
Devant le Balcon


I was amazed at how he had managed to capture tone and wish I had come across these works earlier. I picked a handful of drawings out that really appealed to me, these were the darker drawings and the reason for me doing this was that I wanted to use a white conte stick on black pad drawing by candlelight, I have been doing some paintings by candlelight and I felt that I could gain some influence from Seurat’s works.

1st Tonal Drawing on Black Paper A6

Working in white conte stick the first drawing I did was very sloppy, however I did come back to this a bit later and add a bit of colour, it still wasn’t a tonal effect what I was hoping to achieve, the next two drawings were a lot better.

For the second drawing my girlfriend was i  a seated pose facing away from the candle, with her face in shadow it was easy to capture the silhouette of her face, The third drawing was not so easy as I sat her facing towards the candle and with the light shining on her face on these small sheets of paper it was very difficult to capture her correct facial profile.

2nd Tonal Drawing on Black Paper A6
3rd Tonal Drawing on Black Paper A6

The fourth study was much heavier and darker, this time mostly in orange, red and brown pastel. Facing towards me it was easier to capture her facial features, they are not perfect but I am happy with the overall effect of using these colours, that were very close to each other on the spectrum on the black paper. I feel that if any of these studied look like they have been influenced by Seurat’s drawings then this is it.

4th Tonal Drawing on Black Paper A6

Facing towards the candle, the 5th study was worked over and over again to get the proportions right, this compressed the layers of pastel which made the drawing looked aged and effect that I think looks really great but I didn’t manage to capture in the photo below.

5th Tonal Drawing on Black Paper A6

I took a break from colour for the sixth tonal study to have another go at drawing her facial features in conte, I hadn’t managed to depict them in earlier sketches and so I drew a closer to her at an angle to get them right.

6th Tonal Drawing on Black Paper A6

In the earlier studies with conte and pastel I had chosen to warm colours this was influenced by the orange-red tones of some of Seurat’s studies, for the final and probably most difficult drawing I chose cooler colours.

7th Tonal Drawing on Black Paper A6