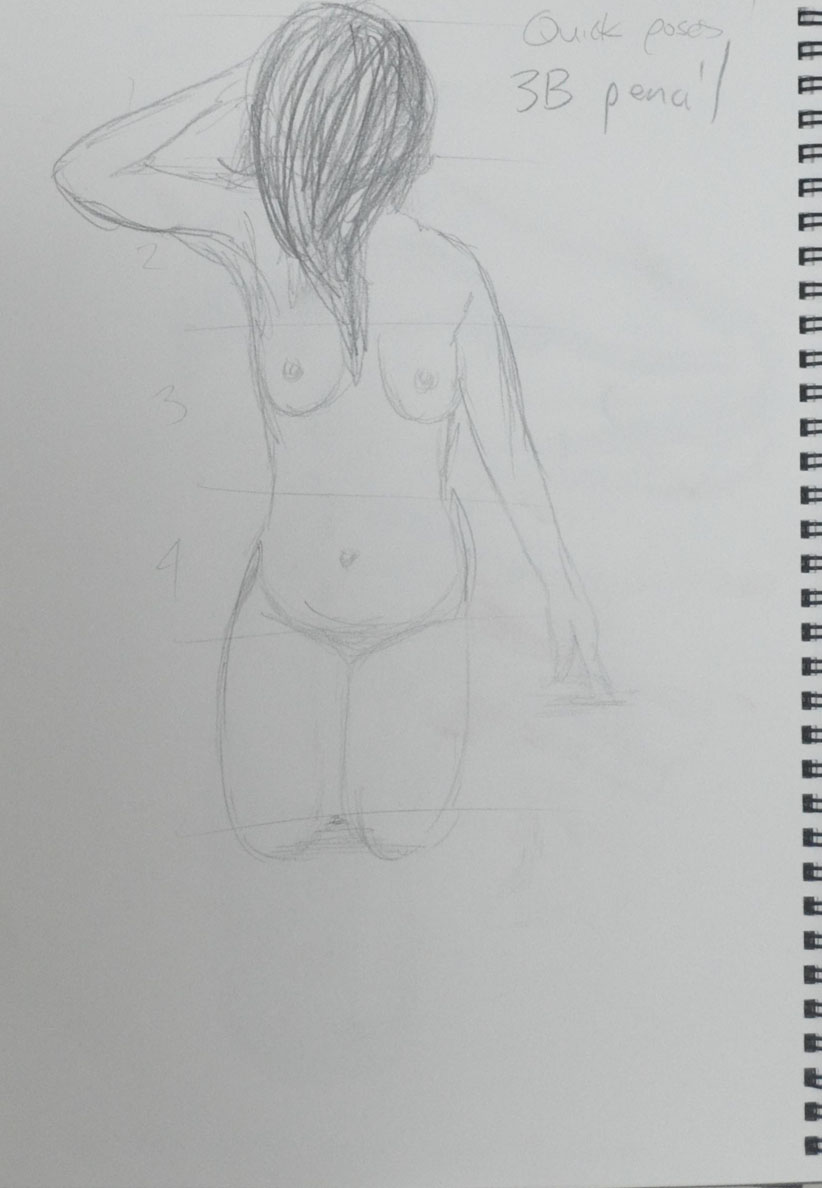
The brief for this exercise was to ‘ Look for the center of gravity in a standing figure. Mark the central axis in your sketches’ and to ‘ change poses every 2-5 minutes’. I divided my A4 sketch book into three panes so i could work smaller and so keep within the 5 minute time frame. Unlike the previous exercises, in this exercise I started from the head down and once I thought the head was in the correct position marked the central axis, which the brief pointed out was from the back of the ear on a side pose, the top of the spine for a back pose and for a front pose started at the top of the head and run down the bridge of the nose.
First three stances 2B on A4
After drawing the head and then marking the central axis I worked to it as a guideline. The benefits of working this small was that I could capture the stance quite well plus add some detail while working within the time frame. The negative side is that when enlarged the drawings are very sketchy.
Second set of stances 2B on A4
The first three drawings took closer to 2 minutes each while 4-6 were closer to 5 minutes and it shows.
Drawings 6-9 2B on A4
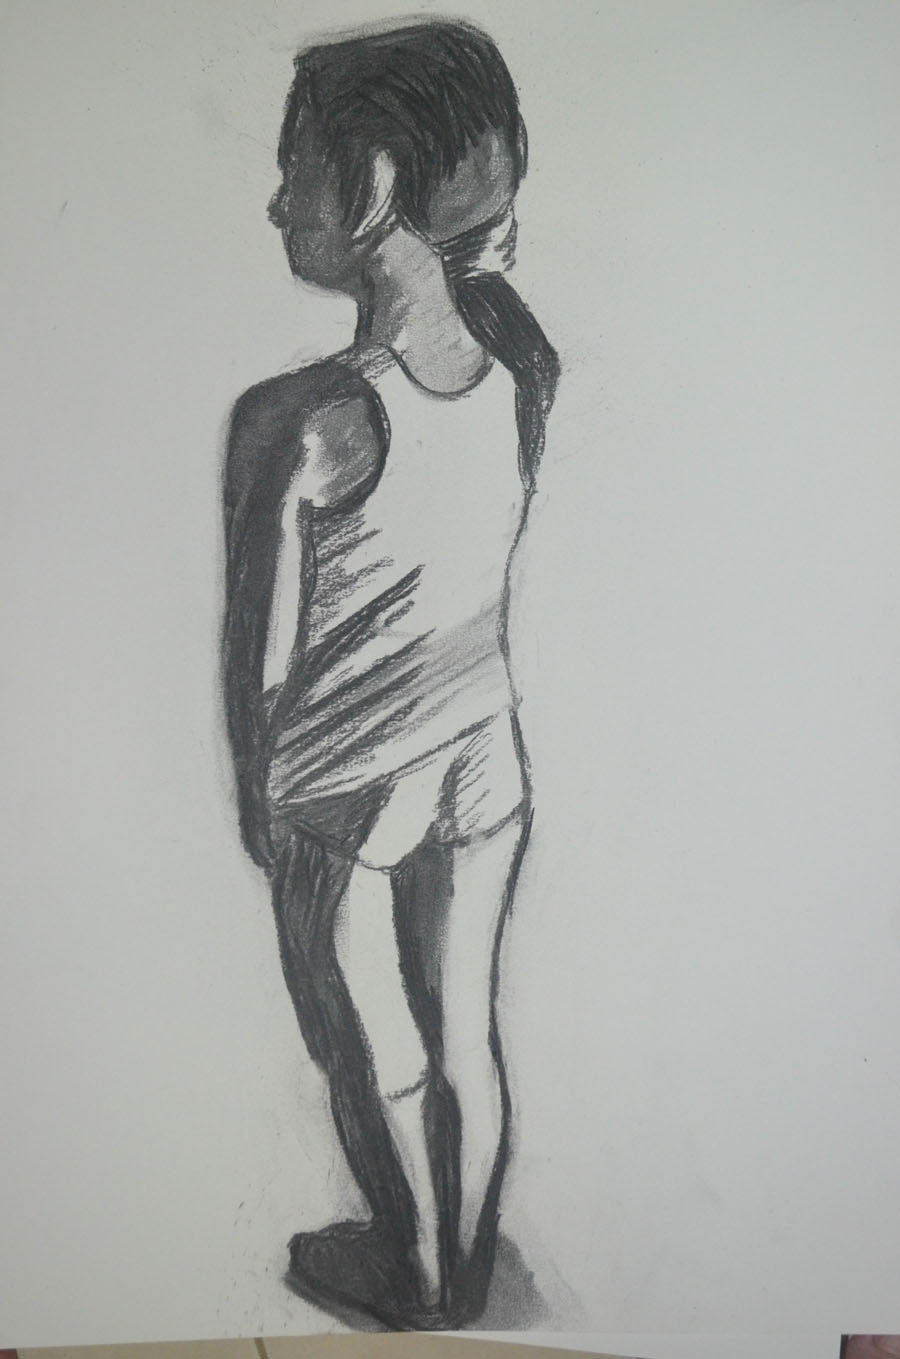
Having got confident drawing he different basic stances by now I decided to get a bit more daring with the next 3, hands overlapping behind the head an back twisting to one side in the first two, and the third drawing bending over with one hand on the left calf. This third drawing wasn’t the most difficult nor did it take the longest to draw but it was the most awkward and I wasn’t completely satisfied at first but looking at it now the proportions and stance are perfect it just felt strange to draw what seems like a triangular form.
2 final stances 2B on A4
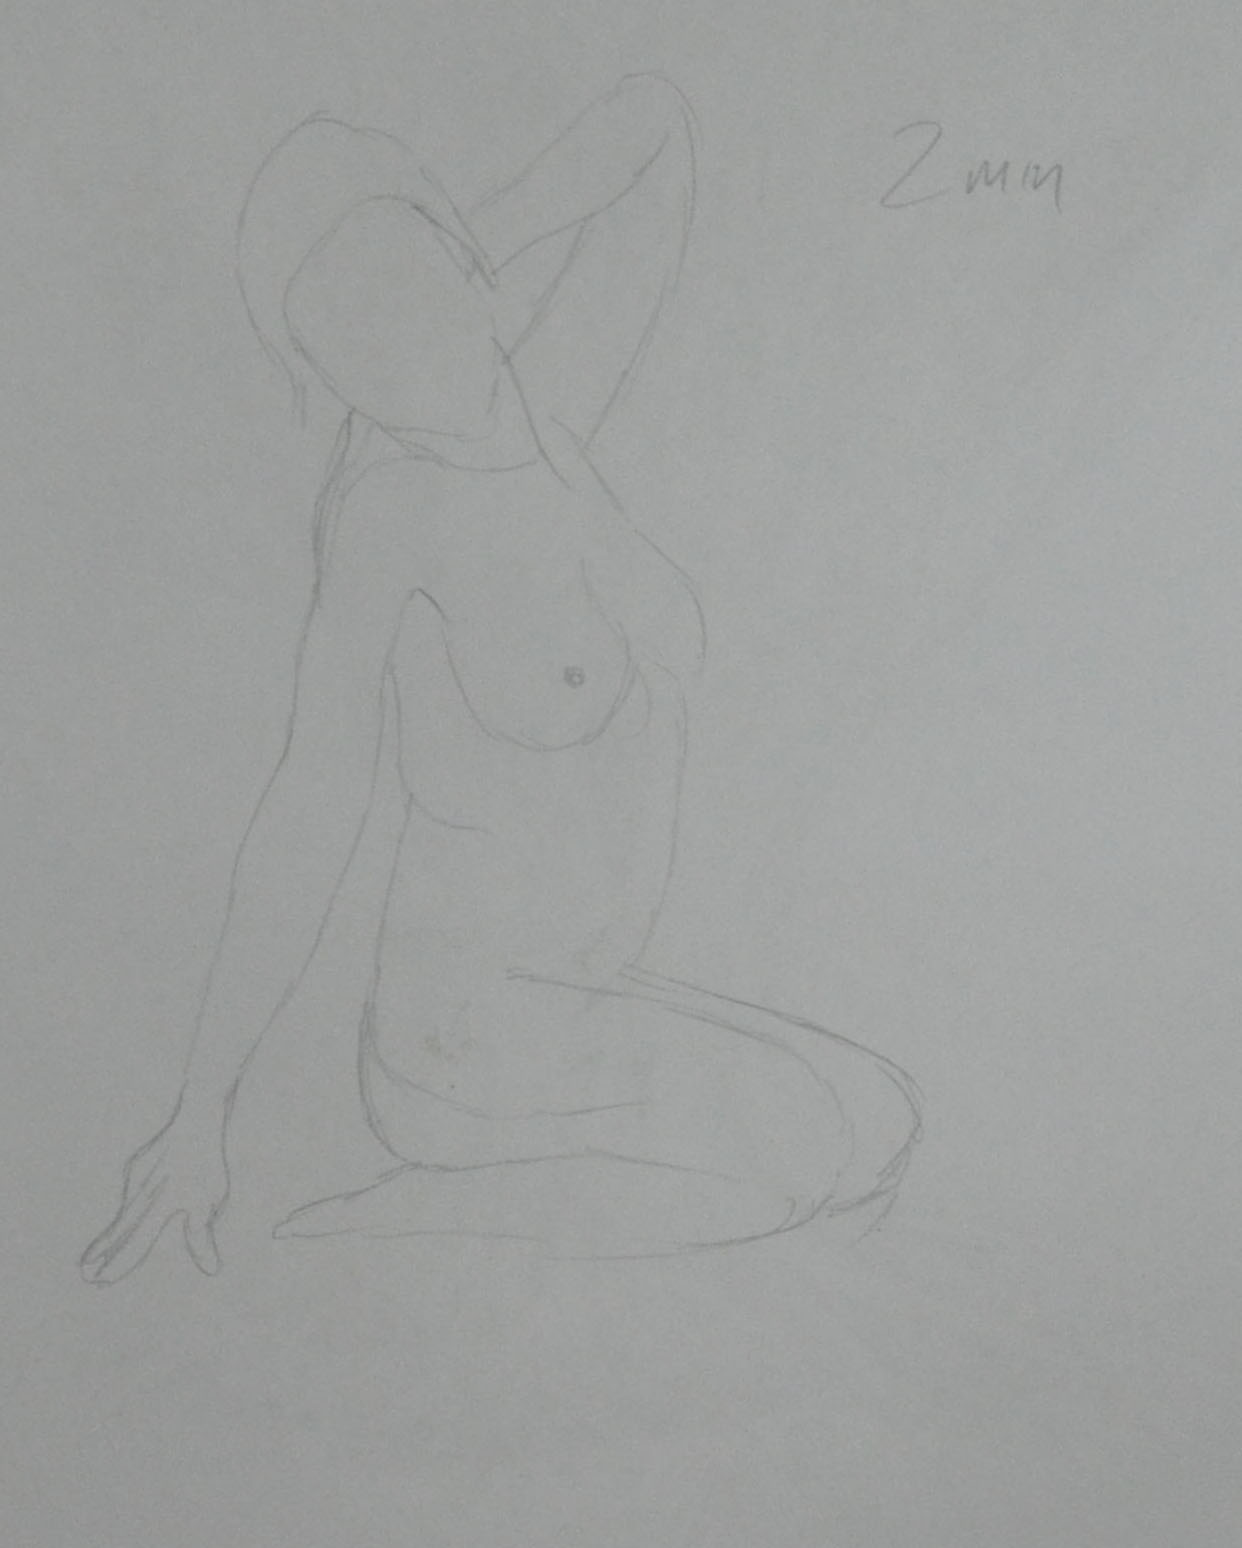
On the 4th and final page of stances I went for a pose that was a true test to see if I could draw the correct center of gravity…The tree pose. My first attempt would have had the model falling over, while my second attempt was close to spot on, with the knee of the standing leg pushed out to center the weight. Last but not least was the model drinking a class of beer from the back and I even managed to get in some back muscles. I have noticed there is an anatomical drawing coming up and I think back muscles on the right model would be great for it.
Were you able to maintain a focus on proportion at the same time as creating a sense of weight and three dimensional form?
In the first exercise essential shapes I believe I managed this quite well apart from the first sketch, which was more of a trial, working with charcoal on A3 paper for figure drawing for the first time. In the second exercise essential elements there was a couple of times I messed up with proportions and coincidentally they were both when I was looking down at my daughter in a standing position, these are the second and 6th drawing . In the second drawing I made the head too small and then when I corrected it, it went off the paper.
Which Drawing gives the best sense of the pose and Why?
This is a difficult question to answer. To make a start on narrowing it down I would go for poses in the essential elements exercise as my daughter was uncomfortable posing for me and I think I have managed to depict this in these poses. Then I would probably say I think I would probably have to say the third drawing. She has the same arched back as me and I have managed to capture this in the drawing.
Was there any movement or gesture away from the model’s central axis? if so did you manage to identify this and put it in your drawing?
In the third and fifth drawing of the essential shapes exercise my girlfriend’s backside was cocked to one side maybe because she was a little uncomfortable at the length of time she had been sat there and I have definitely managed to capture this in the drawings but this, was done without noticing and it had been pointed out by her afterwards. But then, in the essential elements exercise, drawing 3, I haven’t done a great job of identifying this and I think it is down to the shadow on the legs.
It is the big summer holidays in Thailand due to the fact that April is the hottest month ever, anywhere in the entire universe, so from March to May the kids are off. My two daughters are quite energetic when they are together and getting excited because they’re coming to mine, even makes them more so, so barring the weekend when they come over to mine in the summer holidays I usually take them one at a time. My 5 year old was practising dancing for the school show so it was my 9 year old’s turn to come over for a few days.
1 – Charcoal on A4 Sketch Book
My oldest daughter Angel is very quiet when she’s by herself as I think she actually likes the peace and quiet my gaff has to offer so when I asked her to model for me she didn’t complain, as long as she could go in the bedroom play with her tablet and ‘listen to’ the TV afterwards.
Now the brief for this exercise was to draw a sequence of poses lasting ten minutes each…Adjust the light so it hits only one side of the model, to emphasize the darkest and lightest forms.
I’m afraid on the first drawing, sketching my daughter in her T-shirt only took about 5 or so minutes but then I spent about another ten minutes going overboard with the sofa as I really feel it needed some darker areas. This time the drawing was done on charcoal in my A4 sketch book as I wanted to see how much control I had with this medium on a small size sheet of paper in the given time frame.
My daughters legs are very long and she is quite tall for her age but she looks a lot taller in this drawing, her body should have been shorter.
2 – Charcoal on A2 paperq
My second drawing was done on an A2 sheet of paper and again their was too much light shining on her so I filled in some of the background. Now in an earlier exercise we were instructed from the waste, I misjudged this and had to cut the top of her head off. However, I wasn’t going to start again as I really liked the finished drawing, the only problem I had with it was it was all sweeps of dark tone and no hatching.
3 – Charcoal on A3 Paper
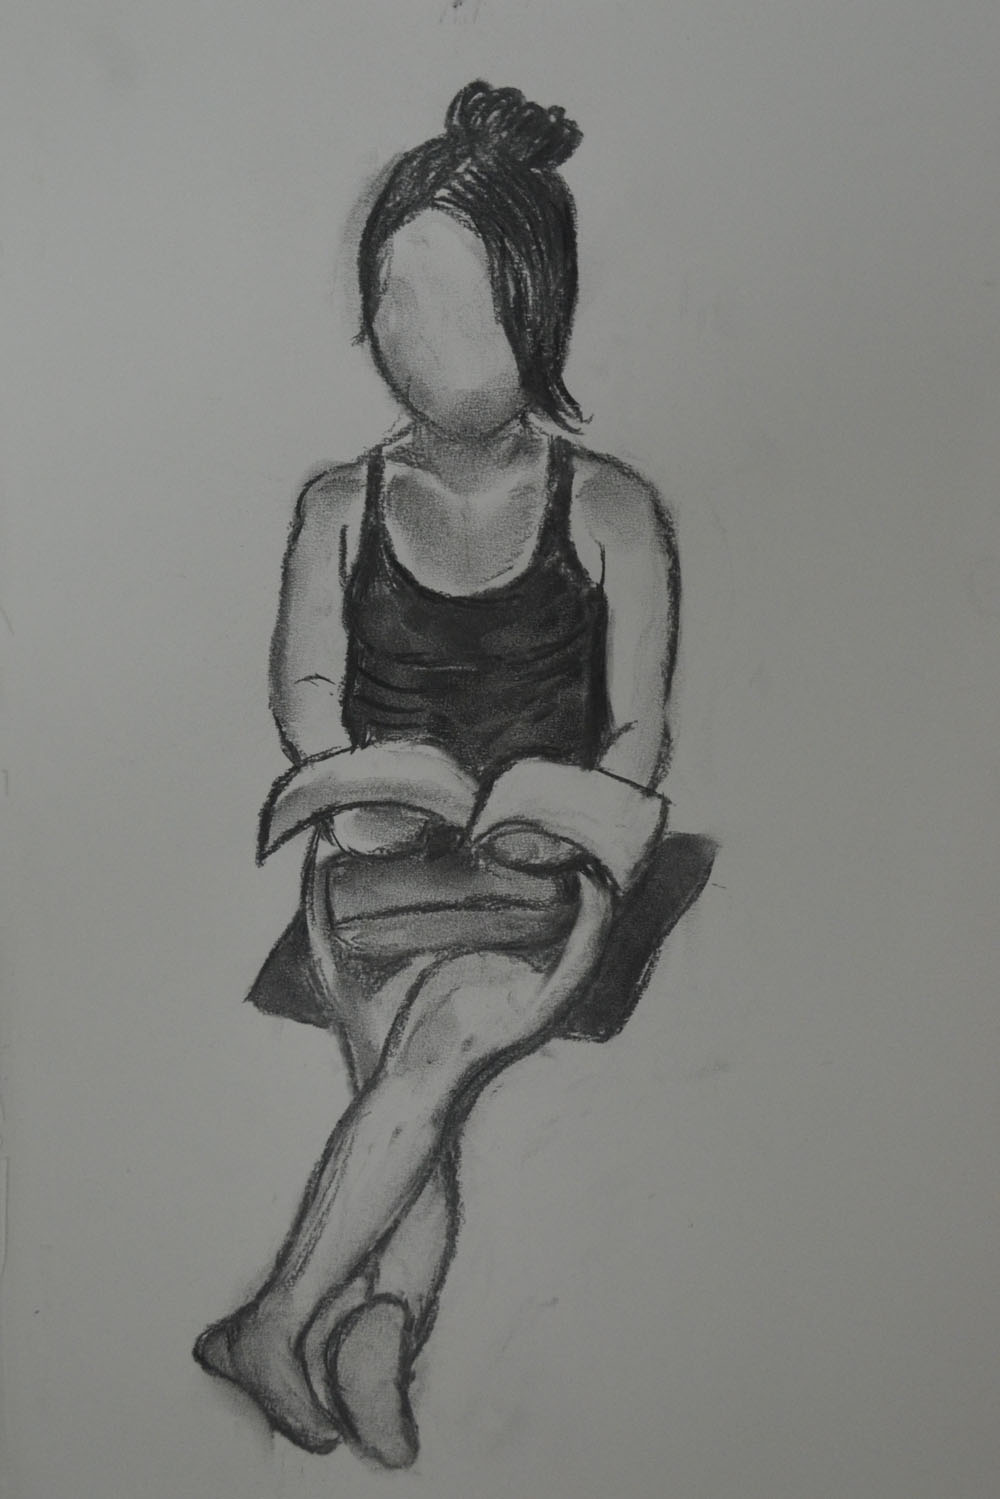
The third drawing was a lot more satisfying, this time I sat her on the front of the sofa watching the TV with the light directly on her upper-chest region. In ten minutes I managed to get all the drawing done complete with swoops of dark tone and hatching, the only problem I have with it is her calf looks two short, this is because her legs are at an angle which you can tell by the position of her feet but I didn’t do to well with the dark and light to depict this.
4 – Charcoal on A3 Paper
Like the third drawing, the fourth drawing was again very satisfying, this time she sat on the corner of the sofa facing away from me, there was more light shining on her but like the last drawing I managed to use a few mark making techniques to build up the different tonal values and this time it actually looked like my daughter. At first I was worried about just drawing 1 leg but then I remembered Degas’s Lying Nude and how the mind fills in the rest.
5 – Hard Pastel on A2 Paper
Moving away from charcoal I decided to do the next drawing in a bluey grey hard pastel to see if I could build up the different tonal values in a not so heavy medium. I had done the last two seated drawings on A3 Paper as it was easier to relate to that size paper with those two seated poses but with this pose I decided to go back to A2 paper as this pose was mostly head and a long back, still I didn’t judge the proportions right and the drawing could have filled more of the paper up.
6 – Charcoal on A2 Paper
I went back to charcoal on A2 for the final drawing and if the profile looked anything like my daughter I might have been somewhat satisfied but looking at the second picture then looking at this one you can see how the legs are too short and the head looks big, I’m not sure whether it’s the angIe am at or I started out to broad.
This was only the second time working with my girlfriend as a life model and so it was a nice little exercise to introducing her to posing for me for longer periods of time.
1st Drawing – A Practise with Charcoal
I started with a practise sketch to get me used to drawing with charcoal on the large A2 pad. For this I let the girlfriend sit on the floor with her back against the bed. She lives in a studio apartment which is basically a bedsit. The proportions were out as there wasn’t much measuring going what I really wanted to know from this trial drawing was how well I was going to work with compressed charcoal on the large sheets of paper.
The introduction to this project pointed out ‘basic shapes are used to construct three-dimensional fundamental forms…The head is a sphere, arms and legs are cylinders, and the feet and hand are ellipses’ and with that I decided to puppetize my girlfriend.
With me being new to life-drawing I decided to start with a simple pose where there was only a slight twist in the central axis, this first pose with arms straight down, parralel to the edge of the paper helped me to ‘establish the bulk of the drawing in relation to the space around it’ as suggested in the brief.
2nd Drawing Sat on Bed A2
The second pose was very similar to one that I didn’t do a great job on in the ‘Quick Poses‘ exercise but this time with ample time to measure, using the head as a marker and remembering what I learnt earlier that the head fit into the torso approximately 4 times to the seat of the backside on the seated figure, the results were satisfying.
3rd Drawing Sat on Bed 1 Leg Up A2
My girlfriend is very small in height, just over 5 foot so for the next sketch I asked her to sit very close to the edge of the mattress so I could draw both her feet on the floor. I started by using a sanguine conte pencil but realised it was pretty permanent and couldn’t mess about with it as much as I could the Conte, the lines wouldn’t erase but it didn’t matter too much and I decided to go over it in Charcoal. The result of this gave me an idea for depicting movement which may come in handy later on.
4th Drawing Charcoal over Conte
I picked up the wrong stick of charcoal for this next drawing that was rather scratchy and almost impossible to smudge in with my fingers but I decided to keep going. This time I thought I would have a go at drawing a face, wish I hadn’t, not in this medium anyway. The girlfriend has an unusual face, she comes from Thailand’s most northern province and probably most northern town and she has a very ‘Thai’ face not like the Bangkok/Chinese faces I’ve been used to seeing over the last 15 years and so any attempt at a face would have to be in a medium that I could play around with.
5th Drawing – Compressed Charcoal and an Atempt at a face
Again I added a few more details toes, fingers, ankles but worked fast and kept the sketch nice and scratchy with squiggly hatching.
6th Drawing in Hard Pastel on A3
The last drawing was from a photo in hard pastel, I was teaching at the language center and popped upstairs to the art store where there were Nouvel Carre Pastels on sale and wanted to see what they were like and also needed to see what could be done in hard pastel in this part of the course.
Have you managed to make a complete statement within this time? What were your main problems?
Within 2 minutes? No, there is definitely a lot more time needed at this stage, however, with more practise drawing the human figure, two minutes could be enough to make a statement of a sort, more so with ten minutes. With one hour in ‘The Longer Pose‘ I do feel I managed to make a complete statement but the drawings did suffer with consistency.
Problems…
1. I have this knack of drawing the bodies really well with flowing lines but then when I get to the head and face I tend to tighten up and give the subject Action Man/Thunderbirds’ like features. I don’t know how other people see the drawings but that’s what I see.
How well have you captured the characteristics of the pose?
In the 2 minute life-drawing sketches In the ‘Quick Poses‘ exercise I would say about 50/50 I can see the original pose in what I captured on paper but then I would say that others probably wouldn’t get it. But then in ‘The Longer Pose’ exercise I would say ever I have managed to capture, in the pose, what draw me to it in the first place.
Do the proportions look right? If now how will you try to improve this?
In the quick poses the sketches do seem to be out of proportion in 2 or 3 but I think this was down to excitement more than anything else, it was the first time I had done any life-drawing and I was also worried that the model (my girlfriend) would be uncomfortable so I rushed my strokes. All the sitting poses however were in proportion and measured the same from the head to the seat of the backside.
I was meaning to draw the girlfriend again with this exercise but I came across two great opportunities to do two longer pose drawings on the same day. Firstly I was teaching a class of two teenagers but on this day only one turned up.
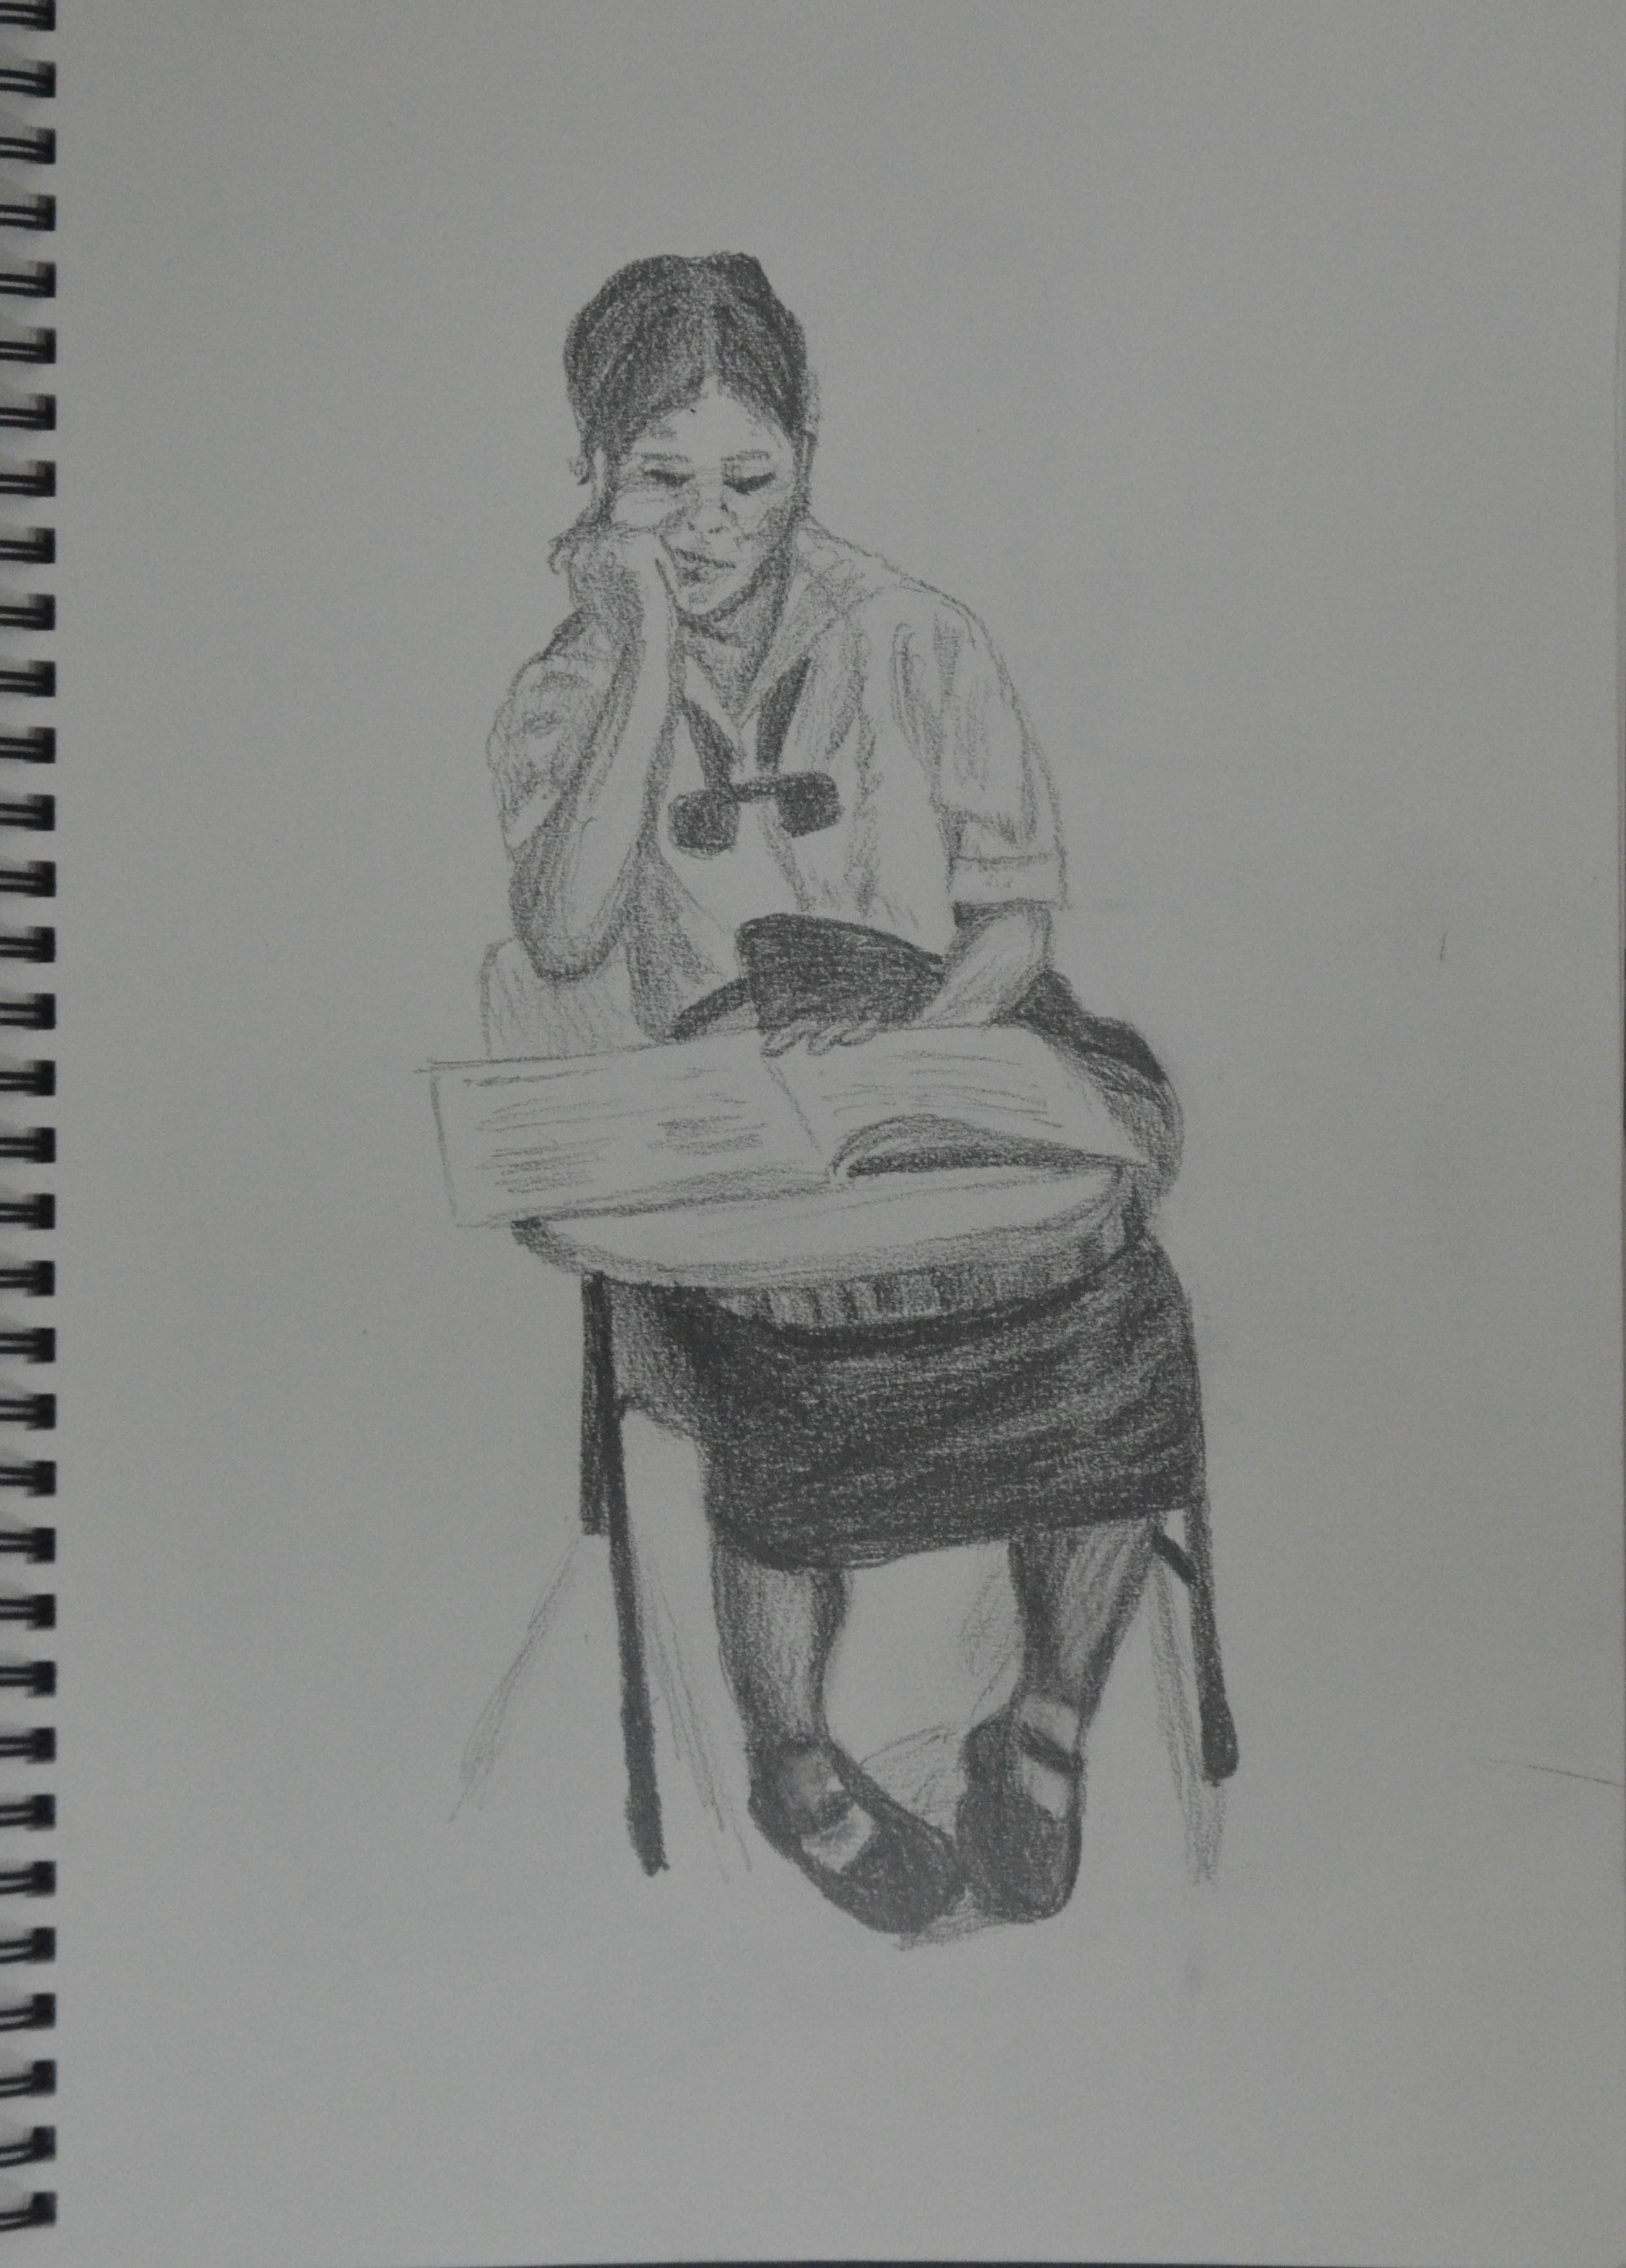
The girl who turned up was dressed in her lower-high school uniform, which are quite quaint and remind me a bit of the Victorian school uniforms so I couldn’t resist drawing her. Being the best English speaker of the two we managed to keep chatting while I finished. The drawing took me only about 40 minutes or so and I used the end of my Mars Lumograph pencil in front of her head and checking the measurement against the rest of her body. As with my girlfriend in the quick poses exercise her head fit into her body about 4 times to the seat.
However, it wasn’t the ideal drawing for this exercise, as the clothes weren’t tight fitting and the desk and bag cover a large proportion of the girl’s body but drawing from her waist (or desk) up it gave me some good practice and my subject fit nicely on the A4 sheet.
35-40 Minutes in 6B on A4
My second great opportunity came with my friend being in the dog-house and taking refuge at mine until he found somewhere else to live although this time I worked mainly from a photo as he could never stay still for long.
1 Hour Drawing in 6B on A4
The drawing took me spot on an hour but a large portion of the time was spent getting his mouth right. I wish I had remembered what I had learnt from the OCA video below and asked him to keep his mouth shut. Nevertheless, I am quite happy with the finished drawing.
This time I drew from the waist out to the feet and then up to the head and again using my same method of measurement. Unlike the drawing of the schoolgirl above you can see more of his body shape and I could actually follow the contours of his body in the t-shirt and shorts. The hardest part of the drawing was his dodgy pointing finger and his open mouth which I had to resort to drawing with a 2B pencil as the 6B was just too big.
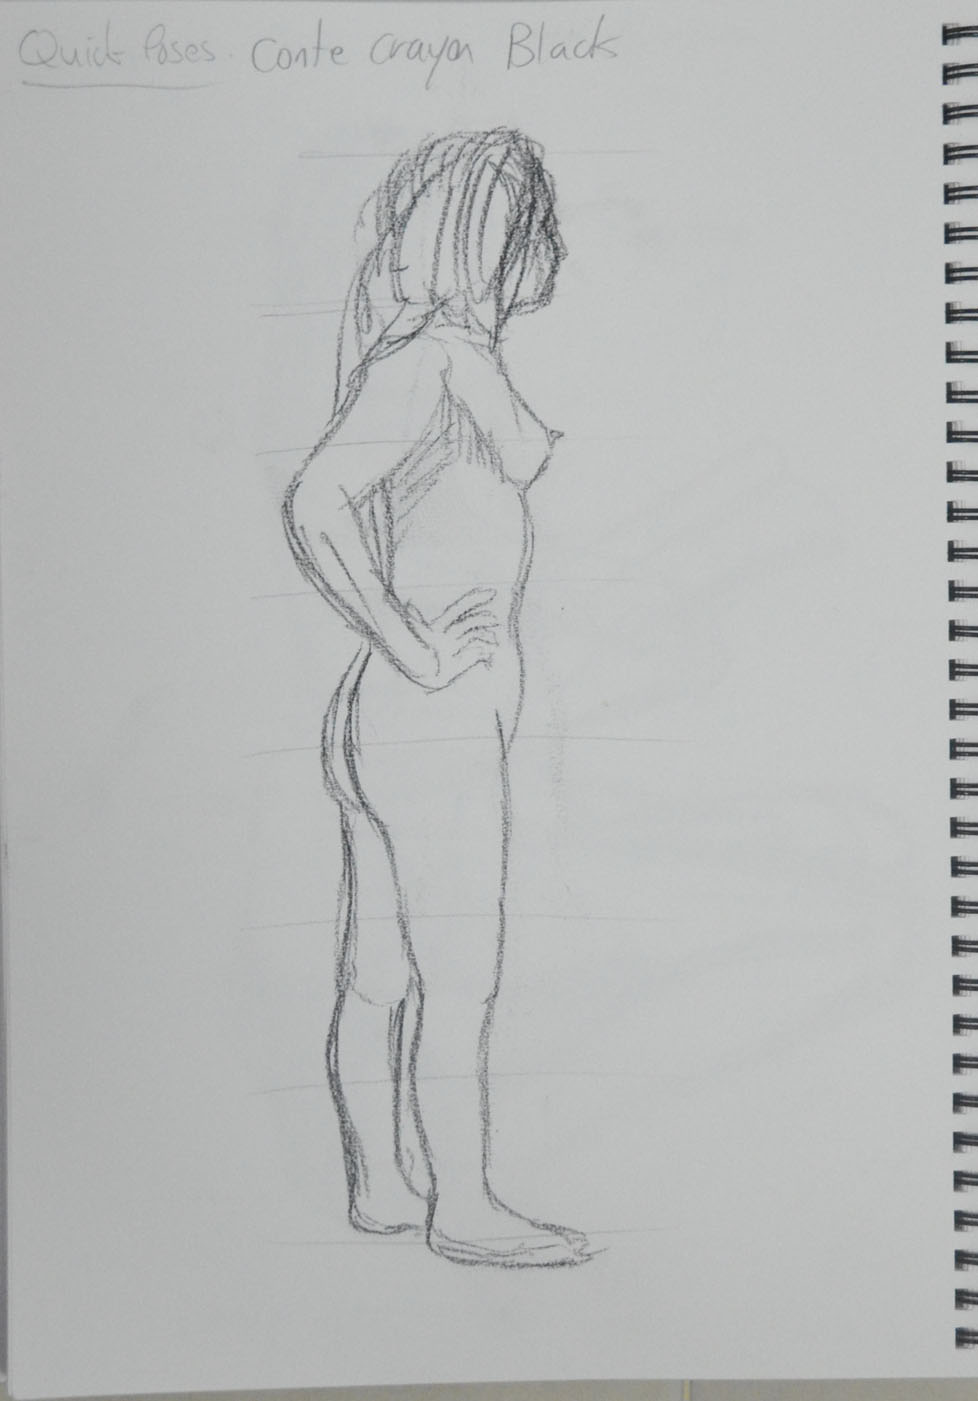
It was a nice refreshing change after the last assignment to do some quick drawings so I went into this exercise feeling quite optimistic. I had already done some quick 2 minute and a 10 minute sketch at school in my last sketch book from a life drawing site, so I was eager to get on with it. I was lucky to have my girlfriend come to visit me as she is a yoga teacher and a very willing model.
1st 2 minute drawing graphite pencil
We left the yoga poses alone for now and just started with some simple poses, that turned out to be not so easy. Like I said earlier I did some quick sketches at school from a life drawing site and they really were quite easy. It was very different with a model stood in front of me swaying about.
2nd 2 Minute Drawing Black Conte Pencil
I did as the brief said and started out drawing from the middle of the body then out to the head and feet and used the black end of my Mars Lumograph pencil for measurement.
3rd 2 Minute Drawing Sanguine Conte
The most challenging thing for me here was finding a pose that I could actually I draw and trying different mediums made me realize just how rubbish I actually was at figure drawing. I had always worked from memory or photographs when drawing the human body.
4th 2 minute drawing Sanuine Cinte
An other big problem I had at this stage was drawing my girlfriends profile and any of her facial features. So at this stage I scrapped even trying to draw facial features and went for drawing the outline of the face.
5th 2 Minute Sketch 3B Pencil
After experimenting with different mediums (graphite pencil, black Conte and Sanguine Conte ) I went back to drawing with a 3B pencil until I got my confidence up.
6th 2 Minute Drawing 3 B Pencil
After 6 x 2 minute drawings I settled for a seated pose for the girlfriend for two reasons, 1 because she was doing a fair bit of wriggling and 2 because I didn’t want to put her off posing for me in future exercises.
I completed 2 x 10 minute drawings in graphite pencil and compressed charcoal, which I was quite pleased with as they did actually look like my girlfriend in shape and height.
Felt Tip Pen continuous Drawing
From there I started to do a bit of experimenting trying 1 continuous drawing in felt tip pen which the girlfriend was quite pleased with as it made her look slim.
My Findings
From measuring while drawing and also measuring after drawing with lines on the sketches I found that the girlfriend’s head fit into her body four times to the bottom of the backside in a seated position if the girlfriend is willing to help me on future exercises then this knowledge will come in quite handy.
Earlier Drawings
The following drawings were drawn using a life drawing site while I was at school just before the summer holidays.
1st Drawing at School 2 Minutes2nd Drawing at School 2 minutes3rd Drawing at School 2 minutes4th Drawing at School 10 minutes
After seeing Degas’s Study for a portrait of Manet in the introduction to part four of this course I thought I would take a look at some more of Degas’s drawings. I was already familiar with his ballet dancer and horse paintings but it was really inspiring to see some of his studies and drawings.
Edgar Degas (1834–1917) Dancer with Arms Outstretched, ca. 1878. Black and white chalk, on tan paper
The drawing above was one of the first pictures that caught my eye, the black and white chalk really make the figure stand out on the tan paper. The girl’s pose is both simple and graceful and I can only see the upper part of her body I can imagine how her feet would be poised.
Three Studies of a Dancer’ (ca. 1880)
I noticed there was a project called stance coming up so the next picture I decided to look at was Three Studies of a Dancer above, Degas again uses black and white chalk on tan paper but this time draws his subject from side, front and back in the same pose. My girlfriend who is also a yoga teacher has agreed to pose for me on some of the exercises and like ballet yoga has some graceful movements so it is nice to get some ideas from Degas’s drawings.
Lying Nude Edgar Degas
The third drawing that caught my eye was ‘Lying Nude’ a very simple half clothed nude lying on her back. Even though you only see part of the models chest stomach and one of her arms the pose allows your brain to fill in the rest.
Seated Dancer Adjusting Her Shoes
Looking at the Seated Dancer Adjusting Her Shoes it is easy to see why Degas was so interested in painting ballet dancers with so many interesting positions and stance in their everyday dancing and training routines. In the drawing above something as simple as a ballet dancer adjusting her shoes before a lesson has allowed Degas to draw his subject in another very unique pose.
After drawing the statues I went back to the National Art gallery to take a look of the work of the only artist who was probably brave enough to exhibit his works while the protests had been going on just 500 mertres away and the site of several shootings and grenade attacks just a few weeks later.
Preekamol Chiewvanich
I have since tried finding a biography for Preekamon Chiewanich but the most I could find on the artist that he did a Bachelor and Master Degree at Silpakorn College of Fine Arts. His work seemed to be a mixture of wood carving and mix media.
Painting and Mixed Media
I’m not sure whether the two pictures above were carved or he had painted with mixed media over natural bark. What I do know though is they are spooky as hell, he called the two paintings Expression Texture and Subjective of Forest 1 and 2 but looking at them again and again he seemed to capture the true spirits of the forest, abstract figures that moved as you looked at them from different angles due to the 3D surface of the textured wood.
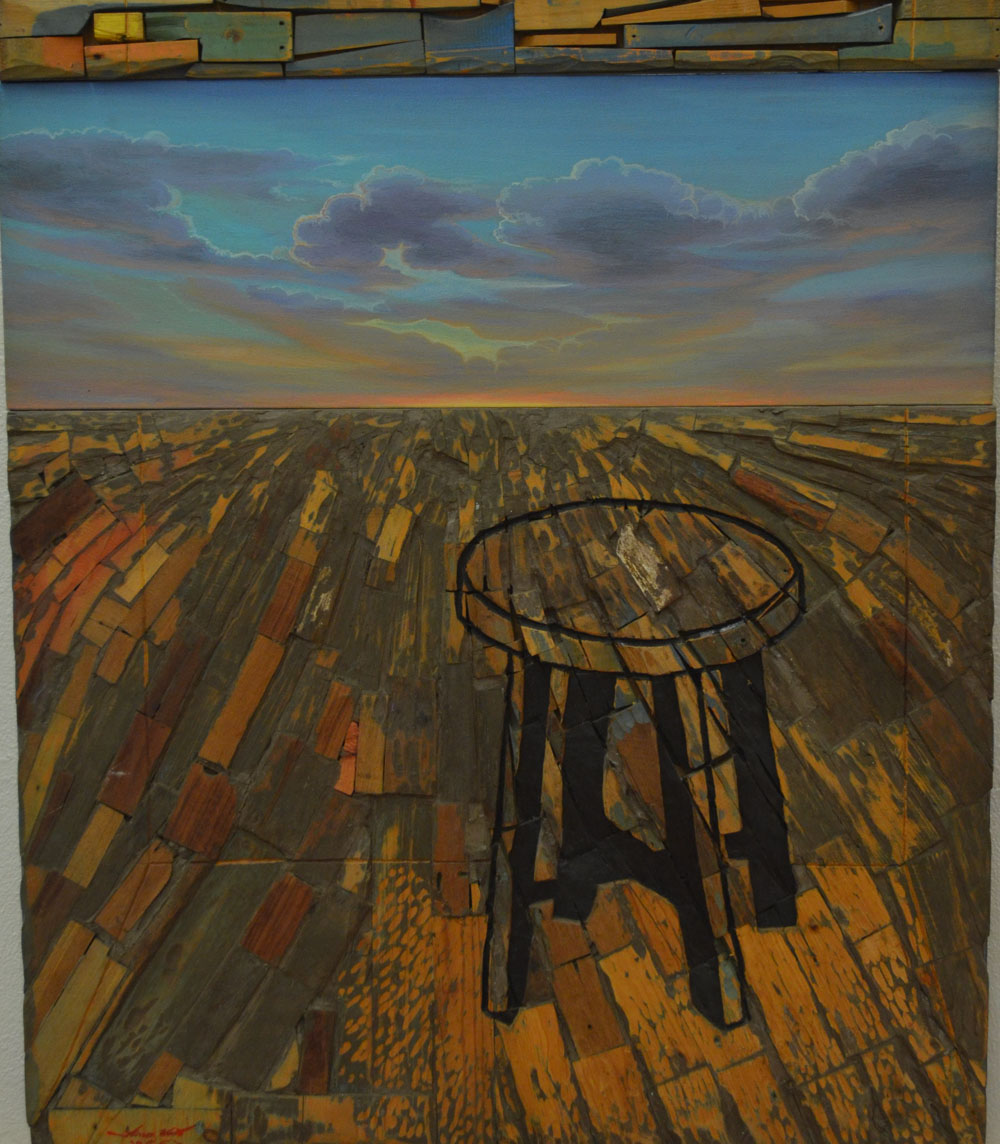
Wood Carving Painting and Mixed Media
The painting of the stool above was another great example of natural 3D art, the stool has been carved onto an already wooden carved surface and like the paintings above changes when viewed from different angles.
Wood Carving and Bicycle Frame
I love cycling and it is my chosen method of transport around Bangkok so to me the piece above was wonderful, what a great idea to incorporate an actual bike into a 3D painting.
Painting Wood and Mixed MediaWood Carving and Mixed Media
The work below seems to be a series of preliminary paintings in preparation for some of his carved pieces above, I would love to know though if they were done before or afterwards.
Mixed Media
I went to the National gallery by bike so on the way home I decided to ride through the protesters at one of the primary road blocks on Rama 8 where I took the photo below.
The task for this assignment was ‘to select a view from a window or from an open door. Try to find a view that includes some natural objects: trees, shrubs, pot plants, fields or garden plants’ also to ‘try and find a view that will demonstrate your understanding of aerial or linear perspective – in other words a view that has some depth to it.’
The brief also says to ‘look for a view that offers an opportunity to draw straight-lined objects as well as items drawn from nature, buildings, gates, fences and so on. It then says that ‘this may all seem like a lot to look for, but most views from windows and doors will offer you a bit of all these things’…
I have spent the best of two months trying to find a window or a door with view with any of these things and came up almost empty handed. The view from the 26th floor of an apartment block in Bangkok only offers you one of the most complex city views you could ever imagine.
view from my apartment kitchen window – Photo taken from back wall of living room
I took a camera with me everywhere trying to find a view that would accommodate the criteria for this assignment and almost came up empty handed and then right at the last week of the school term, the last week in February for me I dropped on 2 views (by accident).
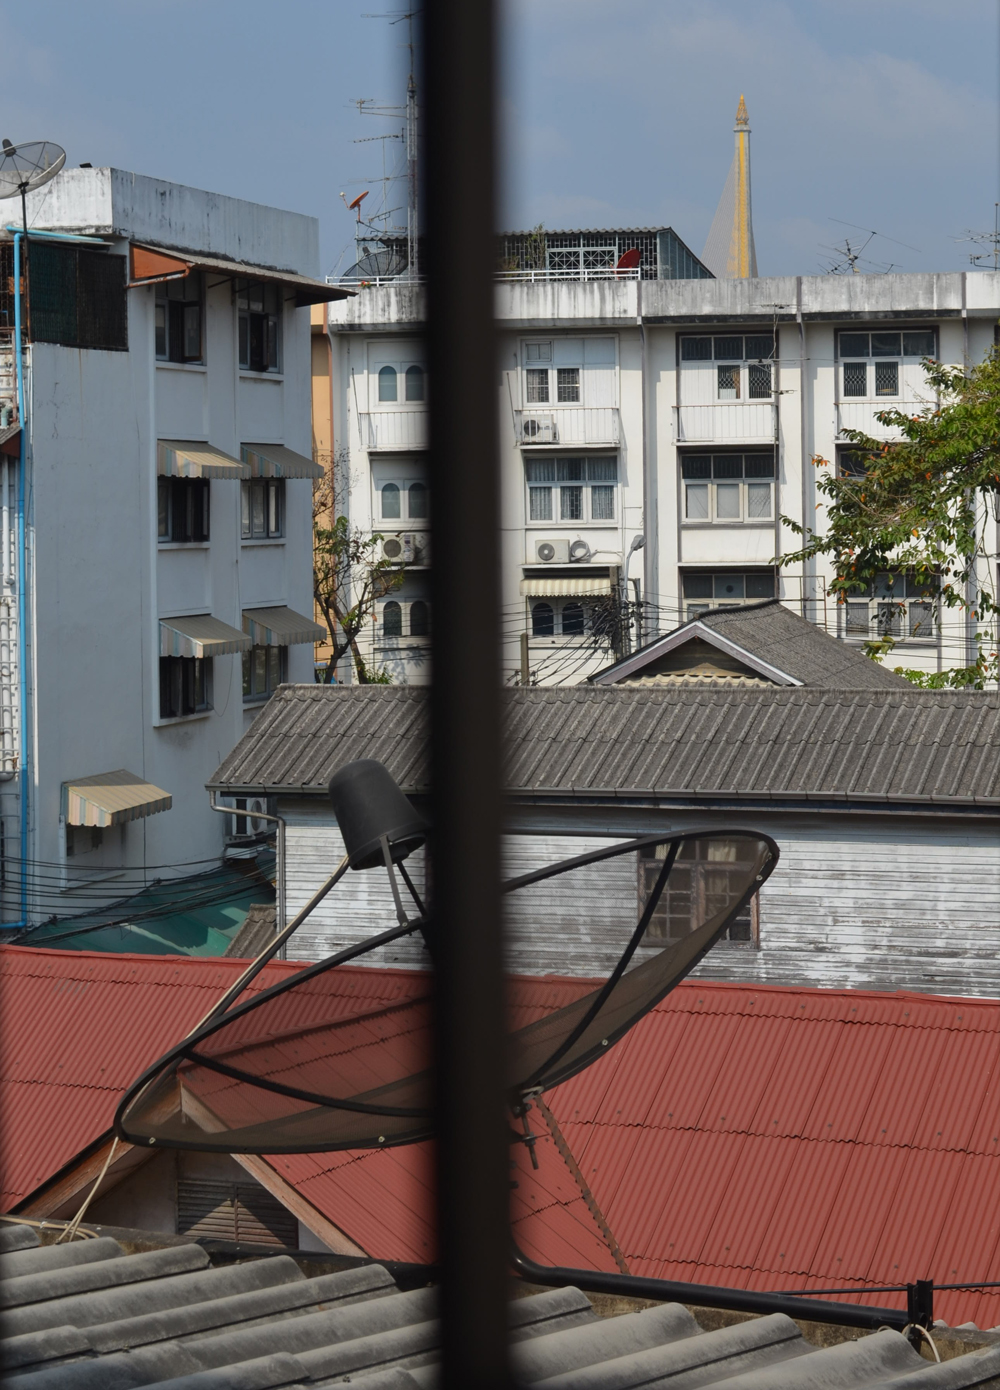
View from a 3rd floor window at school
One was the view from the top floor of the school, which offered mostly concrete and not much of anything else, the other was a view from the school’s second floor window looking out of one of the windows of the school building that I had drawn in both ‘A Sketchbook of Townscape Drawings‘ and a ‘Limited Palette Study from Your Sketches‘.
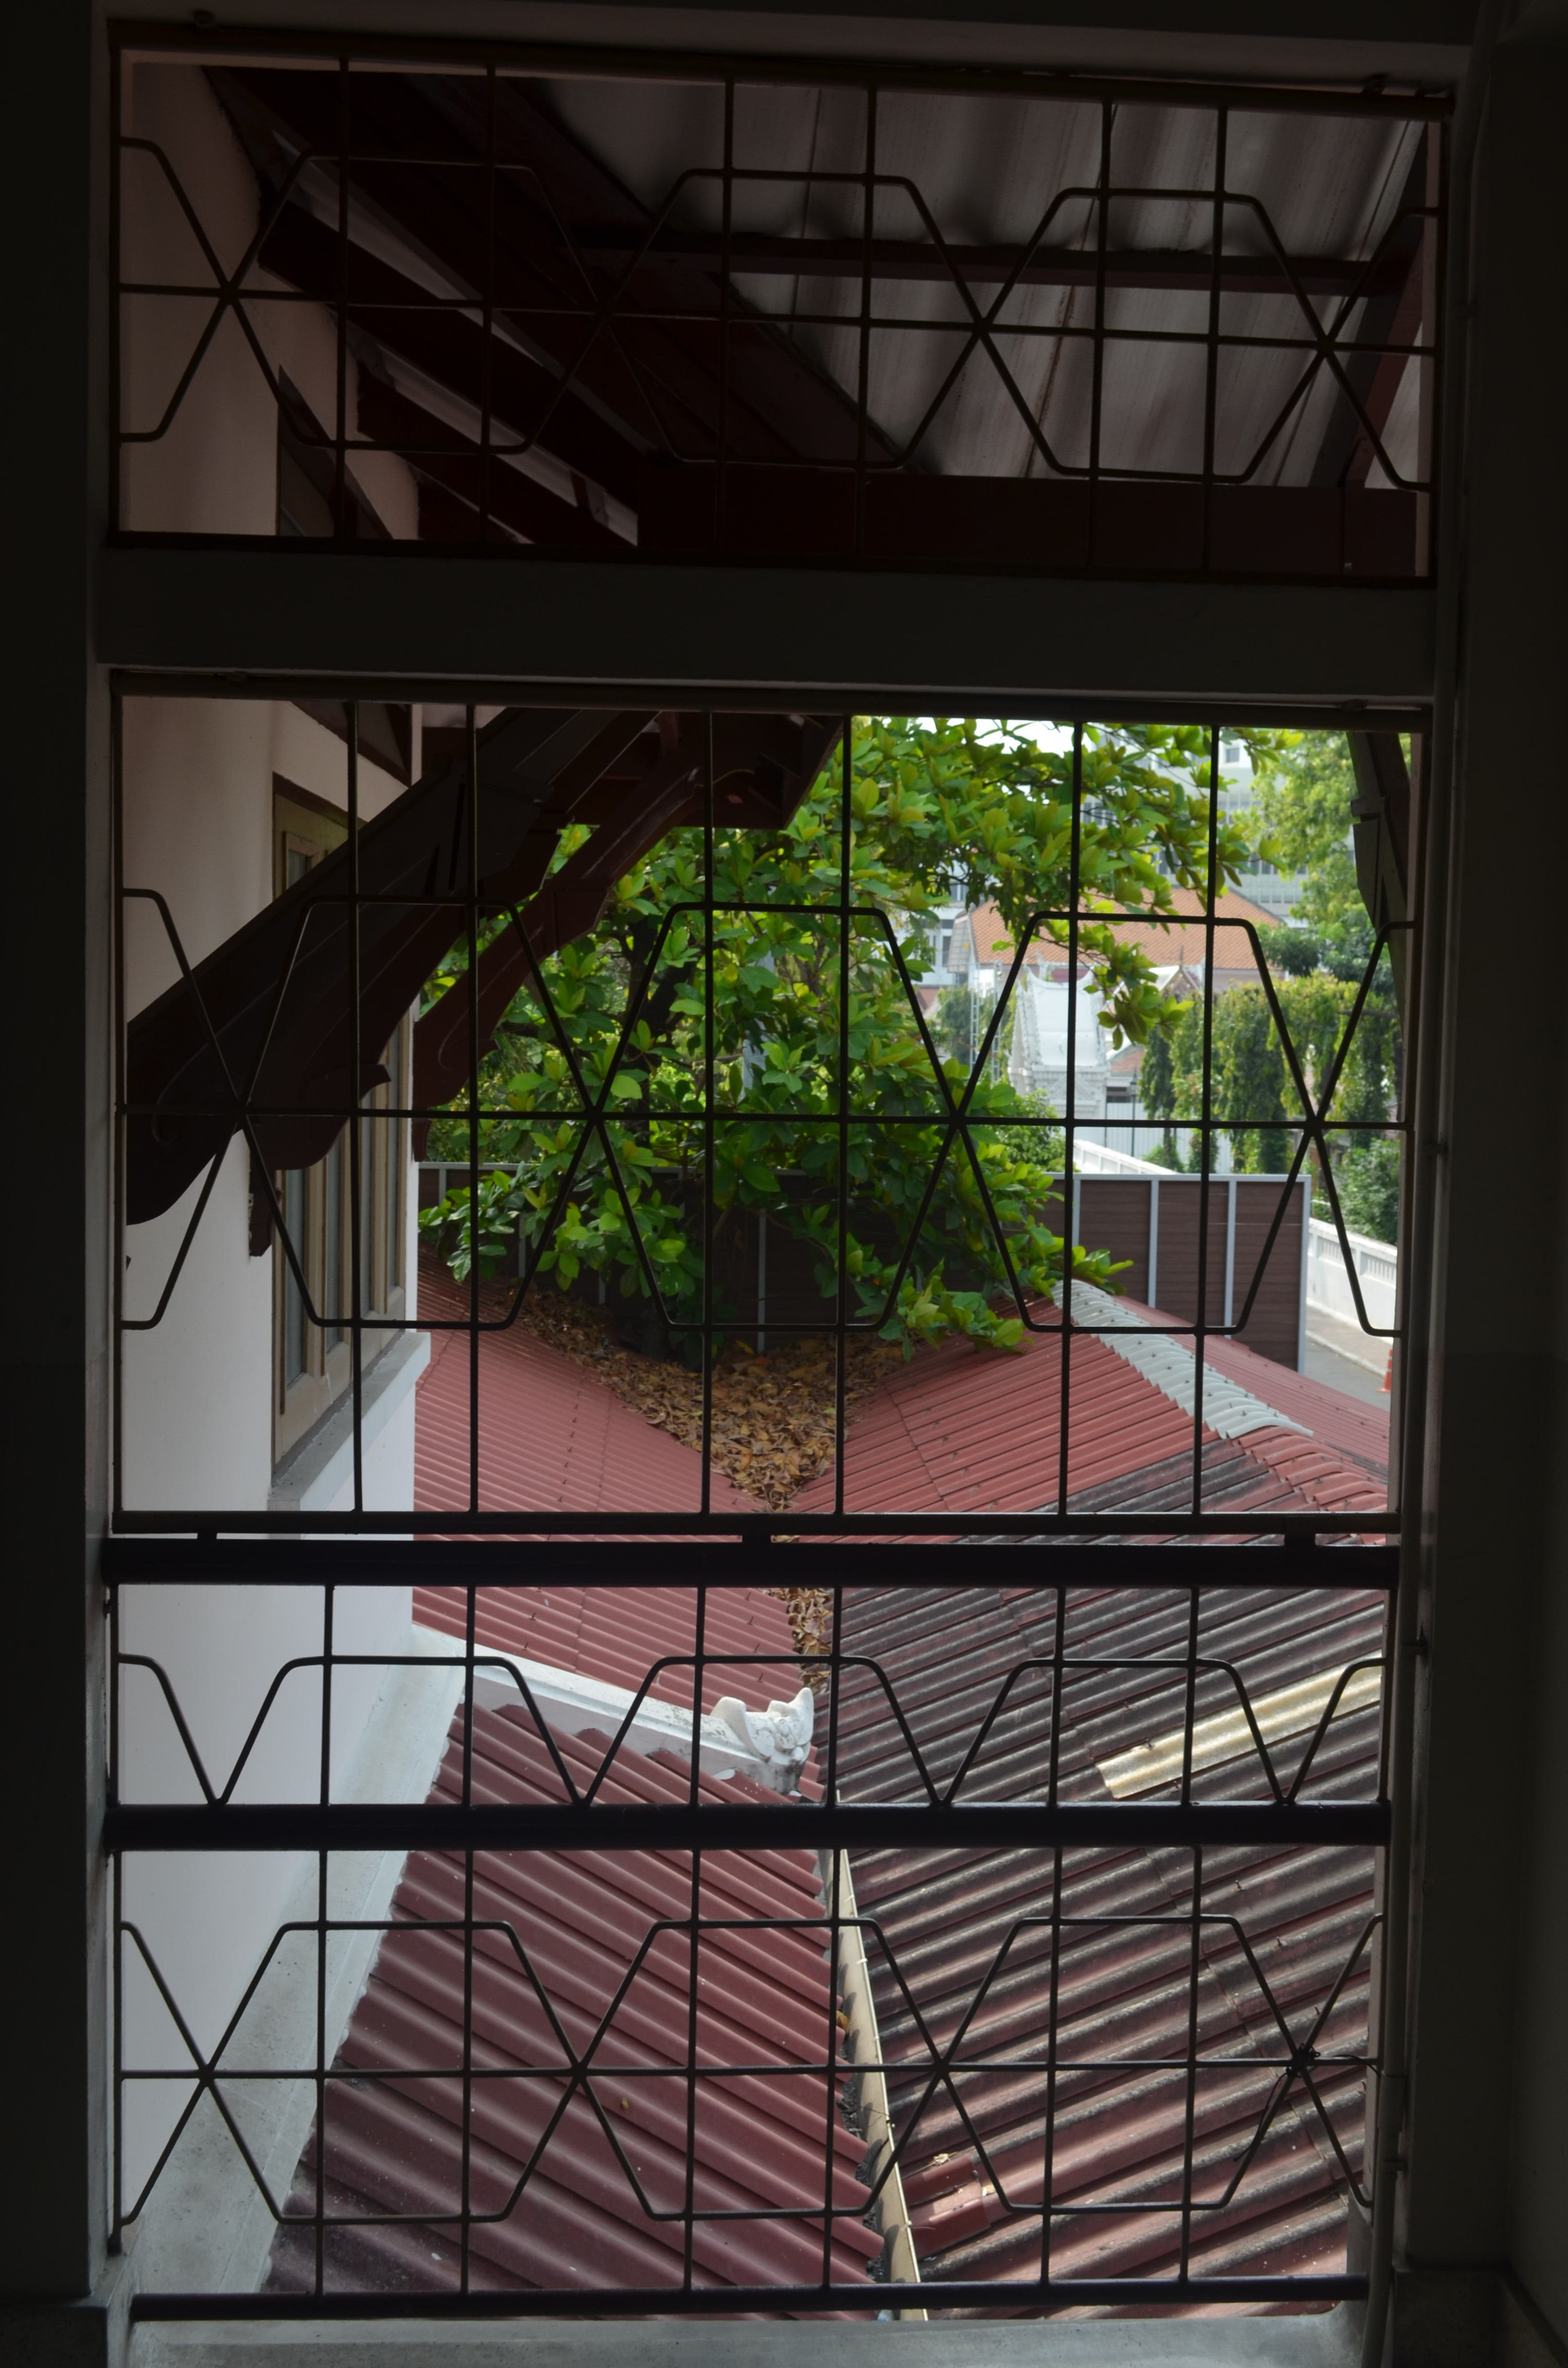
View from second floor window facing temple
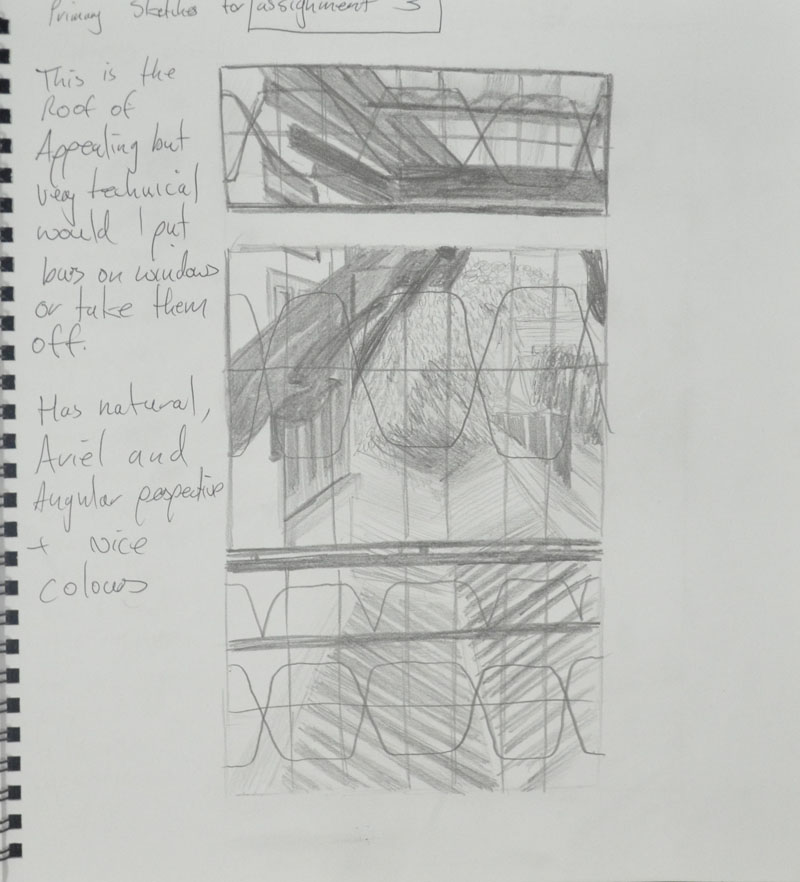
I decided to start by having a go at sketching all three, starting with the view from the second floor window, which even on the small preliminary (rough) sketch in my notebook proved very technical.
1st Sketch from 2nd floor window in my notebook
The second was a half-hearted sketch of the view from my apartment window, working from the photograph I gave up after 5 minutes realizing that it wasn’t a drawing suited to the size of paper that they wanted us to do the final drawing on (A3). But maybe it would be something I would like to come back to later with the possibility that it could be painted in a style close to L.S. Lowry.
3rd Sketch an Attempt at Drawing the view from the 26th Floor Window3rdd Sketch View from top floor classroom
The third sketch was from the window of the classroom on the top floor, which all though had most of everything, the tree in the view wasn’t very big at all and so after a second larger (partial) sketch on A3 I decided that I was to go with the view from the 2nd floor window.
3rd Sketch an Attempt at Drawing the view from the 26th Floor Window
View from the 2nd Floor Window
I started do do a study in line of what I could see from the window. This turned out to be a partially finished drawing but helped me to decide to crop the view to the middle window as it was very technical with the roof beams. It also helped me to decide on getting rid of the railings on the windows.
An attempt at Line Drawing
My next drawing was in A4 and was basically a quick sketch to see if I could meet the assessment criteria in my final drawing.
My Chosen View – Cropped down to the middle window
After the Study of several trees exercise I said that it give me an idea for the final drawing and that was to use oil pastels as I was impressed by the way they left white specs on the paper reminding me of a Seurat painting and if I had committed to the view from the classroom window I would have probably gone with that medium…after trying other mediums first of course. But, with the more intense view out of the 2nd floor window, on the small size paper I decided that it would have to be done in colour pencils.
Colour study in Marker Pen
Still, even though I had already made my mind up the Assignment had asked for broad brush stroke studies to decide on the colours I would use for the final drawing so I tried a couple of mediums that were very different to what I had decided on drawing for the final drawing.
Colour Study in Ecoline Liquid Watercolour
Both of the studies turned out to be quite pleasing and both mediums quite feasible. It was the first time I had used the liquid watercolour as a paint and not as an ink and even though the colours were great, my watercolour painting skills leave a lot to be desired.
I had been plodding on too slowly with this assignment and to be honest that’s because I was not happy with the subject and it was very stressful but eventually I had to start the final drawing and it had to be in dry watercolour pencil.
Final Drawing in Dry Watercolour Pencil
An English language student asked me the other day what I thought has been the hardest medium to draw with and when I replied colour pencil they weren’t surprised. The Derwent artist are very waxy so I prefer using the watercolour, dry, but stillI do have problems blending even though my I have come along way since the beginning of the course.
I started by drawing the shape of the window to act as a border then I drew in the window at the side and the roof beams as well as the horizontal line of the fence then I got stuck straight into the colour starting on the fancy Thai style roof beams (or props or whatever you want to call them).
I spent about an hour layering the colours to get each of them a different tone and looking quite accurate but then realized that it didn’t really matter how long I spent on those as they wouldn’t be the focal point of the drawing.
Next I worked on the window and the wall then the rafters and from there the tree that came up both sides of the fence, through the roof of the outdoor secondary cantine and on the other side. At first I was going to draw the tree with a form of squirkling in colour but when I did the broad brush colour studies I could see a reoccurring pattern of almost star like shapes and so I spent a lot of time trying to simplify the shapes and drawing them by layering yellow over green, from there I filled in the negative space in between to give the tree some thickness.
So far I wasn’t looking at all great but then I decided to use a form of squrkling in three colours on the dry fallen leaves with the occasional star shape trying to mirror the green leaves above, the result was quite nice and it made me feel a bit better about the assignment.
Once I hatched in the fence and the double roof of the canteen below everything started to come together but the problem now was that I didn’t leave myself enough space to draw in enough of the large orange roof behind and so a lot of the roof is hidden by leaves. I do still feel though that because of the direction of the roof beams and the perspective of the roof that the viewers eyes will still look where I want them to and that is to the temple and the road to the right.
I completed the drawing with one of the worse mistakes ever, I decided that I would draw the wall all the way around the window in oil pastel the result was a complete mess. My only hope is that I can crop and frame it when I come to send off my work for final assessment.
Assessment Criteria
Demonstration of Technical and Visual Skills Although the final drawing is somewhat messy I do feel that I have definitely shown a demonstration of technical and visual skills in my final drawing especially where perspective is concerned and I feel that the drawing shows a clear understanding of both aerial and linear perspective. I also feel that the final drawing shows a substantial improvement on the way I have been drawing trees.
Quality of Outcome Well to be very honest I am not satisfied with the quality of this final drawing that looks more like an exercise than an assignment. I really found this assignment stressful, it was very difficult to find a view that I was happy with and the problems we have been having here in Bangkok haven’t helped. But a poor craftsman always blames his tools.
I let myself down with the preliminary work on this assignment but this was due to being very busy working all hours to try and make up for loss of income lost through these protests. If I had more time for the preliminary work the quality of the final piece would have been much higher.
The work in the previous exercises in part 3 as been high quality let down by a low quality final piece.
Demonstration of Creativity I believe I have demonstrated quite a lot of creativity through this part of the course I haven’t necessarily shown this in the final drawing. I would say the projects where this was more visible was Drawing Trees and Townscapes where I let go of trying to pay attention to detail and tried being more creative.
Context
The troubles here in Bangkok have been a great drag on this part of the course. I started out feeling really positive and in October when the protests started hit a brick wall. However I do feel like I have learnt a lot from this part of the course and I no longer feel that drawing landscape is a problem for me.
I have tackled every exercise to the best of my ability and even though I’m not happy with my final drawing I do feel that everything I have practiced through this part of the course is evident in the final piece.